Grinda Shawl

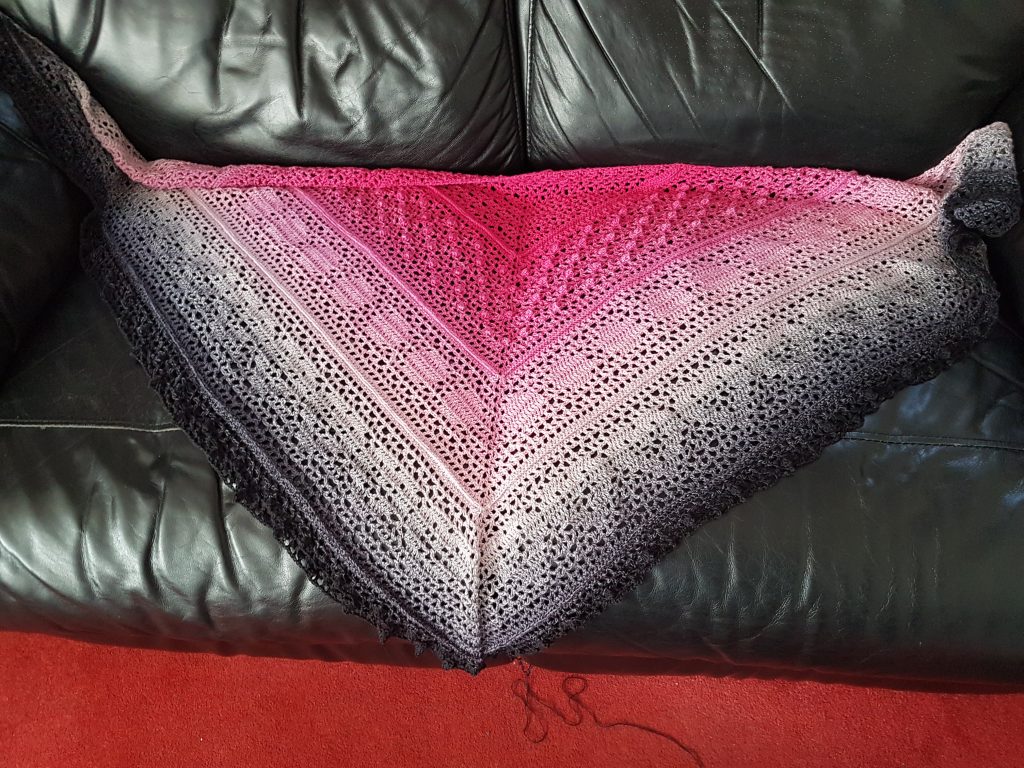
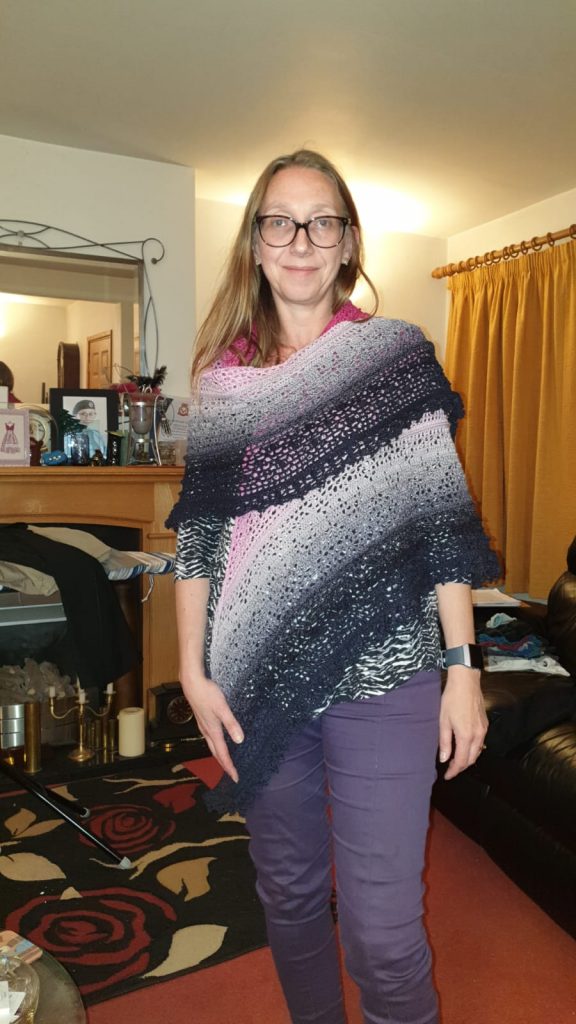
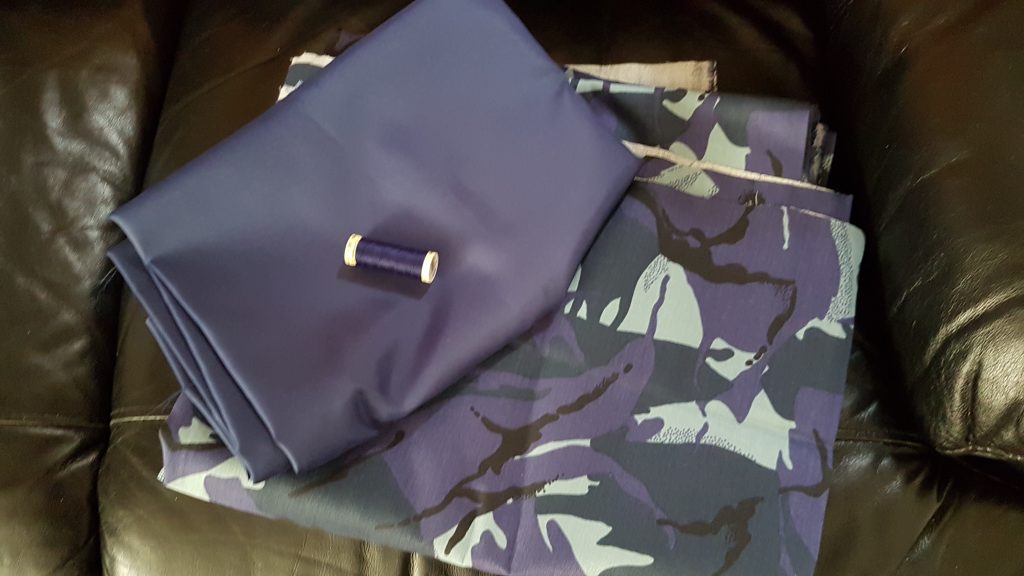
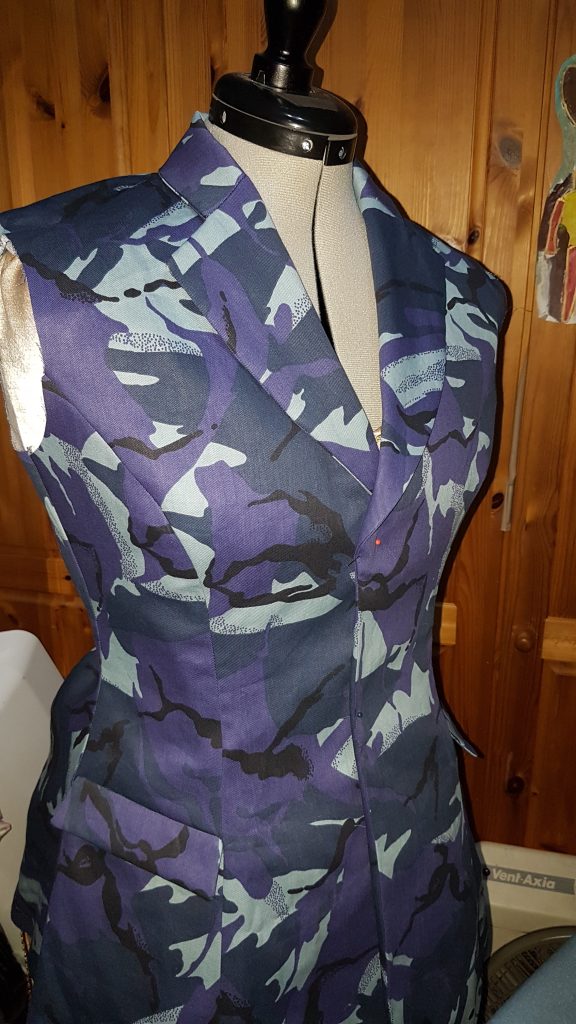
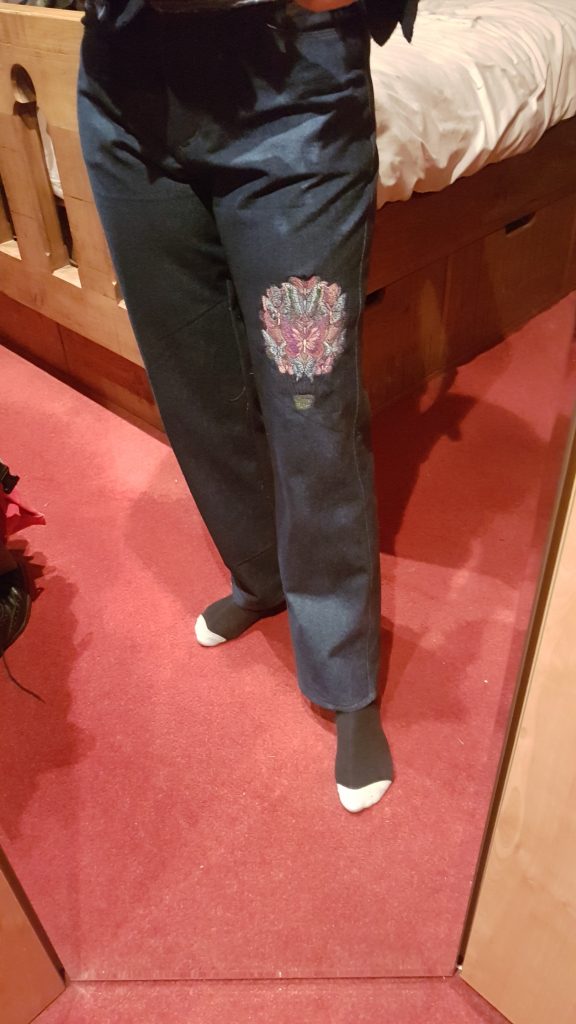
The need for this came about because of the Air Cadets Annual Dining In. Some fabric to make an evening dress was on my shopping list when I had my ‘fabric day’! I had found a pattern, but didn’t quite find the perfect fabric, although I found some that I could try it out with! Anyway, at the Dining In, shoulders need to be covered, and my dress pattern didn’t have sleeves. So the perfect excuse to make this shawl 🙂

It had already been on my radar because my mother-in-law had seen it and liked it at Black Sheep Wools, but I generally wouldn’t wear a shawl, so while I liked it, it wasn’t on my likely to make next list. This excuse put it there!

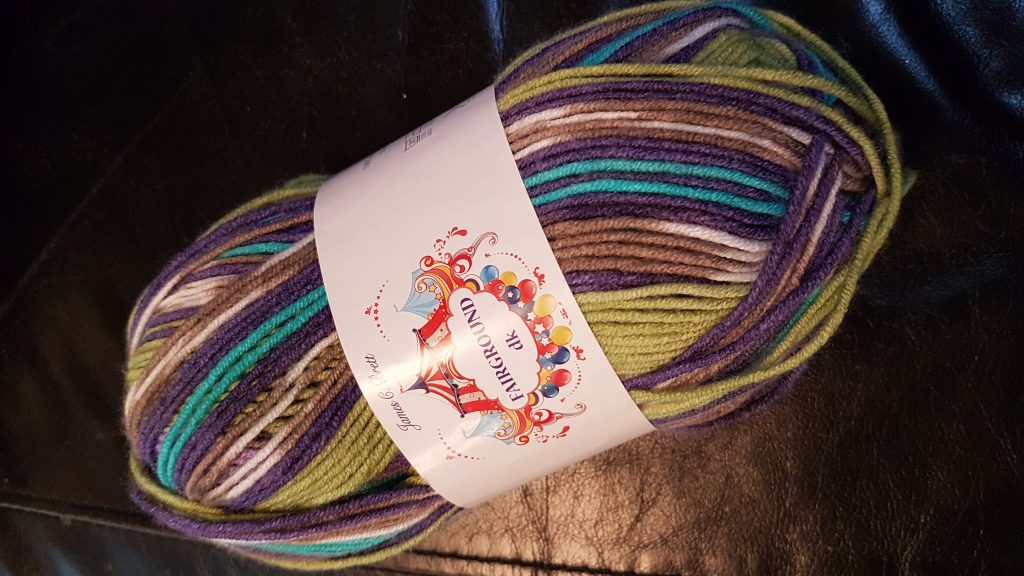
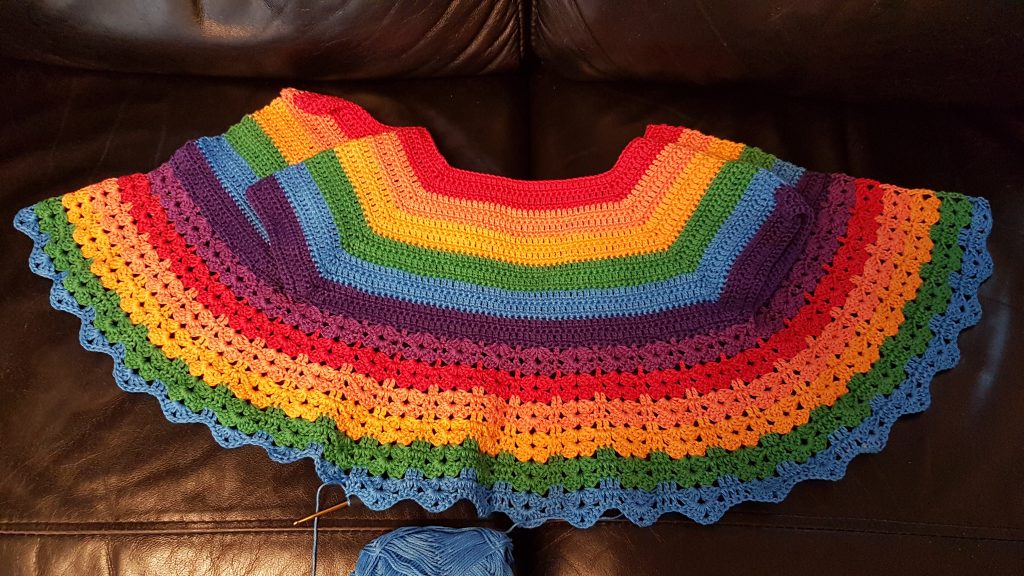
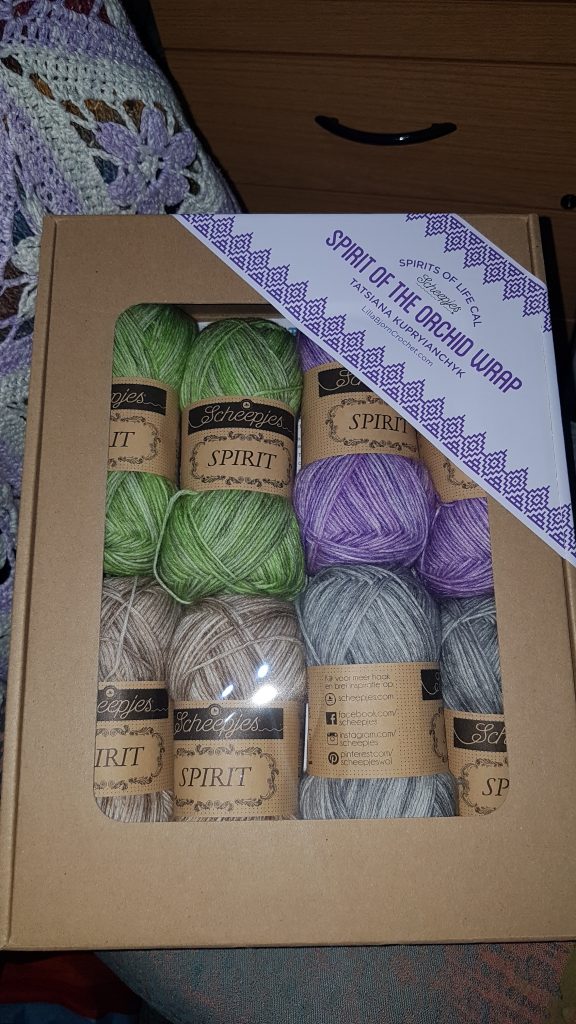
It is made from a Whirl (@ £20.99) and optional additional Whirlette (@ £6.90) of Sheepjes. I went for the larger shawl with the additional whirlette in liquorice. The Whirl comes in lots of lovely colours, but I picked Night time bubbles, which goes from pink to black. This would go with my ‘try it out’ fabric for the evening dress, and the lovely silk I have my eye on. The Whirl seems quite expensive, but it is a 220g ball, roughly 1000m, so not really that bad.

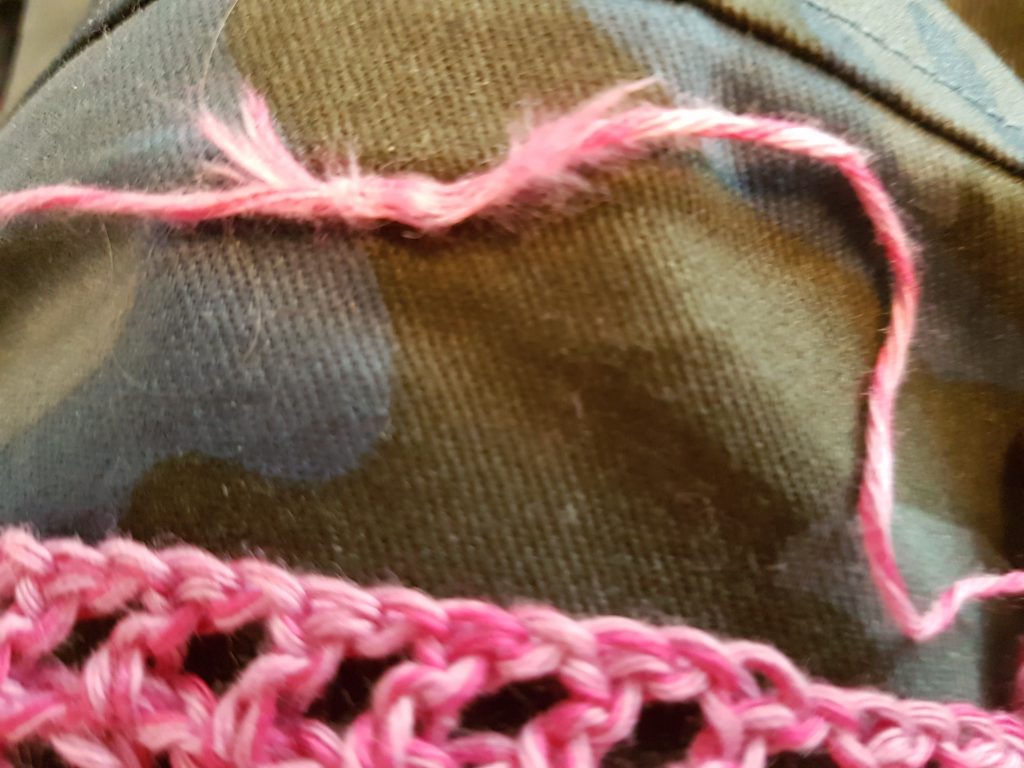
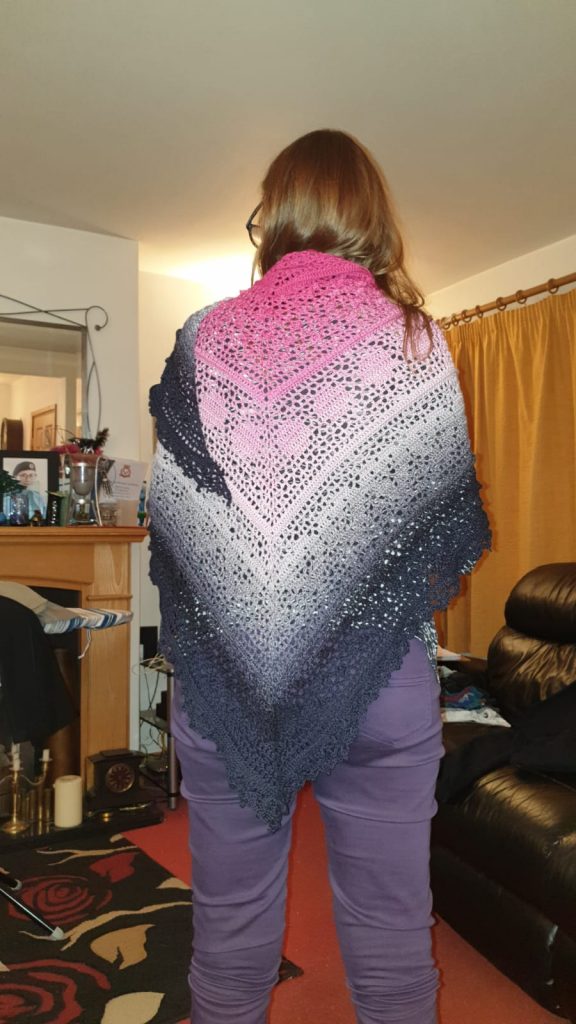
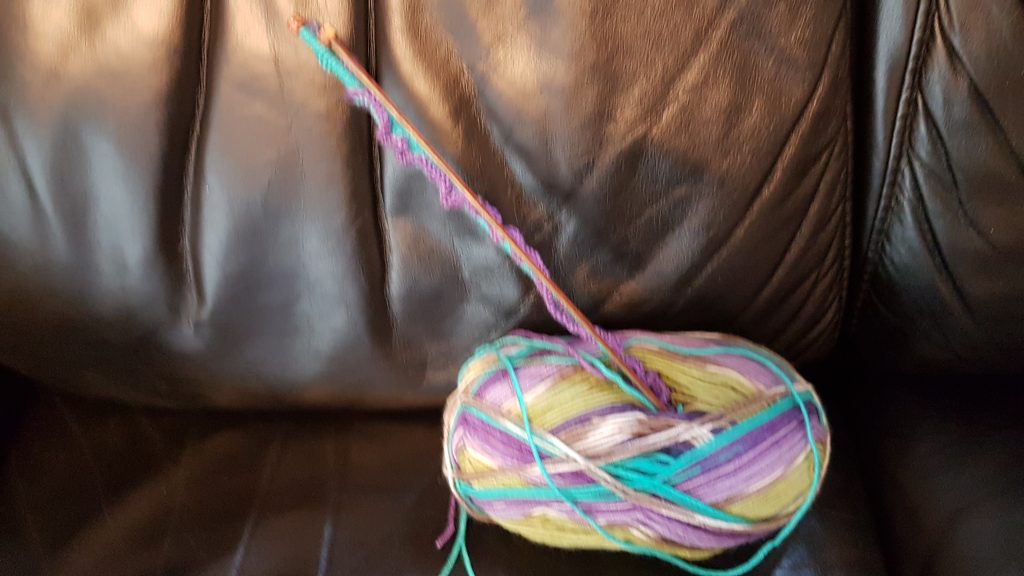
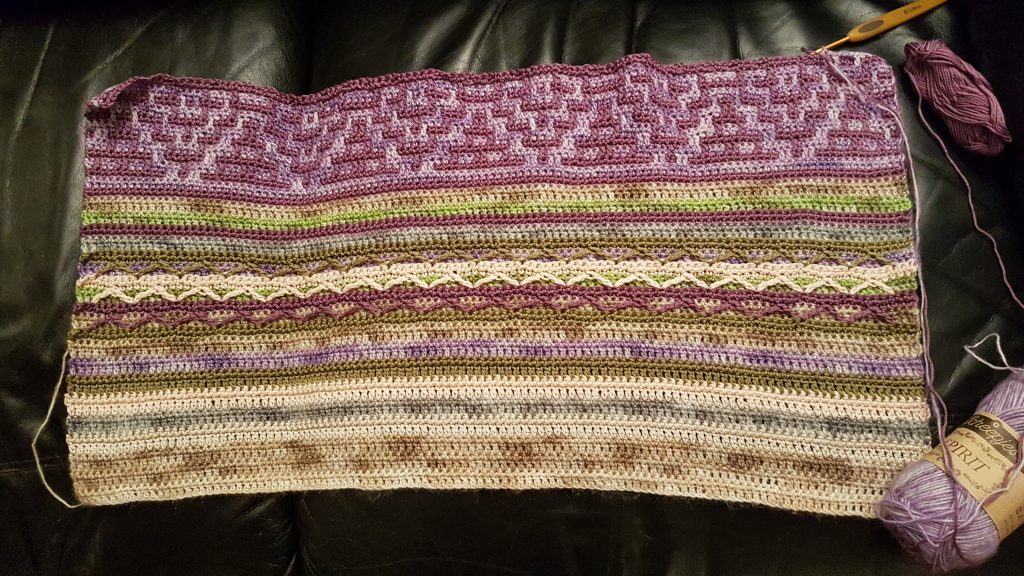
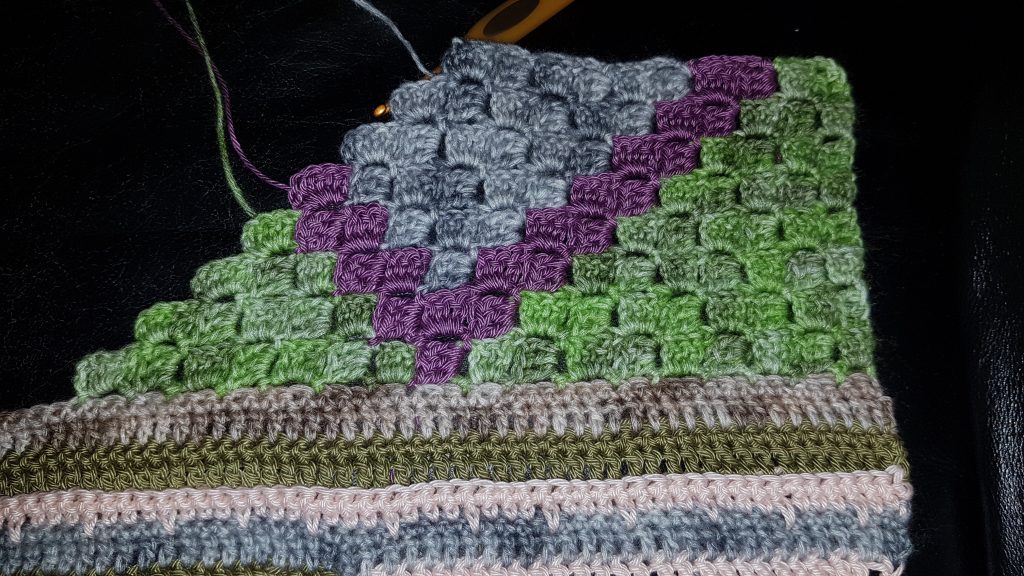
The free Make-A-Long (MAL) pattern is below. The instructions are really good and easy to follow. Just remember to concentrate!! I took it on the train with me when I had a meeting in London, and was gutted to spot I was a stitch short when I did a count. I don’t count every row, certainly not if the pattern fits in, so hadn’t spotted it. It was about 4 rows back, just one treble, which took a while to spot. I had to stop at that point as I was nearing London and as Whirl pulls from the middle it would be difficult to rewind the wool I unpicked 🙁 I did unpick it on the way home, and made it up again. Can you spot it??

https://www.lillabjorncrochet.com/2018/06/grinda-mal-general-information.html

Couple of things about the Whirl.

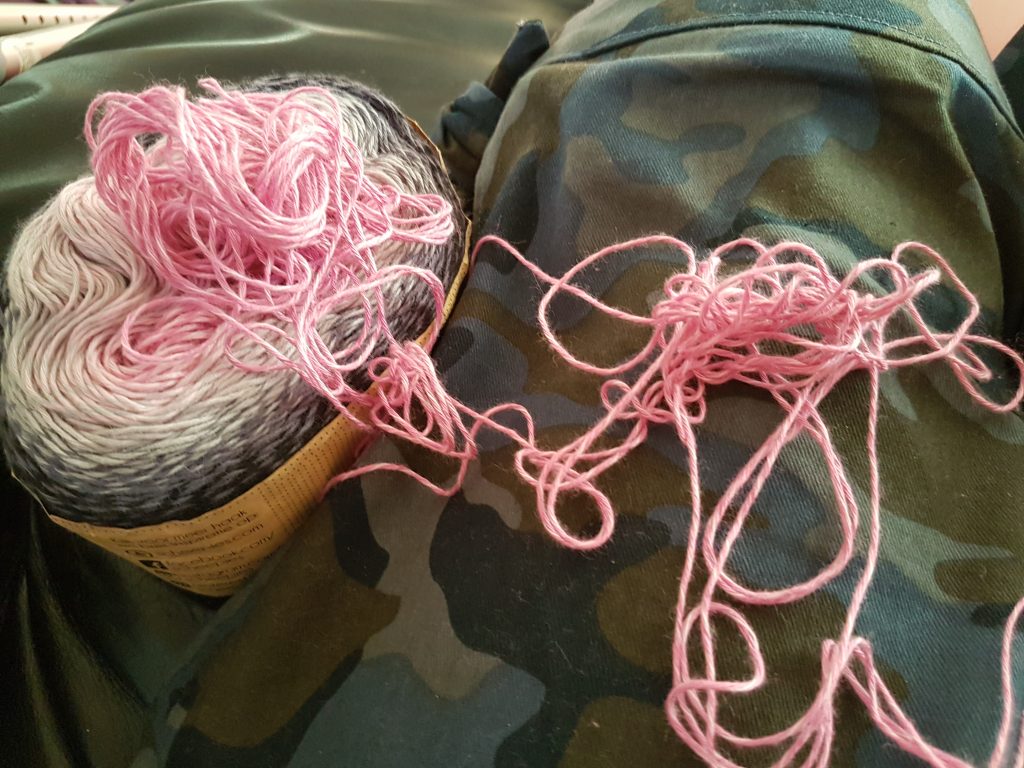
  • I have never had a ball of wool with so many joins in it. I was quite disappointed actually.
  • I don’t really like pulling from the middle.

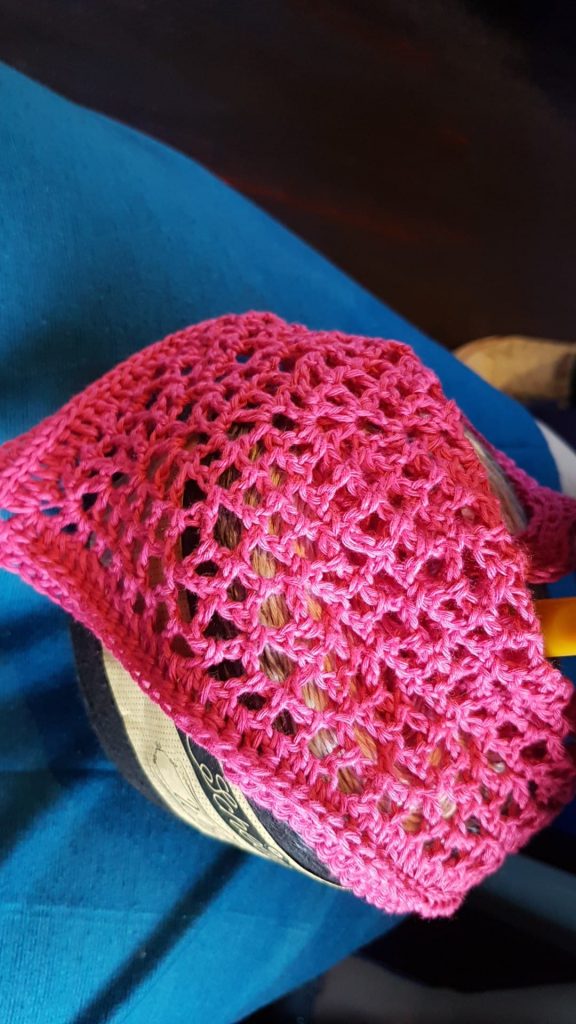
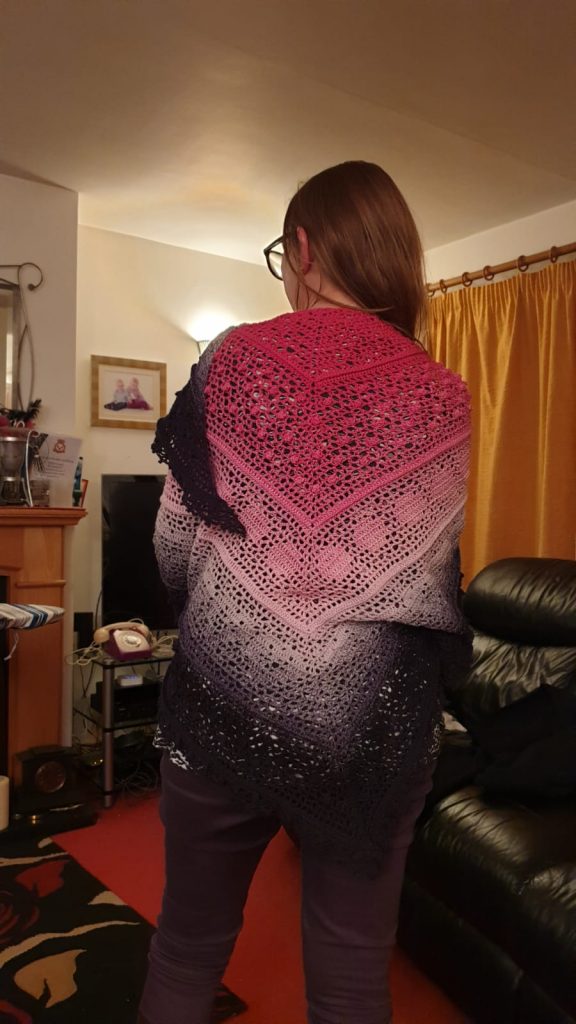
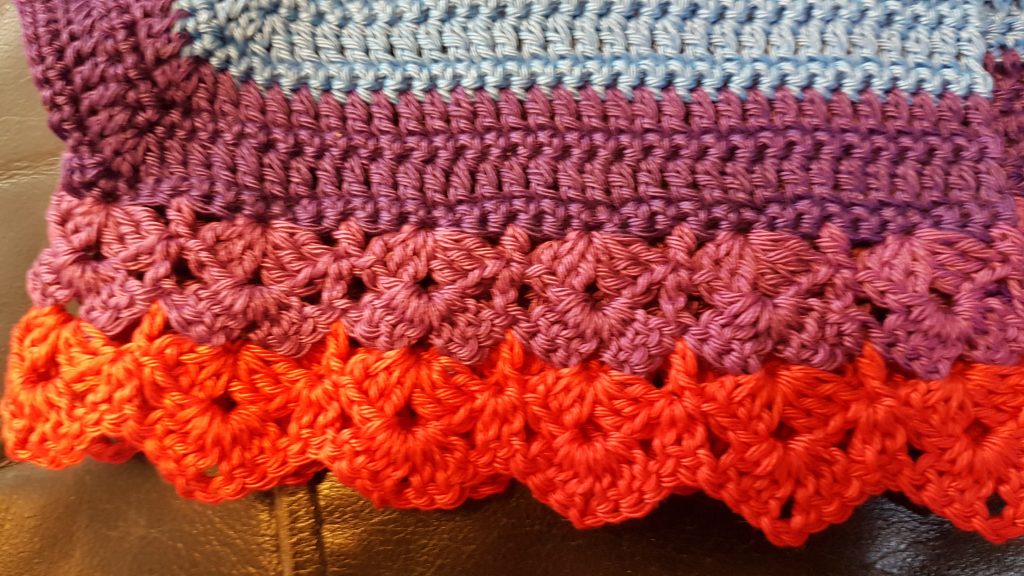
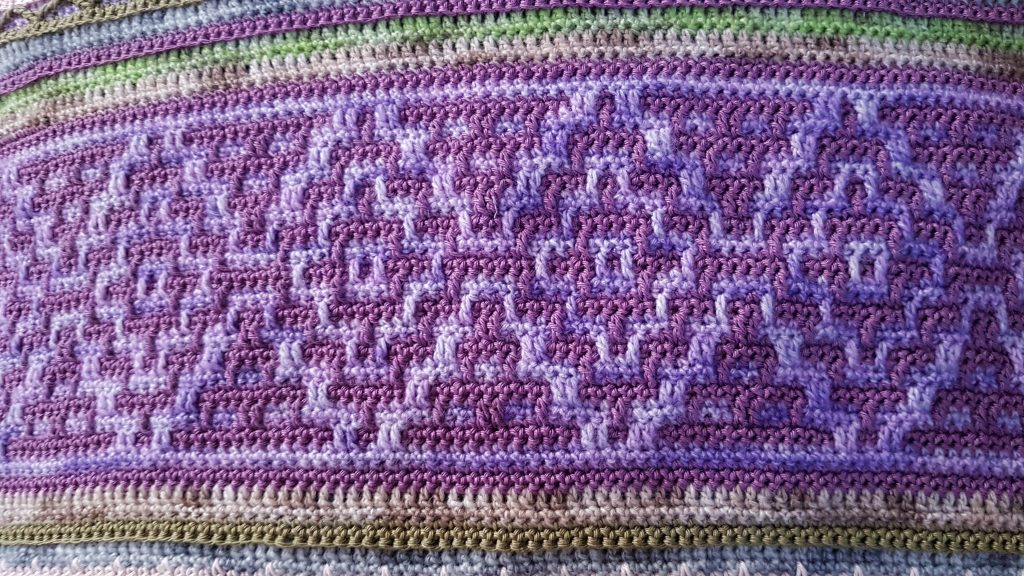
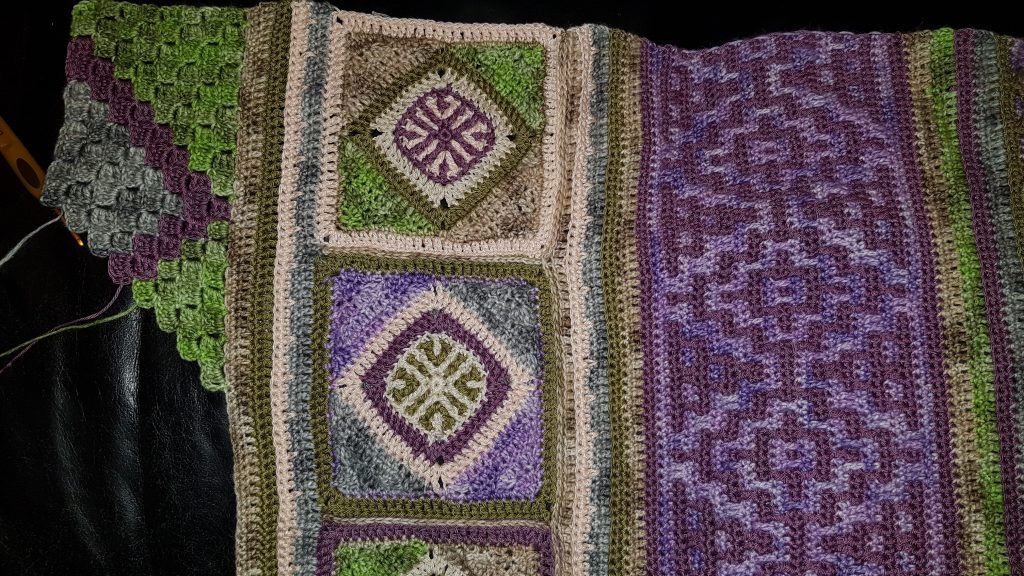
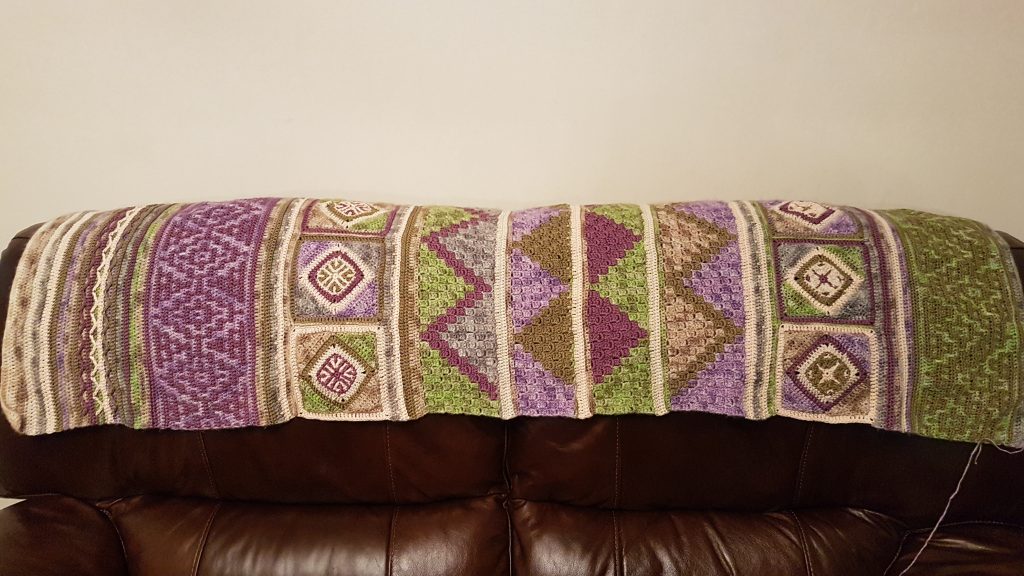
Nearly there – this was the end of the Whirl, before my Whirlette arrived. You can see the heart shapes a bit better in this picture than the later ones, due to lighting.

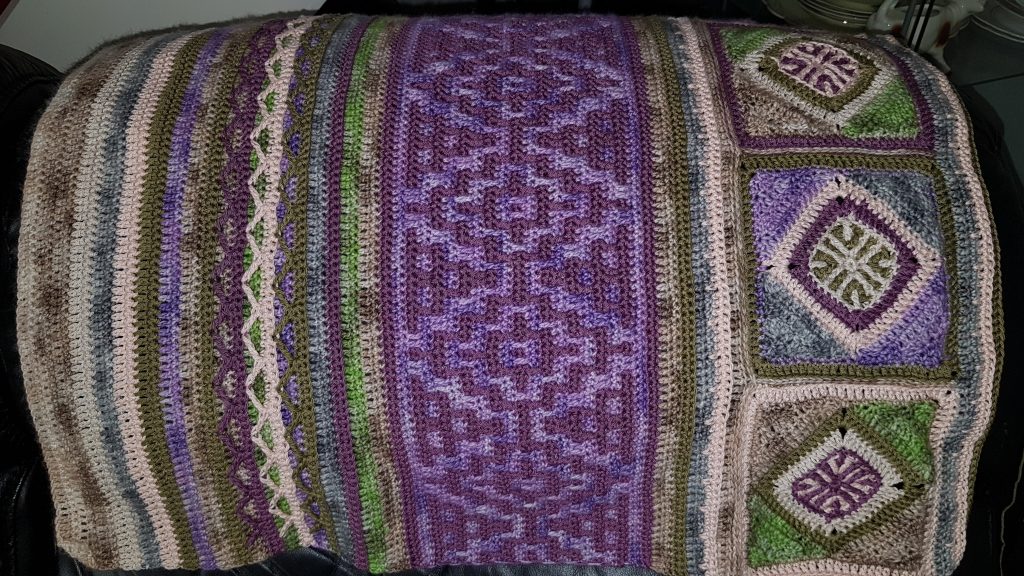
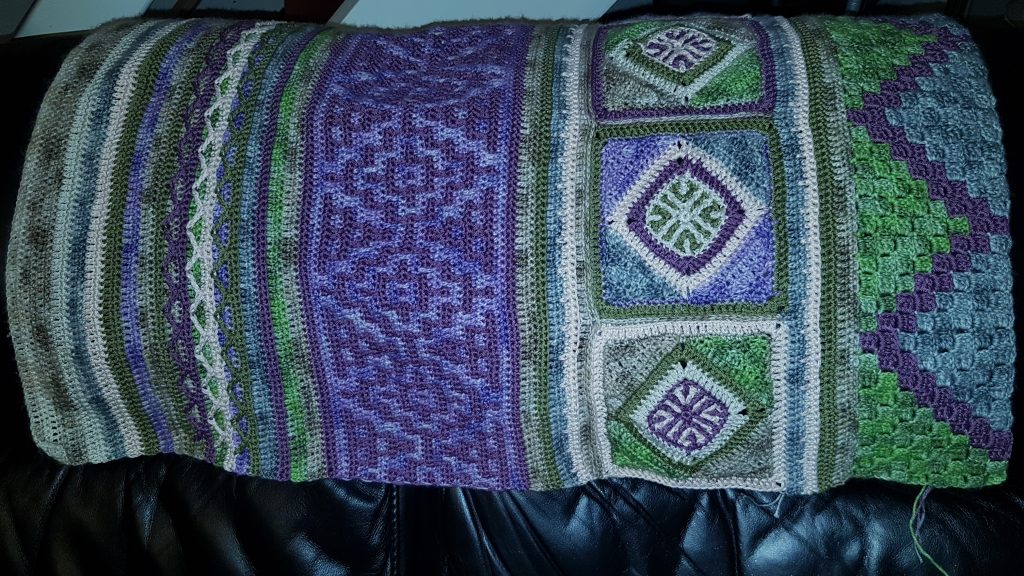
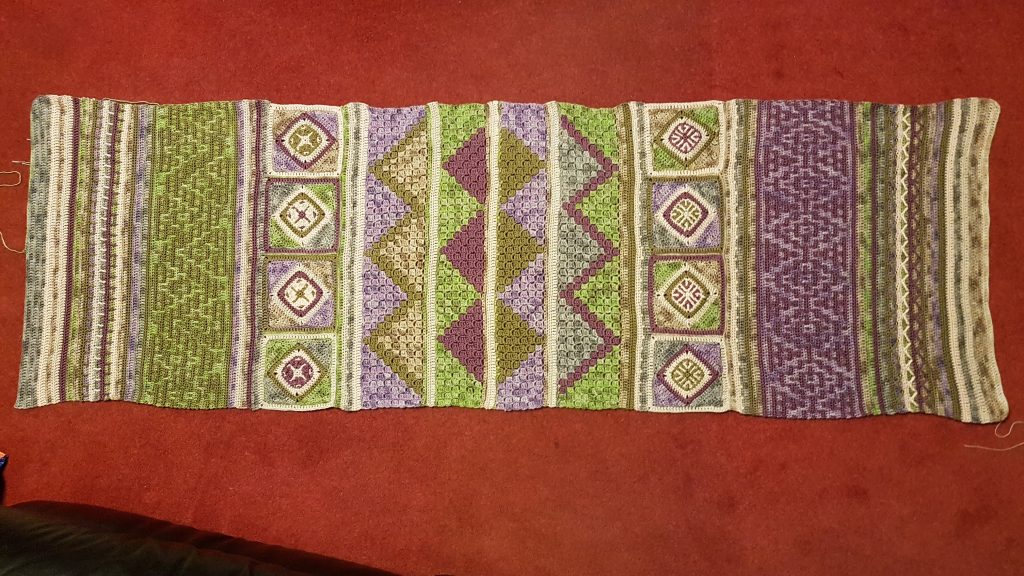
Sheepjes recommend which Whirlette to continue with if you want to extend from a Whirl. I can spot the colour change from the end of the Whirl and where the Whirlette starts – it isn’t quite black enough.. Hopefully no-one else will.

Camo jacket

This fabric was another find on my ‘fabric day’ I had had back in May. With my son having started in air cadets recently, these patterns were jumping out at me a bit more. I am not sure what they would call this pattern. They refer to ‘MTP’, which stands for Multi-Terrain Pattern.

I had been looking for a darker, plain fabric, to do a remake of my butterfly jacket.. this obviously isn’t plain!! But I did think it would be good to do the mid length version of the jacket from the Burda 6921 pattern.

Getting started and cutting out!! Cutting out is not my favourite, but it is obviously VERY important!! I have to make sure the dining room table is completely clear and clean! Not always easy to clear the table in our house!! I do like a photo of it though!!

The first stage is then the dreaded pockets! These are flap pockets on the front, rather than in the longer version of the jacket where they are in the side. Good job I have made lots of waistcoats, as that part when you cut through the fabric is always a little bit nerve racking!

Sewing the sides together is then pretty straightforward. Next challenge the collar:

I am missing pictures of putting the sleeves in. The main fabric is sewn, and then I needed to hand stitch the sleeve lining in place.

I seem to be missing pictures of the final item too… Will have to add them later. I love this jacket and wear it all the time though. I am sure I will make another!

Knitting – weird sizes

I have made a couple of things from this pattern booklet before and never noticed the weird sizing. I made a cardigan that I have made previously in a smaller size, this time in 2-3 years. But it came out tiny! I also made a jumper size 12-18 months which came out bigger than the cardigan!

The cardigan:

The Jumper:

Compared to each other and the rainbow flower cardigan:

So this cardigan was too small for my granddaughter, but she loved the rainbow one. I knew someone else with a younger toddler, so gave this cardigan to them. I have bought some more of the wool, so will make another a size bigger!!

Crochet flower cardigan and another rainbow!

I stumbled across this pattern somehow and thought it would look good in a rainbow! I actually used the Sheepjes wool for this. I did the pattern for a 3 year old. It came out really quite big, but that’s not a bad thing. After this one I made another cardigan for my granddaughter, and did the 2-3 year size (rather than 4-5), and it was smaller than the jumper I did that was 12-18 months!! Both from the same sirdar pattern booklet!!

https://www.ravelry.com/patterns/library/flower-cardigan-3

I thought it was such a simple idea and came together really nicely, and really effective.

Rainbow jumper – Stylecraft Batik Swirl

This was one of those where the display in the shop just sold it! Well done Black Sheep! I had seen this lovely wool on previous visits, but wasn’t sure what to do with it. However, this time they had patterns on display and most importantly made up jumpers. I wanted!

The jumper only takes 2 balls @ £8.99 each, so quite a good buy. I really like the Stylecraft wools. They feel really soft and easy to use. I haven’t come across any knots in them either which is really good.

This is knit in a single piece from one cuff to the other! A circular needle is used, just for the length of needle and number of stitches. Once sewn up at the sleeve and side seams, a band is added around the bottom. Very simple, and nice and easy to take anywhere. I do like being able to take my projects away with me. Some of this was done in the hotel room in Newcastle overlooking the Tyne 🙂 That was a really nice break away – did an Ice Bar, walked along some of Hadrian’s Wall, and revisiting Durham.

A couple of minor annoying things about this one… it is a sleeve length I don’t particularly like.. and if you are going to do a rainbow, get the colours in the right order! But I do actually love it!!

Historic Transport Day Outfit 2019

I wanted a new outfit for transport day this year. I was thinking something that I could wear normally as well if I wanted. I had found a really soft denim type fabric with a daisy pattern on it (the family have always liked daisies since my sister called her daughter Daisy 🙂 ), which I thought would make a nice full skirt, which would go with a tie front blouse. I was thinking maybe Sandy from Grease, at the start of the film!!

I had had a bit of a ‘fabric day’ in May and went round all of my favourite fabric shops:

Nortex Mill in Bolton, Leons in Chorlton, then Fent in Macclesfield followed by Shufflebotham’s. I was after fabric for something for transport day, and also some silk for an evening gown – more on that in a later blog.

This was my fabric for this project:

I used the skirt part of the pattern for the 1950 vintage dress, and made it longer at the back, shorter at the front (just to be different). Lined it and put a waistband on. I also put pockets in it!!! I need to move the hook on this to tighten it up a bit more…. 🙁

I didn’t have a pattern for a tie front blouse, so did some searching on the internet and found this really useful blog:
https://sewoverit.co.uk/sew-tie-front-shirt-penny-dress-pattern/

I don’t have the Penny Dress pattern, but the theory should apply to any shirt pattern, right?

I used my Burda 6849 shirt pattern and applied a similar logic and it seemed to work out okay. I had some blips… The blog had suggested a facing down the front edges, and not a button band. This conflicted with the yoke lining, so I have ended up with a lovely shirt yoke, messed up with a facing as well. But nobody else knows this when I wear it!! Don’t tell anyone!!

Now the big question when I do a blog – did anyone take a good picture of me wearing it? I will go check!! I wore it for the day, watched the car parade through the village, and then sat on the field with my husband’s tractor and a picnic.

Jeans & Cords

How have I nearly forgotten about the pair of jeans I made? And even the cords before that for Milly. This pattern was picked because Milly likes ‘Mom jeans’. Although what the shops sell as mom jeans are not what I would wear! I find the shape most unflattering!! These weren’t quite right either – for Milly or me!

I started with the black cords for Milly, but I also cut out my jeans at the same time. The cut out denim sat on my shelf for over a year I think!! In fact the cords sat in my room to alter for quite a while too.

Plan was to taper the legs a lot more than in this pattern, but I cut them out as per the pattern, to pin and cut as desired at the appropriate stage. So I made the black cords first, pockets all done, fly done, pinned legs together to get Milly to try them on.. took them in a little bit more.. I would try to get her to try them on each time, but it was always too much trouble!! I finished them off anyway, and while the leg shape wasn’t too bad, the waistband was way too loose. They even fitted me, but as I didn’t like the fit at all they had to be altered again. They sat in my sewing room for ages before I got round to it!! Belt loops had to be undone (only on the top edge), the waistband unpicked, the top part of the back and side seams unpicked, all including topstitching. The side seams were taken in a little, and the back seam quite a lot, and then all re-topstitched. I cut out a new waistband too and attached that, and re-attached the belt loops. It was not fun, but I was pleased to finish them. They are still a bit loose around the waist, and she has to wear a belt with them!

That was why the jeans sat on my shelf for so long – I just couldn’t build up enthusiasm to do them, when I hadn’t liked the fit of the cords. But I encouraged myself by making them more bespoke with some embroidery, which would distract from the weird shape! I splashed out on a couple of bought designs, and used another that I had bought previously.

I started with the pocket, and some nice teacups. Once embroidered (only one pocket), the pockets were attached to the backs.

Next part in making the jeans is the front pockets, and all the double stitching around them:

I then did the embroidery on the legs. First a butterfly hot air balloon.

Then a steampunk-ish butterfly / sewing related one… you can’t tell at this stage though!

I was very happy with the embroidery parts, so didn’t want anything to go wrong with the sewing after this stage and waste the hour or so watching the hot air balloon stitch out!

Here are the embroidery sections at the end:

I did try them on lots to try and get the shape right, and to position the embroidery designs in the right place, but I would still have liked narrower legs.. they are ‘comfortable’! I think they look pretty professional, but don’t wear them as often as I should!

Spirit of the orchid wrap

Design by Tatsiana Kupryianchyk @ LillaBjornCrochet.com

I had seen these kits at Black Sheep Wools previously, and even when in the sale hadn’t bought it, thinking “I’m not really a wrap type person”. However my addiction to crochet beat that.. I can’t remember why I was at Black Sheep AGAIN (I probably had an idea I would buy something like it as I was about to finish Carousel), but the sale was on again after Christmas, so I bought the kit with money from my mother-in-law. It seemed most appropriate, almost compulsory, since it was buying her a crochet kit for Christmas previously that had got me hooked. I had also previously bought my mum a wrap crochet kit (which she has just finished) as a challenge of something different, and this certainly looked to have some different styles. I was right 🙂

This is the first panel and start of the second. The first part is not the most exciting!!! Right side a row of trebles, sometimes a back post treble to give more texture, then the wrong side doubles, various different colours!. There are some pretty zigzag patterns – front post double trebles in the rows below. The second panel is fantastic though, and a joy to see the pattern emerge. This is mosaic crochet and is just so clever. It is time consuming, and I never got to the point I could remember the pattern for a full row, and each row is different, so constantly checking the pattern. Not something you can easily carry around to pick up and do while waiting to pick up a child!

Second panel complete, and with the start of the third panel, which uses overlay crochet:

I don’t think the overlay crochet was my favourite, but they turn out quite pretty, especially once crocheted together:

Panel four is C2C, which I have seen lots of references to on Facebook crochet groups, but I actually had NO idea what it was or how it was done. This is another fantastic panel. The pattern does become apparent and it is easy to follow the chart if you lose track of where you are.

It looks like I stopped taking pictures of the individual panels in progress after this… The next one was another C2C, and then we are halfway 🙂 The C2Cs are repeated in mirror image with different colour combinations, another overlay section, another lovely mosaic, plainer rows to finish, and then the border to add

And with the border:

Started early Feb, finished end of March.

I will have to try some more mosaic crochet 🙂

Another dragonfly shirt

Dragonfly top with peplum

Something for going out in. I had already made the dress from this pattern (Owl dress).