This pattern can be found on Ravelry: https://www.ravelry.com/patterns/library/mimosa-shawl—mimosa-huivi I had been given a lovely Sheepjes Whirl for Christmas from my mother-in-law, and spent a while searching for something that I thought would have some resemblance …
Officially started in December 2021, but not done much yet!! This was a spontaneous buy when I had to go to Black Sheep Wools for more yarn for the Labyrinth blanket! I also bought some …
These have been on the go since before Christmas 2020!! Finally finished! I had bought a selection of sock wool, as I do like to wear them, but think I should leave it to Mum …
This was a long project!! Started June 2021, but only finished January 2022!! I really like it, but it hasn’t been a favourite make. It wasn’t something that was easy to remember, so constantly needed …
I am one of those sewers who always likes to look at old Singer sewing machines in antique centres, and am always surprised at how much they want for them, AND critically always say I haven’t got room for one!
My husband doesn’t listen!
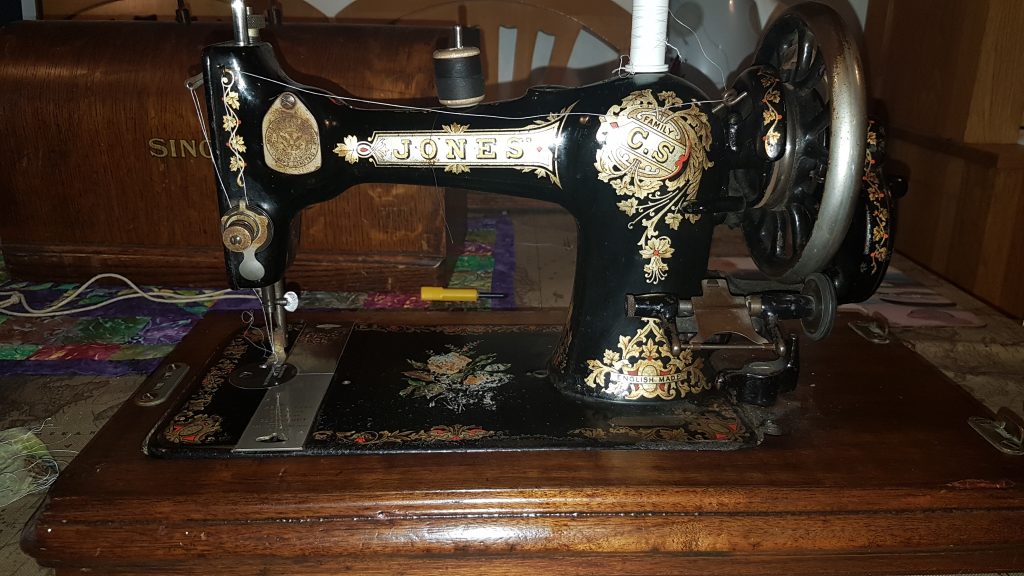
He saw one listed on Facebook’s MarketPlace and made an offer on one… low and behold my first antique sewing machine. He then kept getting more ads for them, and ended up getting another… Both are fantastic quality.
Jones Family CS sewing machine, a type 4, dated to 1899, oiled and working. The case in the background is the one for the Singer, but the case for this one is immaculate. I am not sure if he paid £40 or £50 for this.
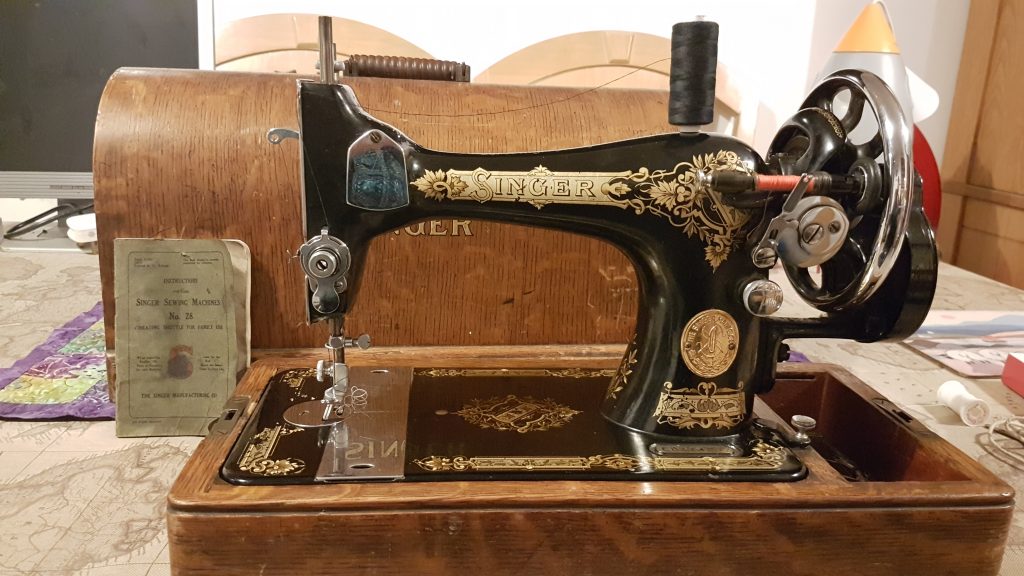
And the younger 1937 Singer is also working again thanks to some tlc from Paul. I think he paid only £30 for this one!! This was apparently the one the lady took out to do repairs.
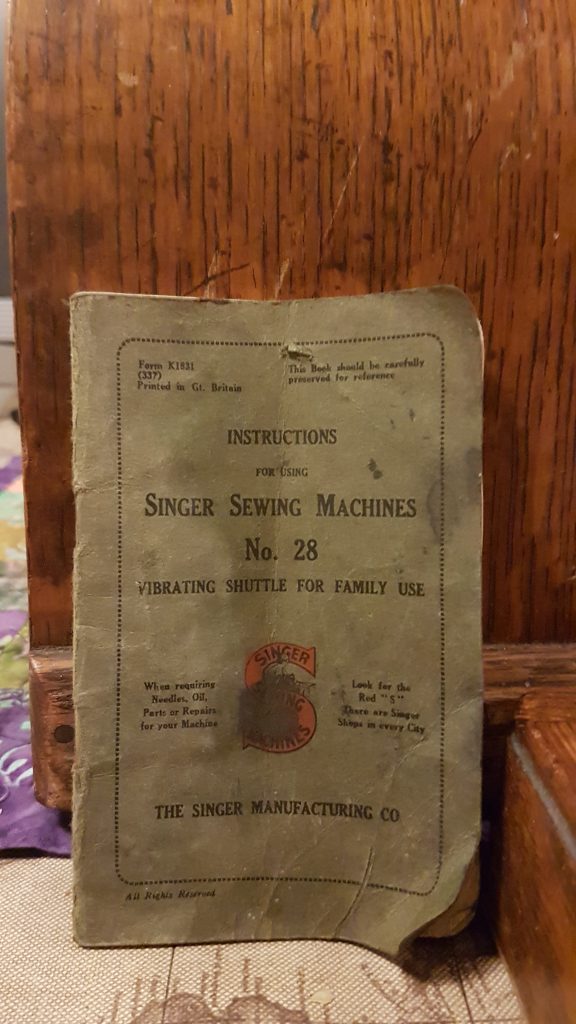
And still has the manual:
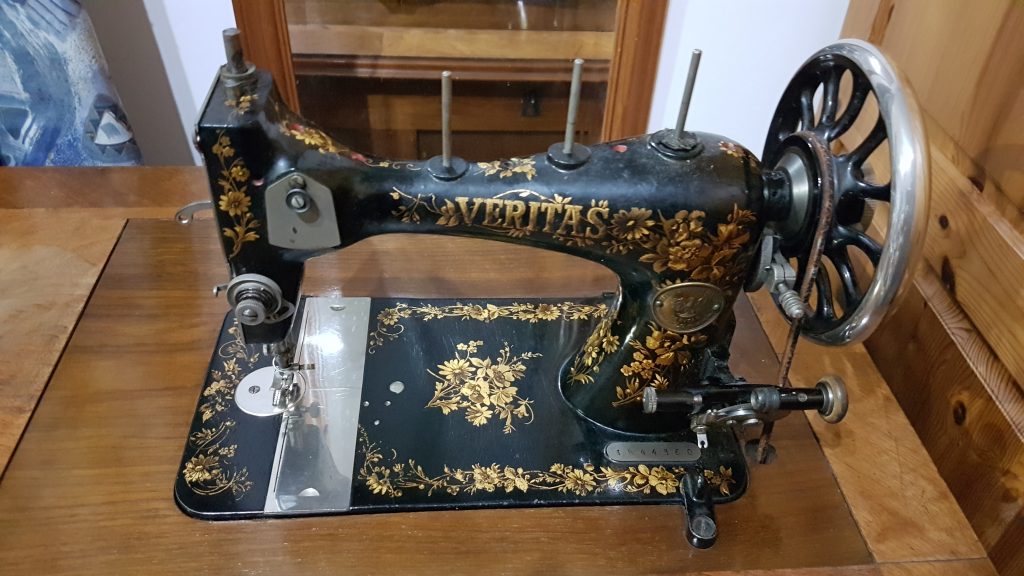
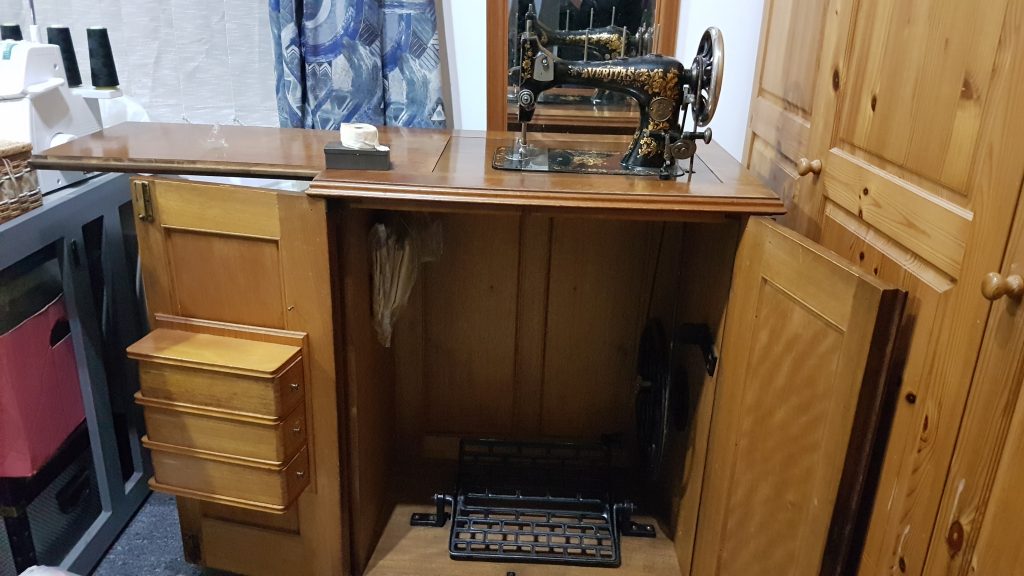
As my Nan’s house has sold, we went to collect some clocks that Paul and my Dad wanted, before the house is cleared. Nan has told us to take whatever we wanted. Well, I don’t think anyone else wanted the sewing machine…. I definitely didn’t have room for it, so have had to have a clear out / move around in my study / sewing room, but yet another beauty. I haven’t been able to date this Veritas yet. My Mum made her wedding dress on this!!
It came complete with some old patterns inside the cabinet too, and a good old ‘button tin’ amongst other treasures.
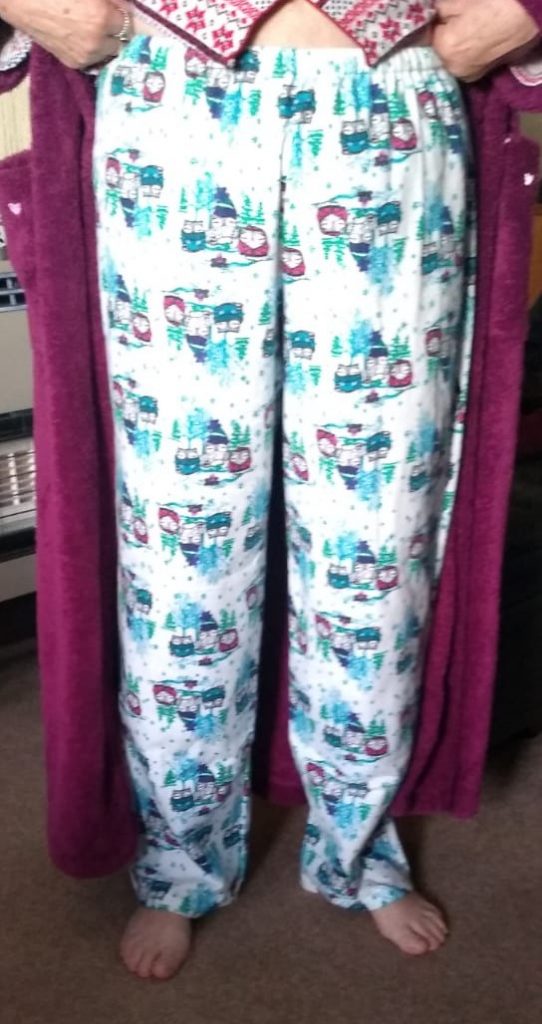
I drafted a pyjama bottoms pattern from a simple leggings pattern (New Look 6435). Just added a bit for not using stretch fabric, and a bit for comfort. As usual I got carried away doing, and didn’t take pictures of any of this make. Fortunately my mum sent a picture of her trying them on, on Christmas Day:
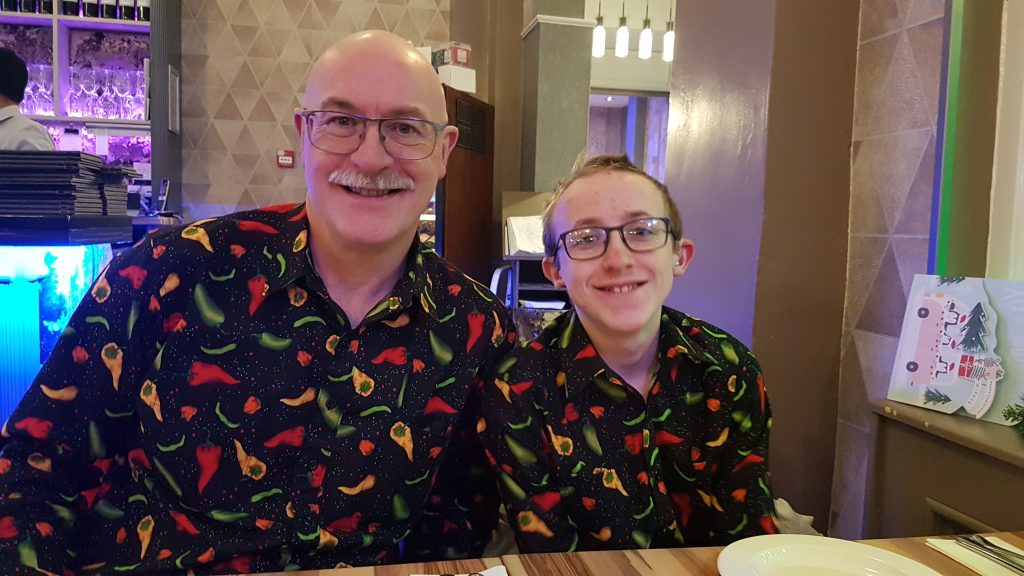
I have already posted Paul’s chilli shirt, this addition is Robin’s – a mini-me version of his Dad!
Turns out that Robin has grown rather a lot, and I can no longer use the boys shirt pattern I have been using for him. I made his from the same pattern I use for Paul’s shirts, but the smallest size (which actually fits me pretty well too). I had to fold over the pattern to the smallest size… I was being lazy, and have now made a copy of the smallest size for future use!
Both have matching face masks.
This was at one of our favourite Indian restaurants – Ba Bursi in St Helens. Matching masks also provided to the owners of the restaurant!!
As always I left it way too late to start making gifts for people, having started ‘thinking’ about Christmas fabric back in October I think!! I have gone a bit bah humbug about Christmas lately (particularly in current Covid times), and don’t like going and buying random gifts from the shops for people that they may or may not like. I like to put some love into what we give people now. It may not always seem like much, but home made gifts take a lot of time and care.
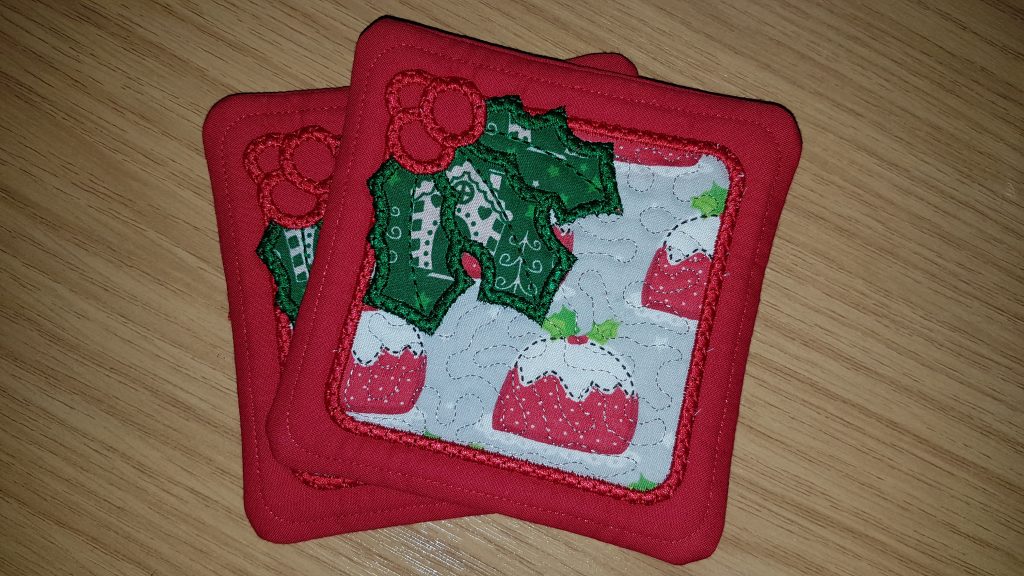
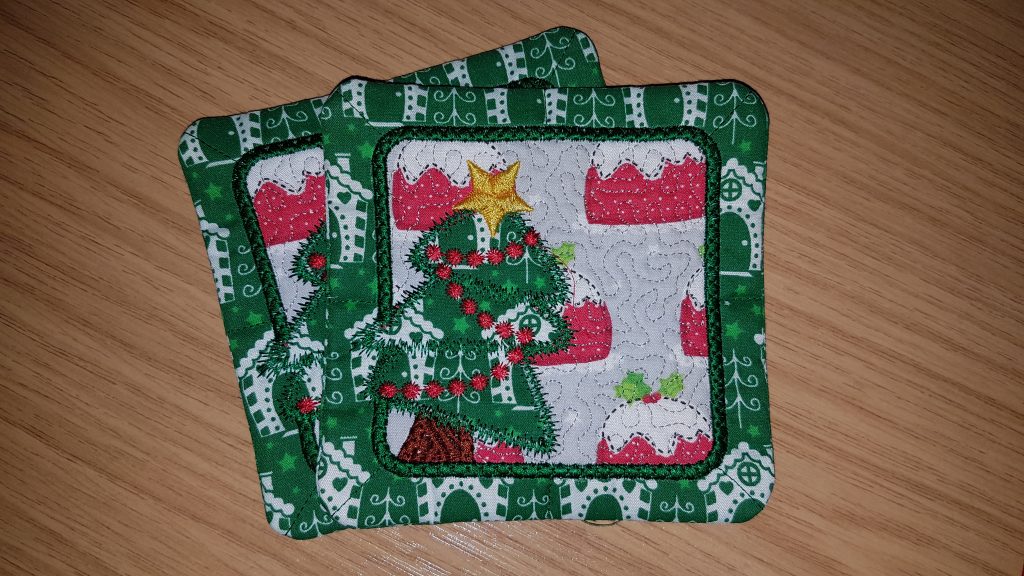
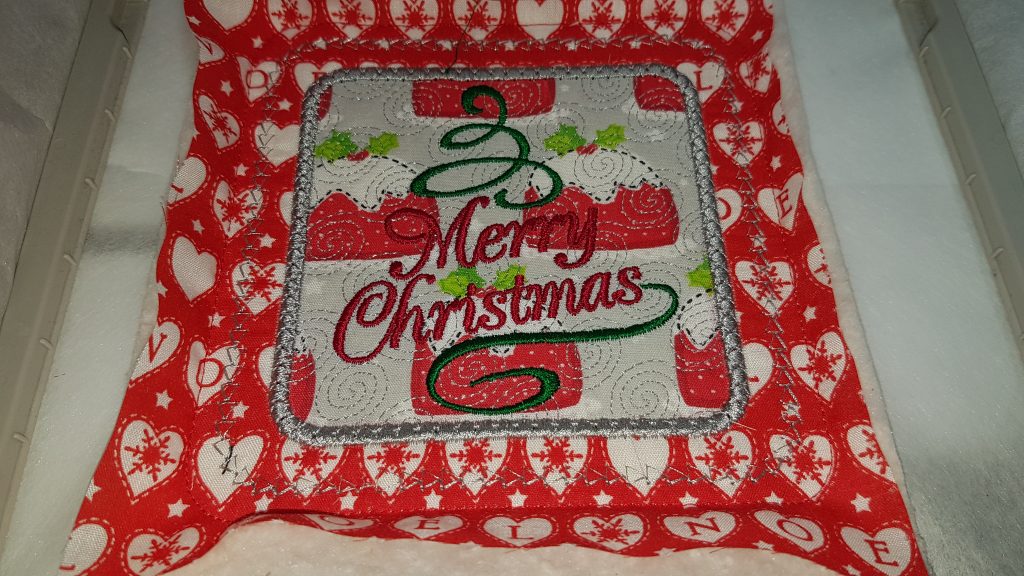
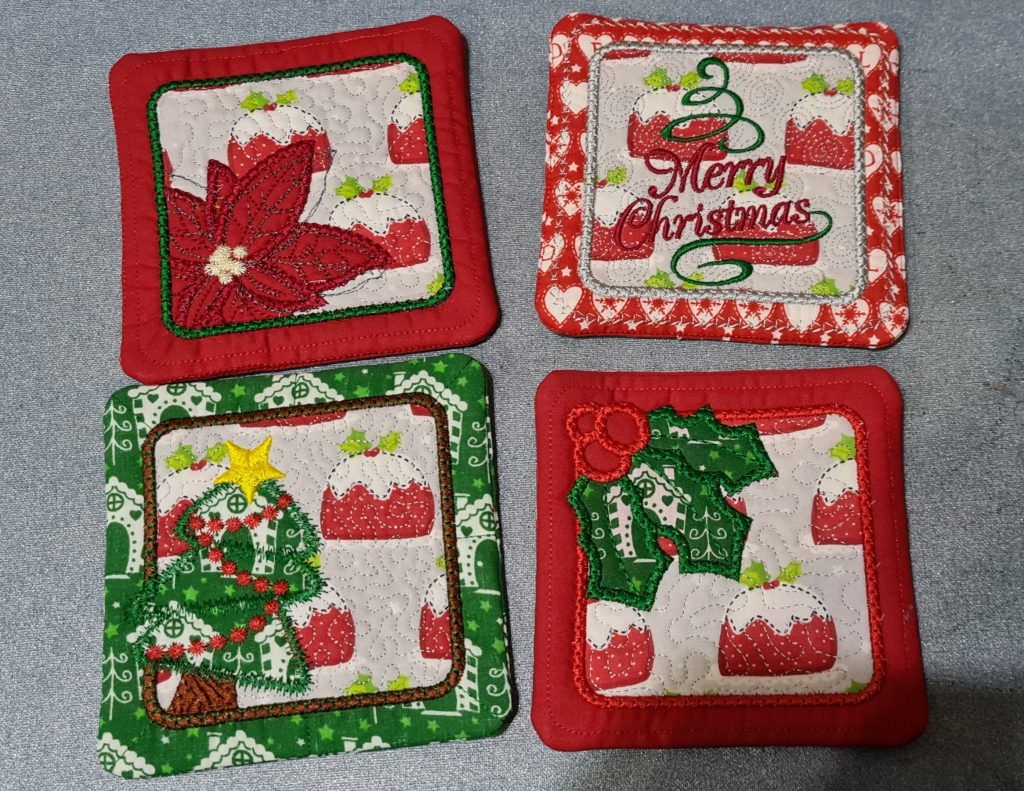
This year I found some nice Christmas coasters.
I have NEVER broken as many needles on the embroidery machine in my life!! Each coaster should stitch out in about 40 minutes, but with colour changes, and trimming the fabric parts each took about an hour! I can’t remember how many I made now, I think it was 20!
In the meantime, my husband was wood-working and machining wooden pens on his lathe!
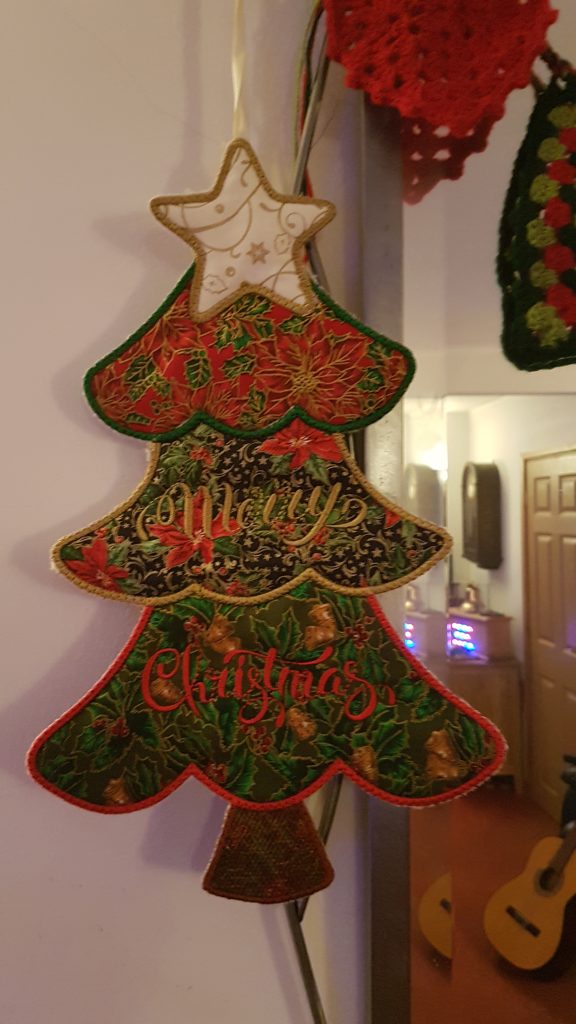
I also found a nice Christmas Tree to make. I wanted to try this as it involved multiple hoopings, and I wanted to see how that worked. As always the instructions for all of these designs by Kreative Kiwi were absolutely fantastic, and easy to follow.
My husband then also found an easy, impressive make, on-line. Basically 2 9″ semi-circles sewn together. The way you then fold them makes them look like a Christmas Tree:
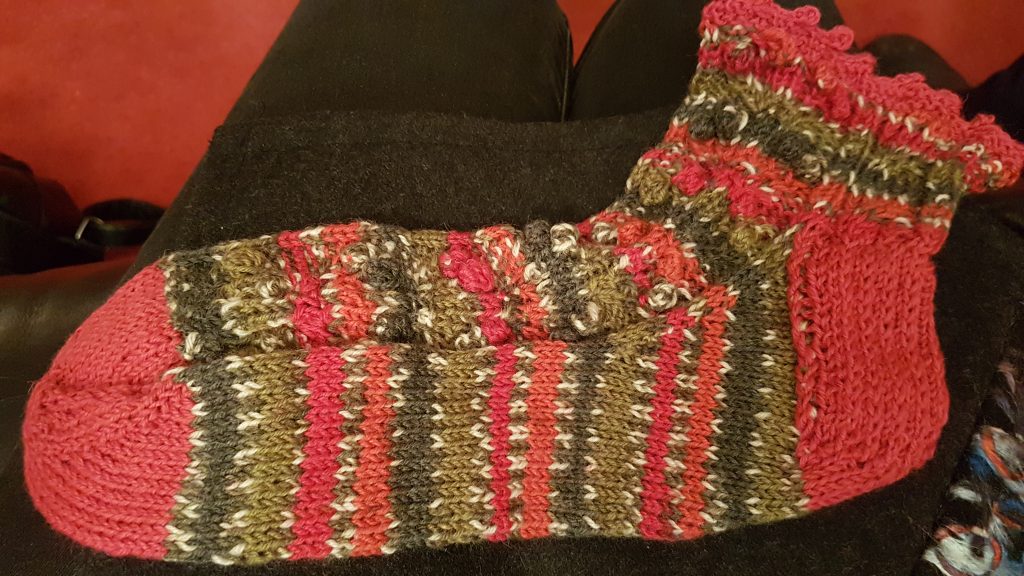
Mum has been knitting us lovely socks for years. I first had a go a couple of years ago when Black Sheep Wools were giving away a free Christmas sock pattern with the wool. They looked lovely and festive, so I thought I would have a go! This potentially put me off socks for a long time!! They were ‘toe up’ socks and I just didn’t know where to start. Mum started me off and I did eventually finish one sock, but it was very slow going as there were cable patterns and bobbles all the way up!! I didn’t start the second sock for at least another year!!!
Getting that toe part started and getting going is really fiddly, as there just isn’t much space while there aren’t many stitches. I persevered though, and finally got a pair of festive socks, which I wore a lot in December! They are quite big, so nice and warm over normal socks, like a pair of slippers.
While these were quite fiddly and slow, I did quite like knitting on dpns (double pointed needles) and the sense of achievement of something new. I had already had good intentions of making more socks (before I did these), and my daughter had picked some sock wool on one of my many visits to Black Sheep, so I now had to try some more, but definitely a simple pair.
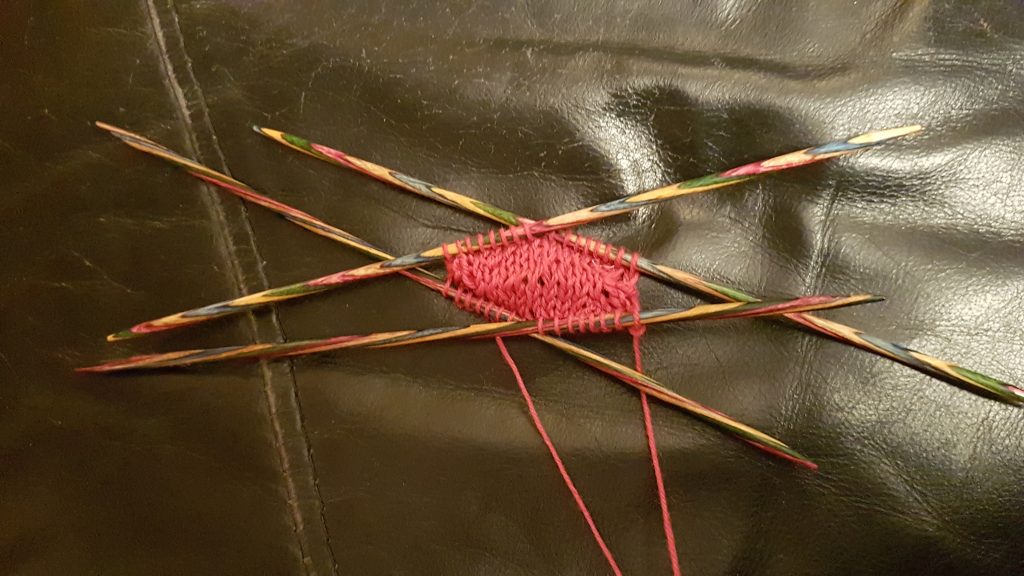
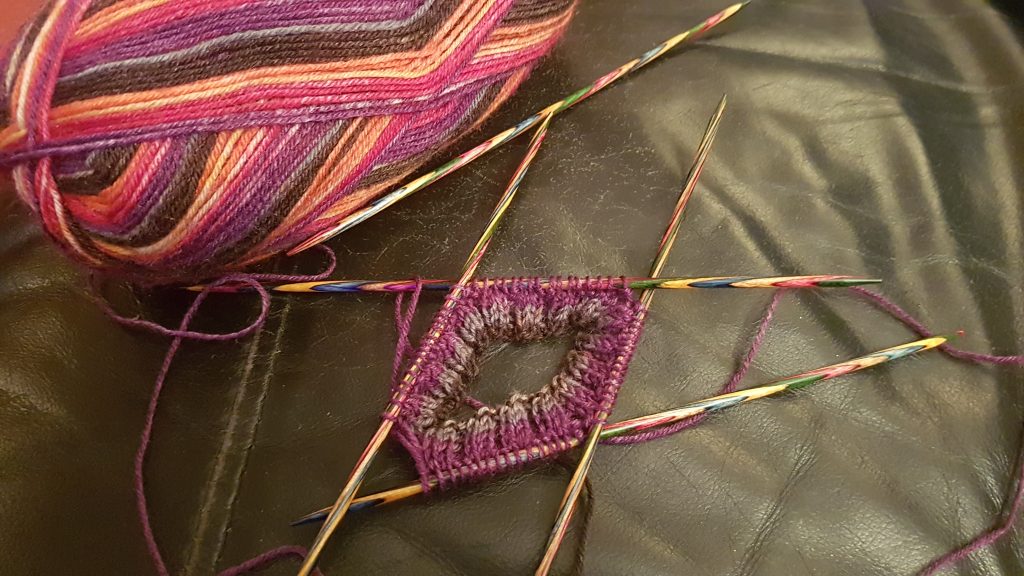
This time I did an ‘after thought heel’ pattern which mum had left with me. They start at the cuff, so a lot easier to start.
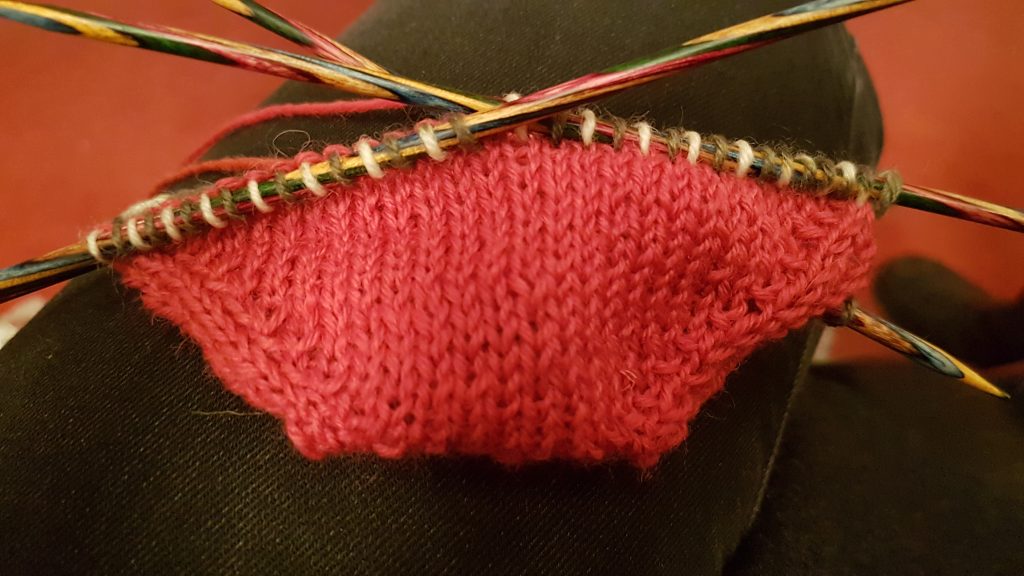
The after thought heel is quite clever too. When you reach where the heel needs to be you knit a section with a separate piece of wool, and then carry on with the foot. When you have finished the toe, you go back and pick up the stitches below and above this separate piece, and then pull out the separate piece, and just knit the heel! Finishing at the toe was easier than starting there… And when you get down to the last stitches, finish off with a kitchener stitch. I had never heard of this, but as ever Google and YouTube are your friend!
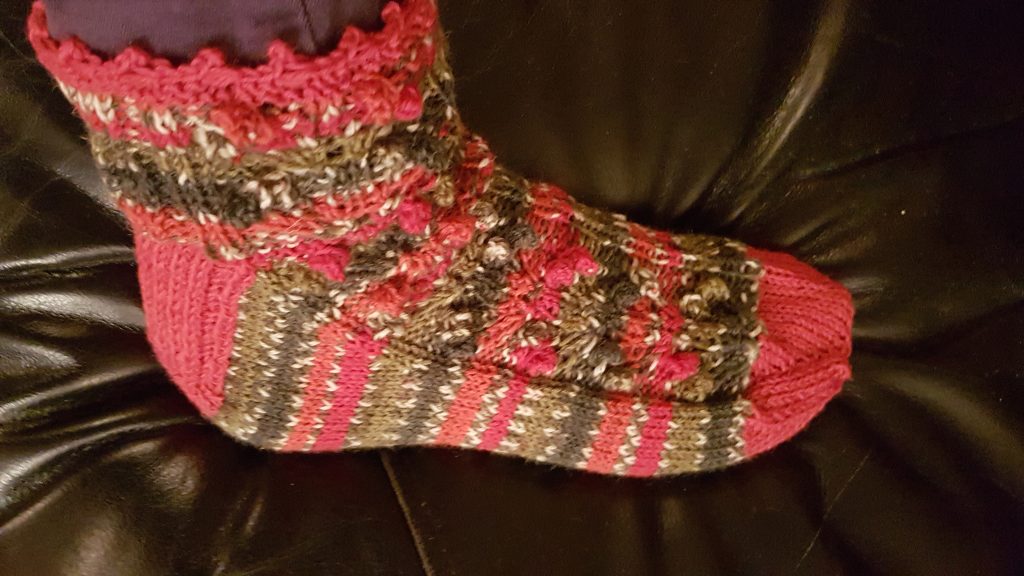
So these were really easy to just pick up and knit a bit whenever as no pattern, but with lovely wool that stripes they look great! These came out a bit large, but may shrink a bit when I wash them. I even managed to start them at roughly the same sequence in the wool, so they stripe in the same place on both socks!!
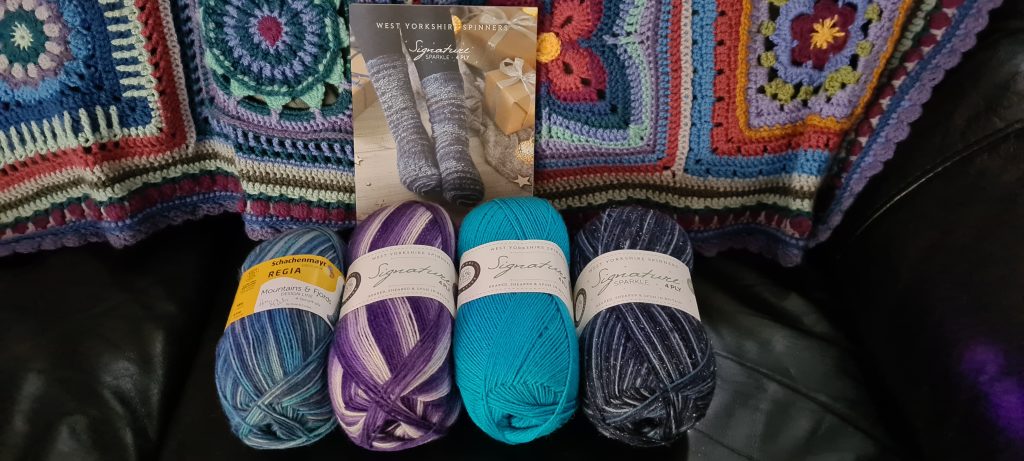
You could say I also have the sock bug now!! Hubby nipped out between Christmas and New Year, and bought me a full set of Knit Pro Zing dpns, and then I ordered a few more balls of sock wool. I bought more than I really needed to get free delivery (that’s my excuse). Obviously, if Paul had told me he was going to Black Sheep when he did, I would have gone and bought some then, and still bought more than I need!!
The pattern was released over a 4 week period, and could be knit ‘flat’ or ‘in the round’. I actually learnt a new cast on method for this – the German Twisted cast on – apparently more stretchy at the bottom. It was interesting to learn another method, but when I analysed what was being done, I am pretty sure it was exactly the same as the thumb method I normally use!! I am open to being corrected, and maybe need to look at it again.
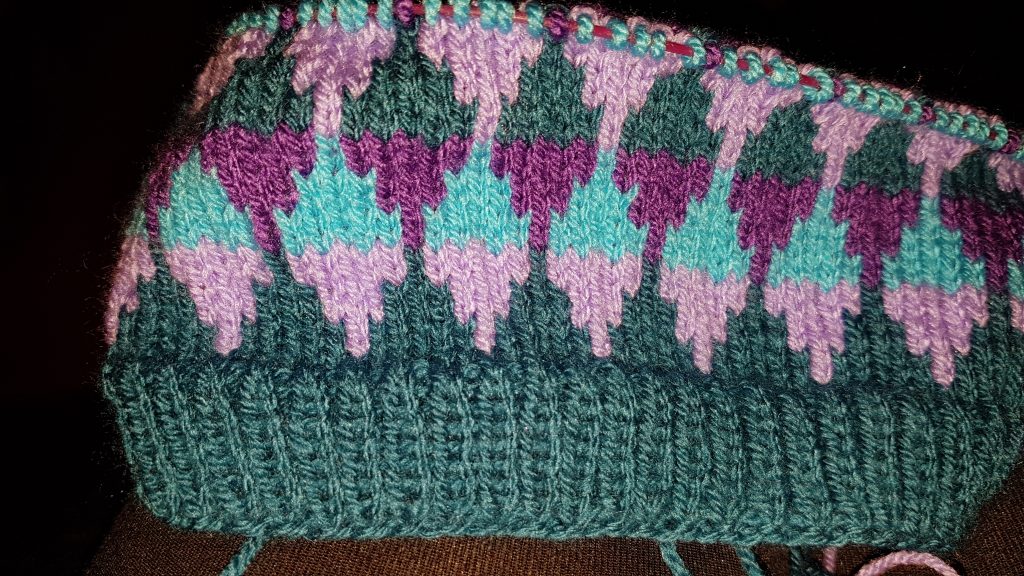
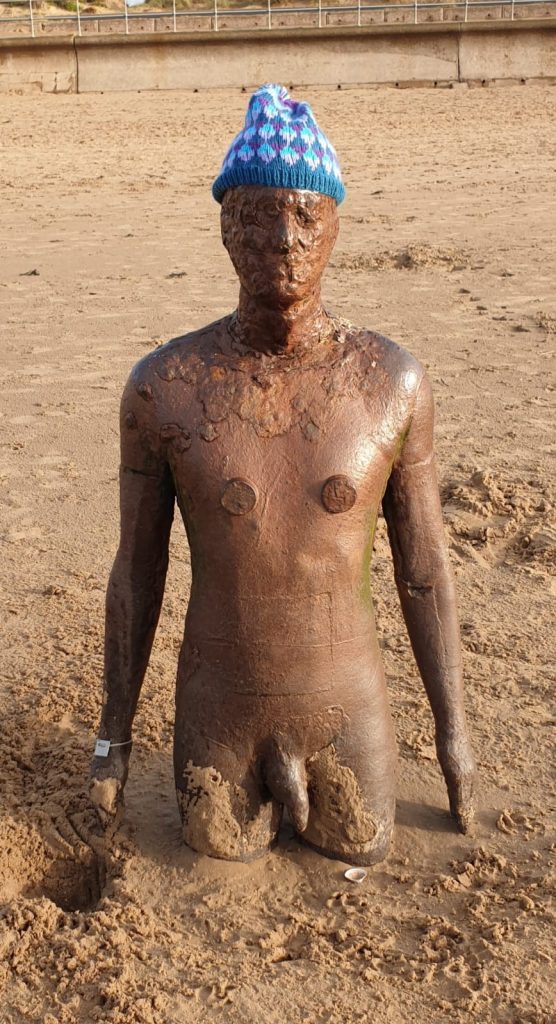
It wasn’t a mystery for long (which caused some consternation within the facebook group!!), as you needed to know which size to make, and it was a head size, so obviously a hat!!! I managed to use wool I already had in stock (I really have plenty so not really an excuse to buy more), and used Stylecraft Special DK (SSDK). I decided to use circular needles for a change. This is partway through the second part.
I should show you a picture of the back. I don’t think I have every really done colour work before, normally choosing pretty colour changing wool!
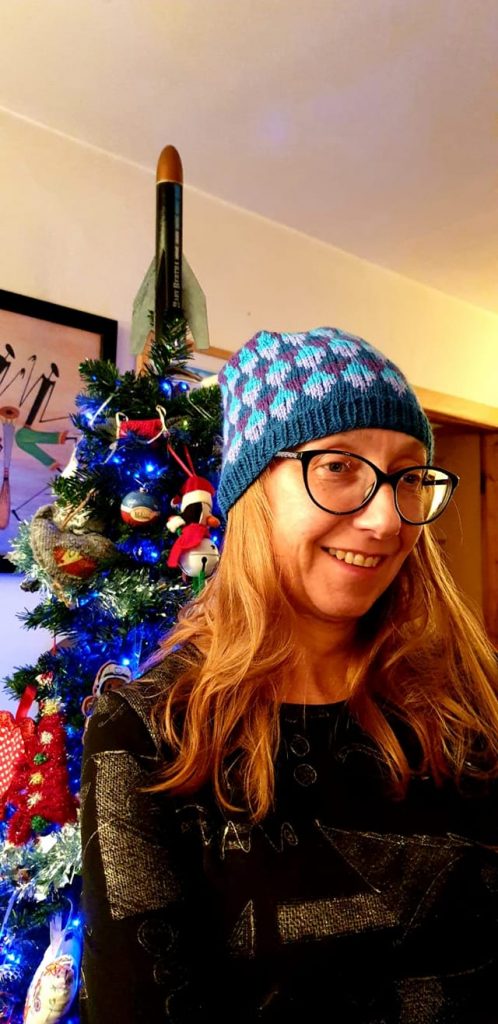
It was nice and relaxing to do, and to see others’ progress in the facebook group. Some people were doing multiple ones at a time! I am happy with my finished hat, which after popular consensus had a bobble added!
Here it is on an outing to Crosby … Another Place by Antony Gormley:
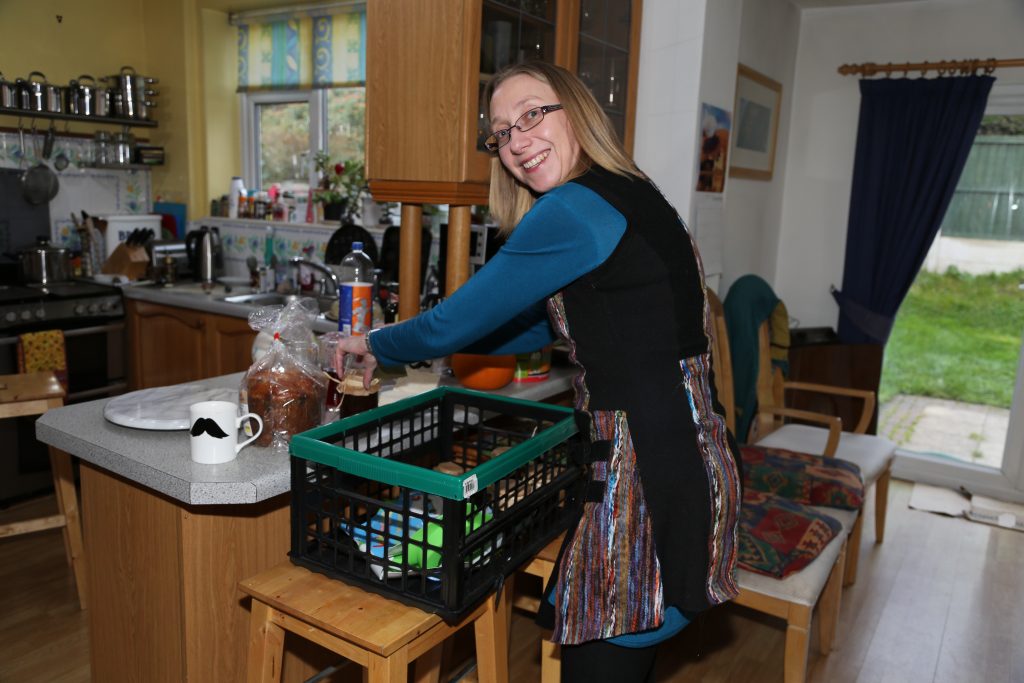
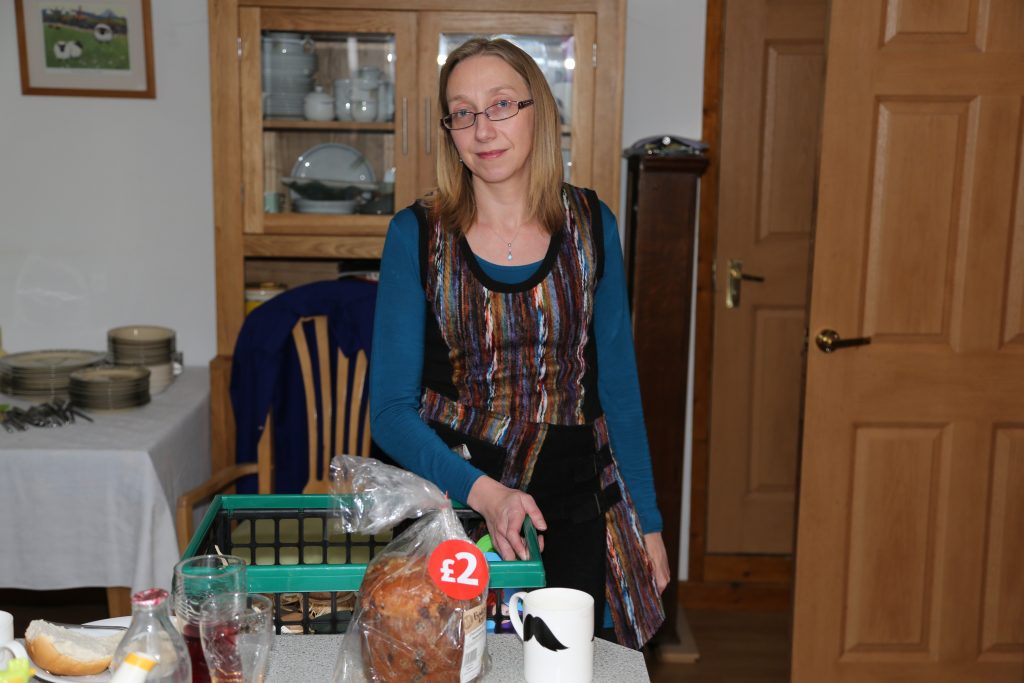
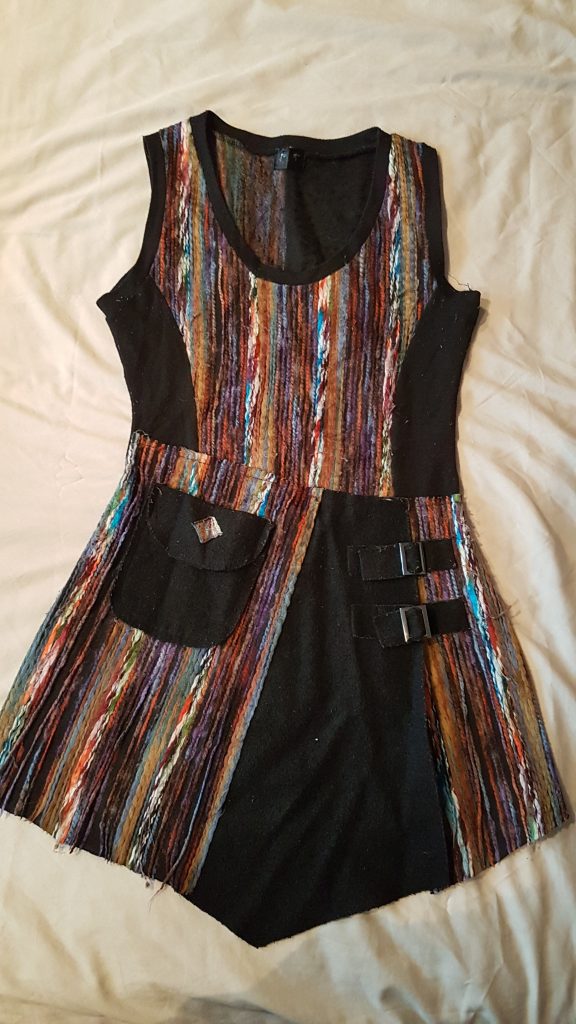
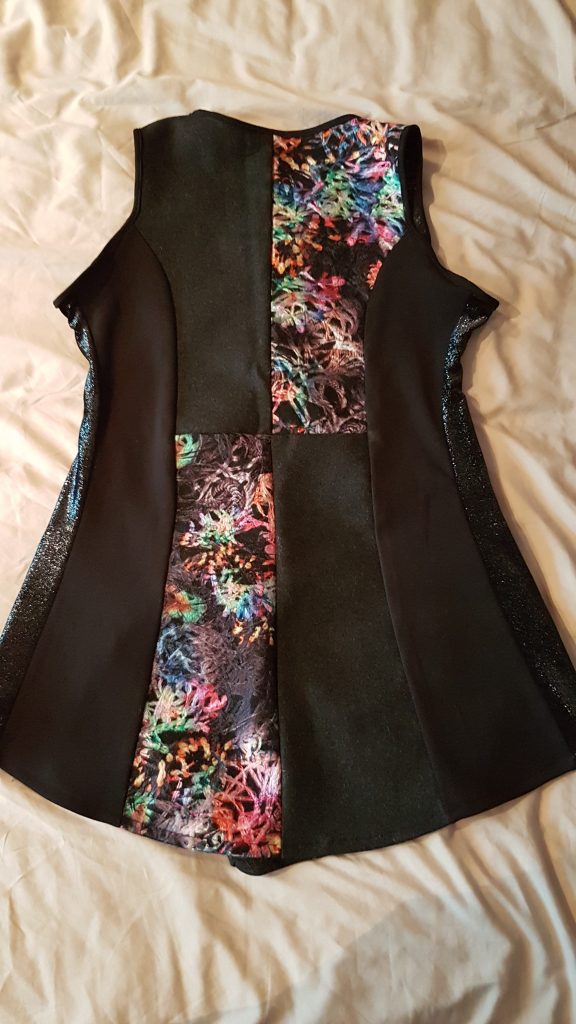
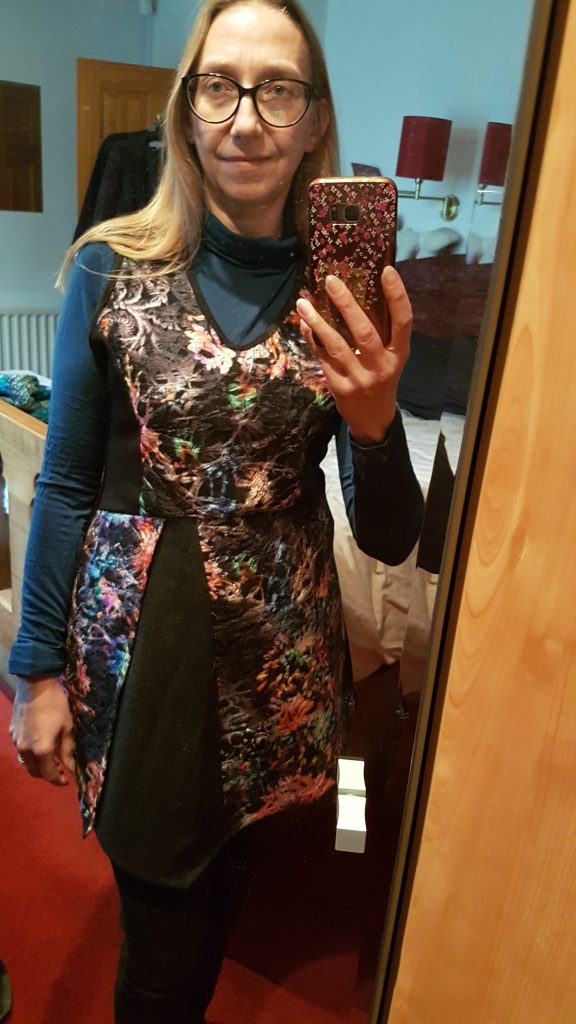
I bought this lovely fabric at the knitting and stitching show in Harrogate in 2018. I eventually decided to try and use it to copy a tunic top that I had worn a lot and was looking worse for wear!!
This is what it looked like back in 2013!!
What I didn’t take into consideration when I copied this, was that it had a little bit of stretch to it, whereas this fabric had absolutely none! I loved how it had turned out, but didn’t finish it off, because I could only just get it on!! It has been in a bag for about a year!
With a few days off work, and finishing a few things off, I thought it was time to look at this again!
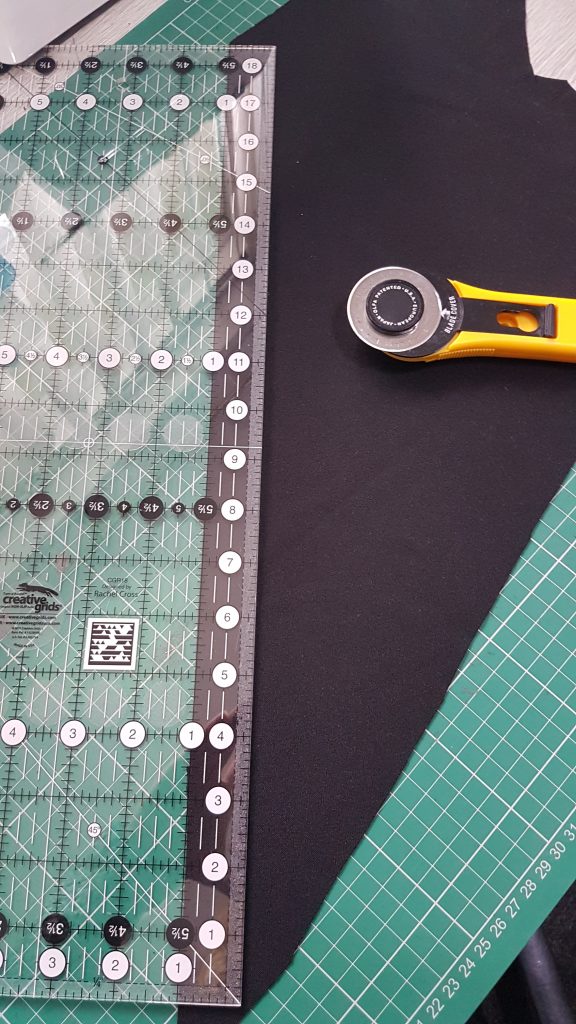
I decided the easiest way to make it fit, would be to add some extra, stretch fabric, in the sides. I decided to just do this as a straight insert, and found some lycra fabric leftover from making my daughter gymnastic shorts. Black, but sparkly!
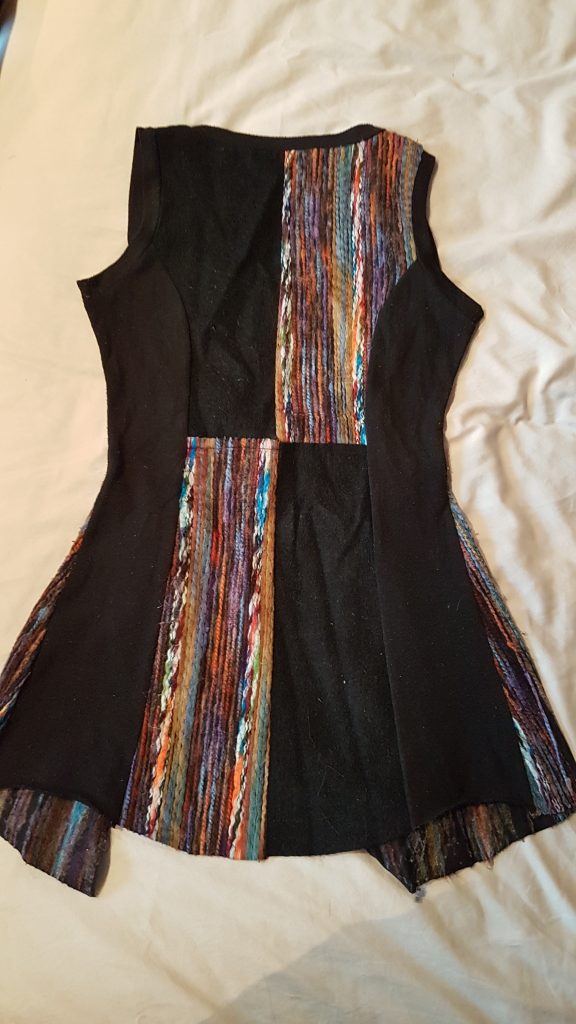
I then found the original jersey used for just a couple of the back side panels originally, to make bias binding for the neck and sleeves.
Finally I has a tunic I can wear 🙂
I am still not 100% happy with it, but I can wear it!
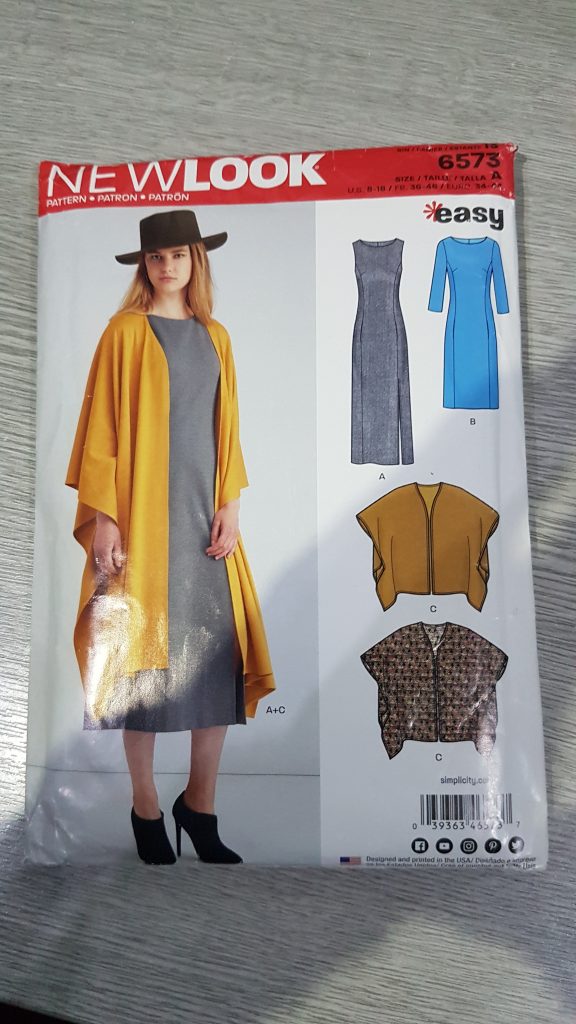
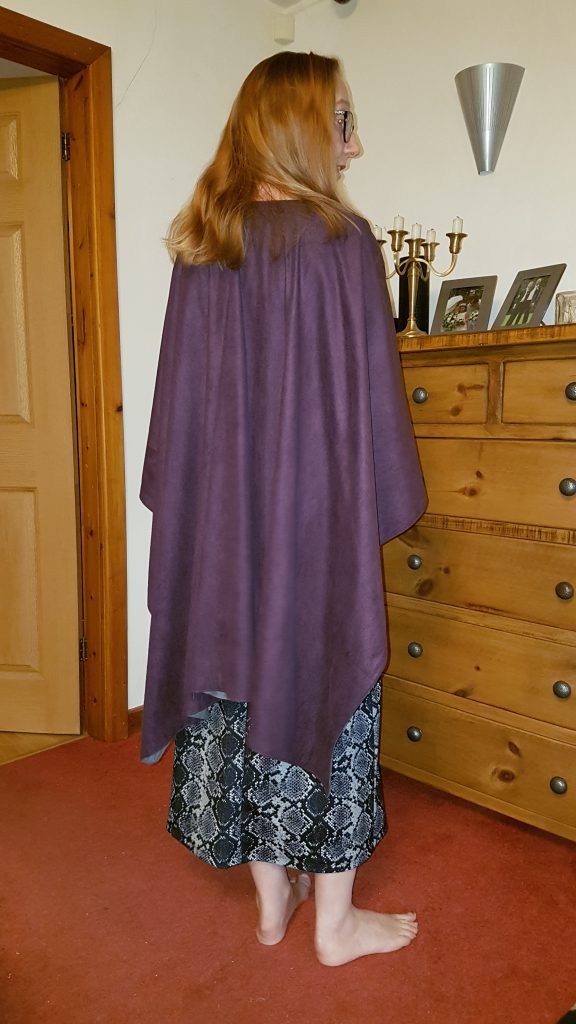
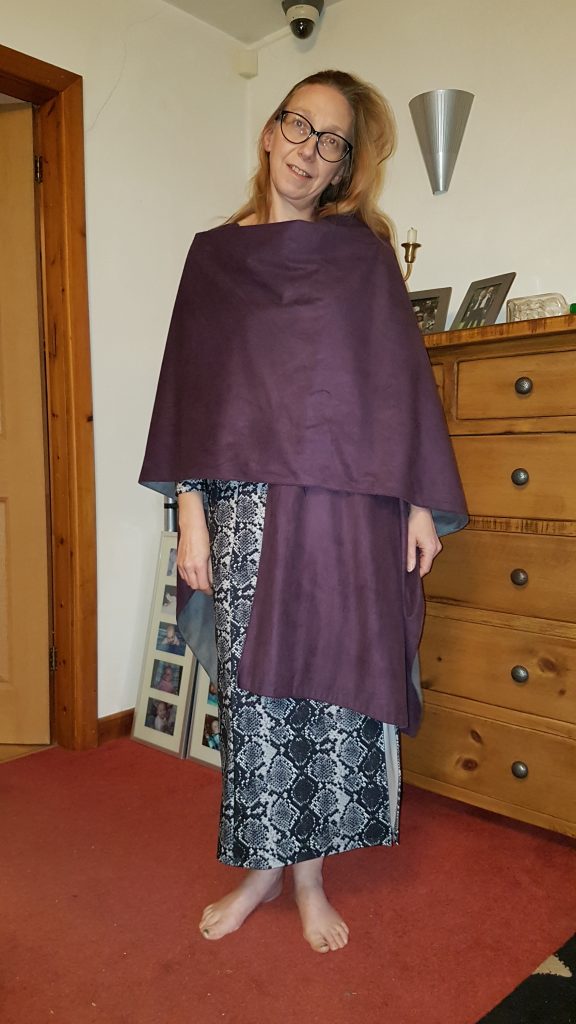
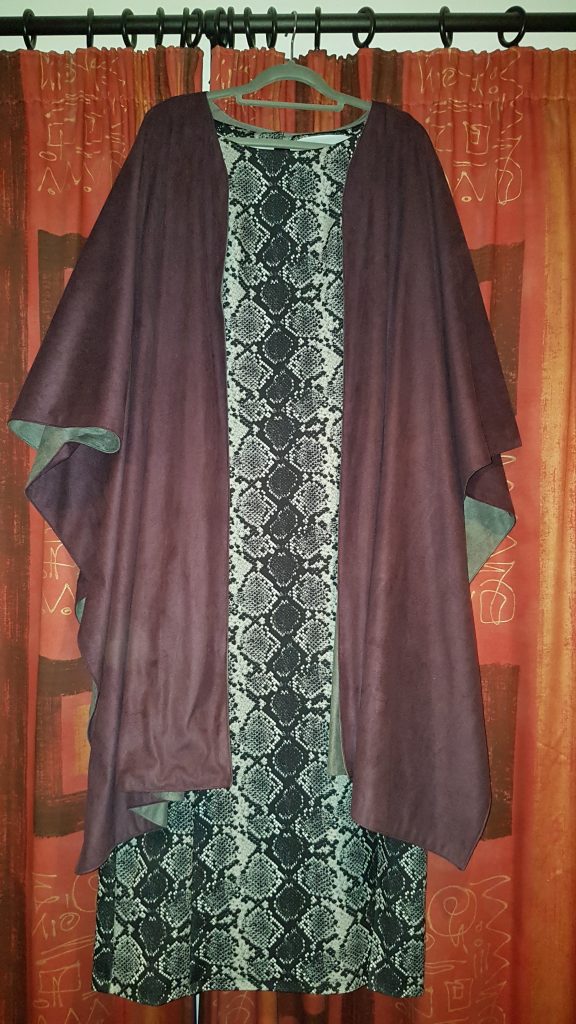
Paul saw this cape in a window display in the wool shop in Cleckheaton. It was a Sunday, so shut at the time, but he liked it so much he rang up on Monday and bought the pattern. It has taken me a while to get around to, but I have finally made it!! To be honest it doesn’t look anything like it did in the window display on the pattern.
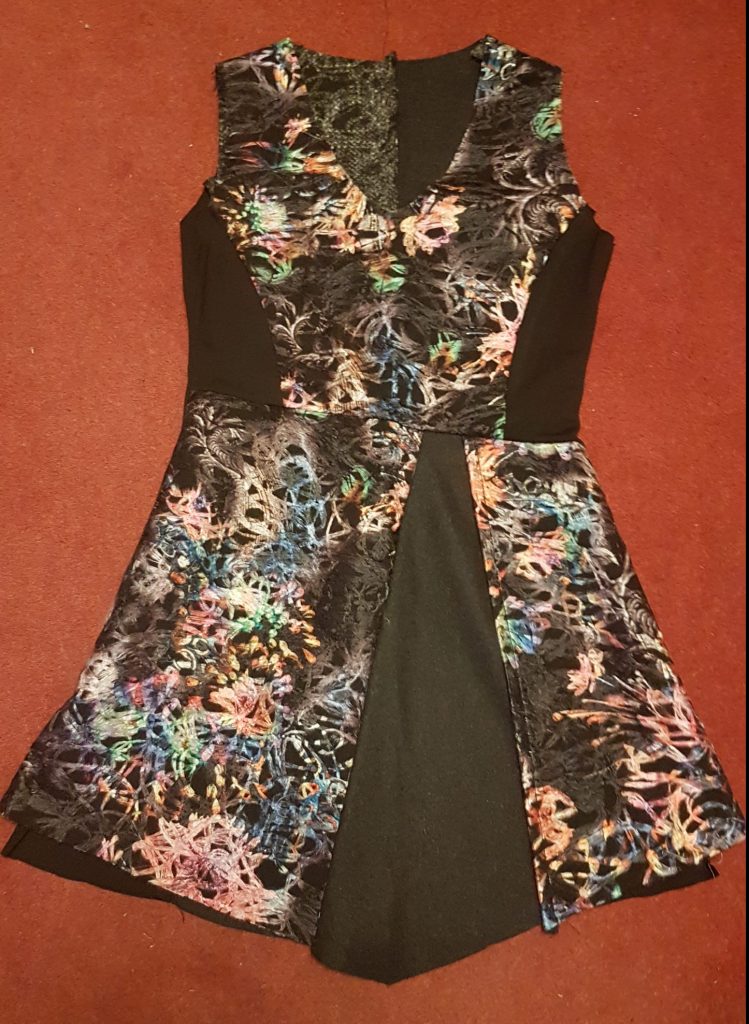
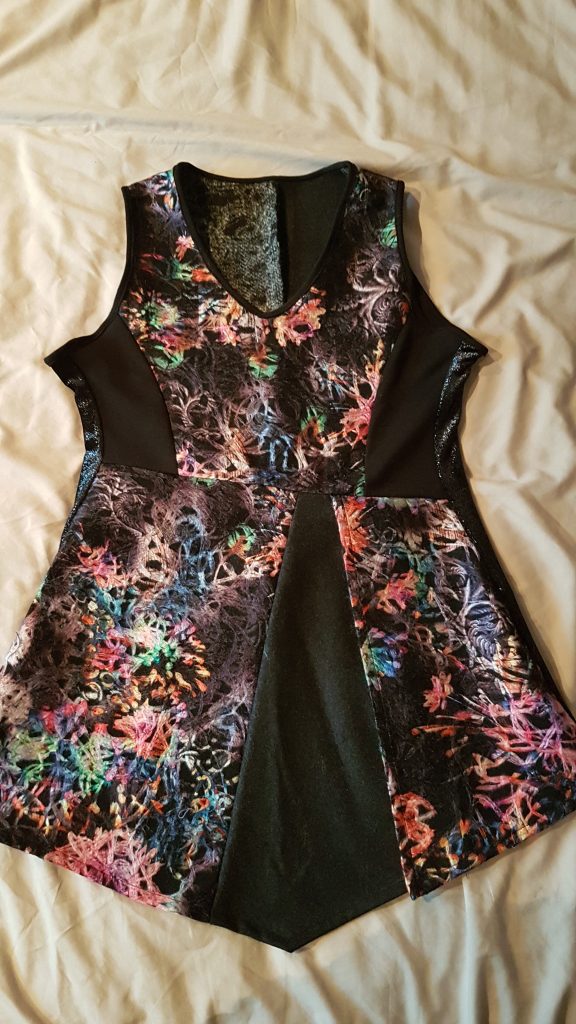
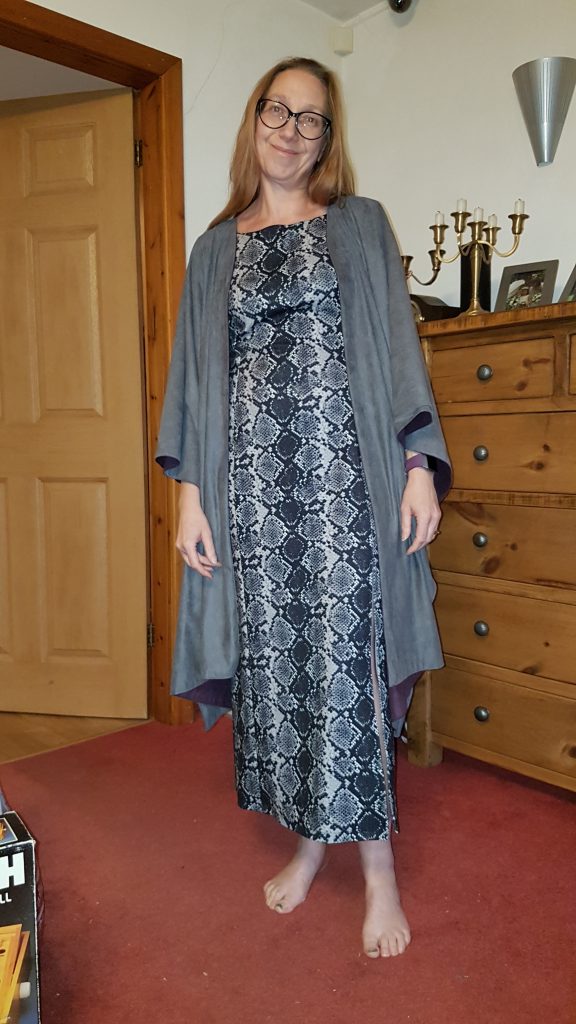
I actually liked the dress as much, if not more than, the cape. So when I was looking for fabric for the cape, I also bought some for the dress.
I have used a faux suede for the cape. When it arrived, I decided it was too ‘light’ and not enough for the cape, which is just a single layer piece, hemmed all the way around. So I ordered some more faux suede in a contrasting colour to make it double thickness and reversible!
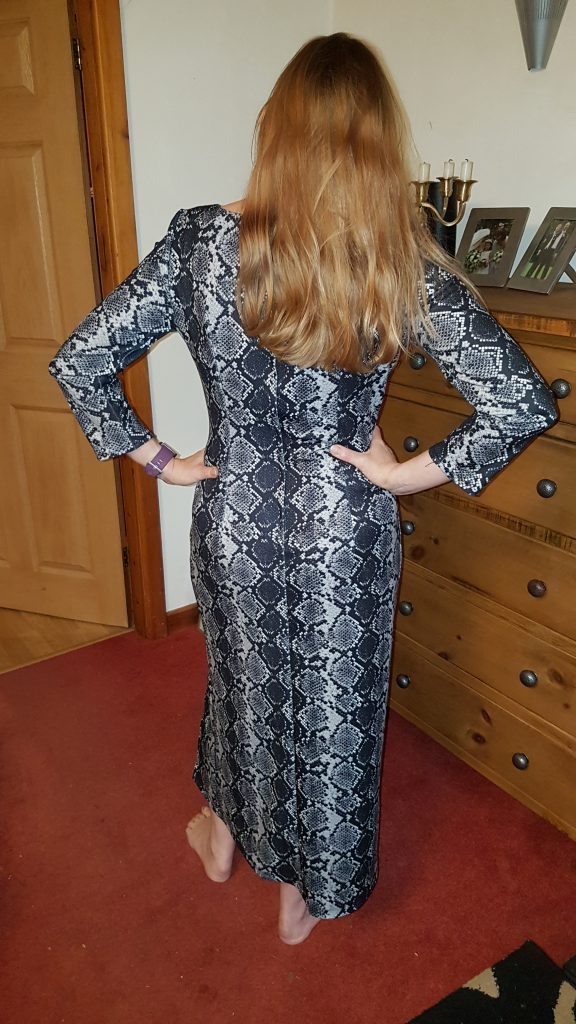
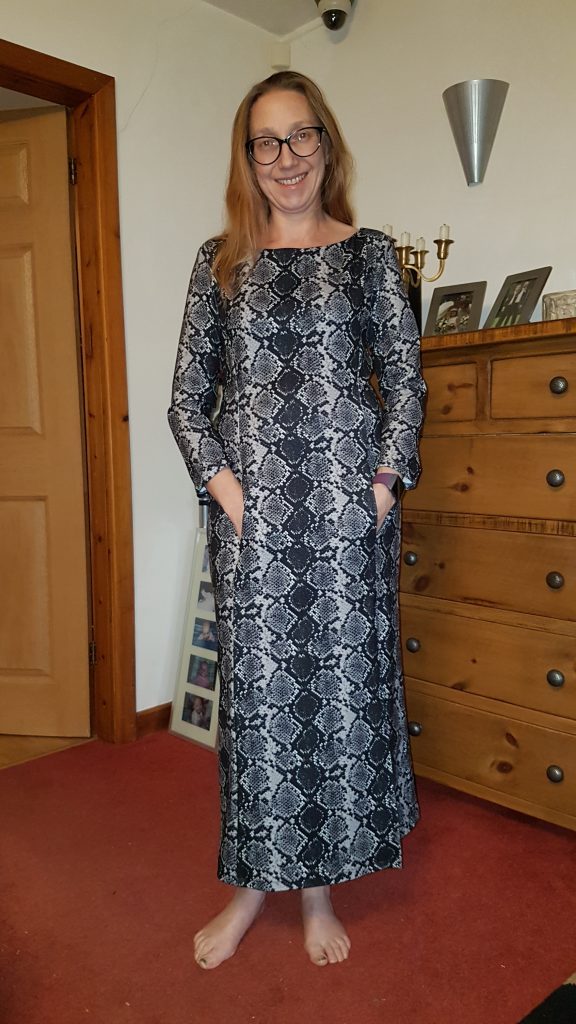
For the dress my eye was drawn to a snakeskin ‘crepe scuba’. Not my normal thing at all! But the fabric was black/grey (which IS my thing). The first suede I picked for the cape was purple (my favourite), but the contrast I got was grey, so either way it would go with the dress.
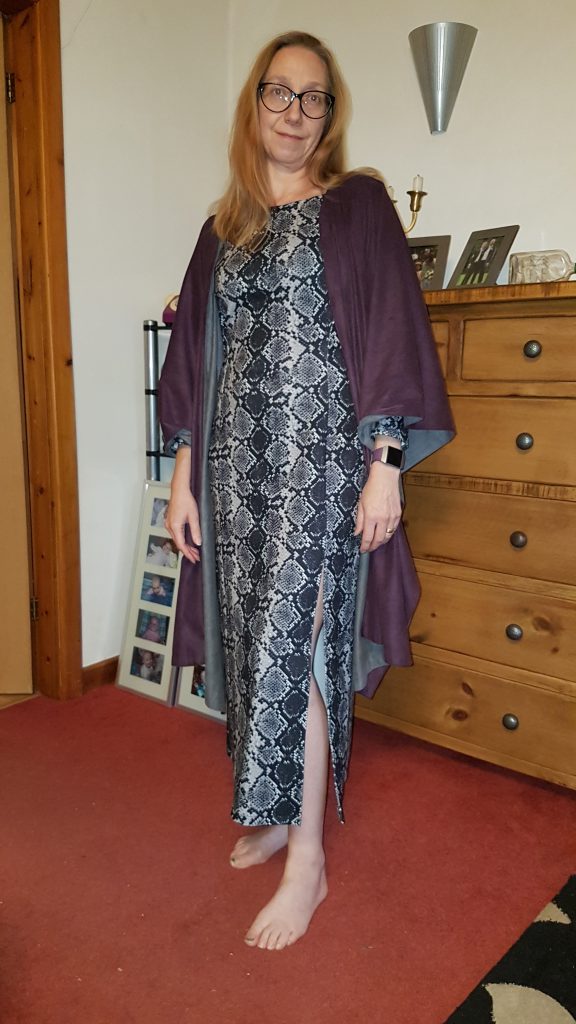
I made the cape first. As I said, it is a single pattern piece, cut partly on the fold. I either hadn’t read the pattern properly, or looked at the fabric width on-line, as I bought 3m, and only needed 1.6m! As a single piece it is large so I needed to cut out on the living room floor instead of the dining room table, which killed my knees!!! It actually took quite a long time to sew all the way around the edges, trim and turn, and then to iron the seams neat and top stitch. I think it looks a bit too much like a graduation gown, but I think it will grow on me (not literally). Paul loves it!
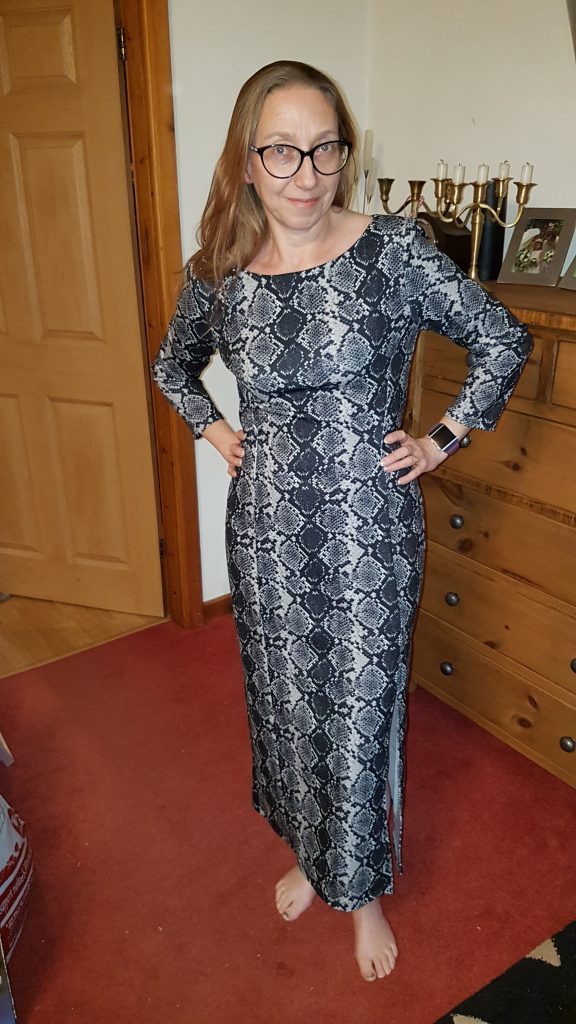
The dress has been a different nightmare. Sizing again. I really need to spend time to think about this next time, or maybe do what you are meant to and make a toile (a practice version in cheap fabric). I cut out the 14… big 4 patterns always used to need to be 2 sizes bigger than bought clothes in the UK, and is in between bust and waist sizes for me. And I thought the scuba would be a bit forgiving due to the stretch. However, I think I should have gone smaller due to the stretch.
I had sewed darts, and made the pockets (YES it has pockets!!), and joined all the main dress seams AND the zip down the back and then when I tried it on it was HUGE!! Because the pockets are in the front (a bit like a muff!) it was going to be hard to adjust those seams. So I completely unpicked and moved the bust darts and took some in the front side seams as far as the pockets, made the back darts much bigger, and took in at about half an inch down the side seams. This was still a bit big, so I took almost another inch in down both side seams!! Huge adjustments, I definitely made the wrong size, but it roughly fits now!!
I overlocked all the seams to neaten (and trim off all the excess!) and then left it for a few days before tackling the sleeve fitting…
The sleeves weren’t too bad though. I checked the fit to the armhole, and the seam allowance needed to be 4.5cm instead of 1.5cm under the arm, but I tapered this down to the cuff.
This is what it looks like!! Not too bad. I think it will look better with some good boots on!!
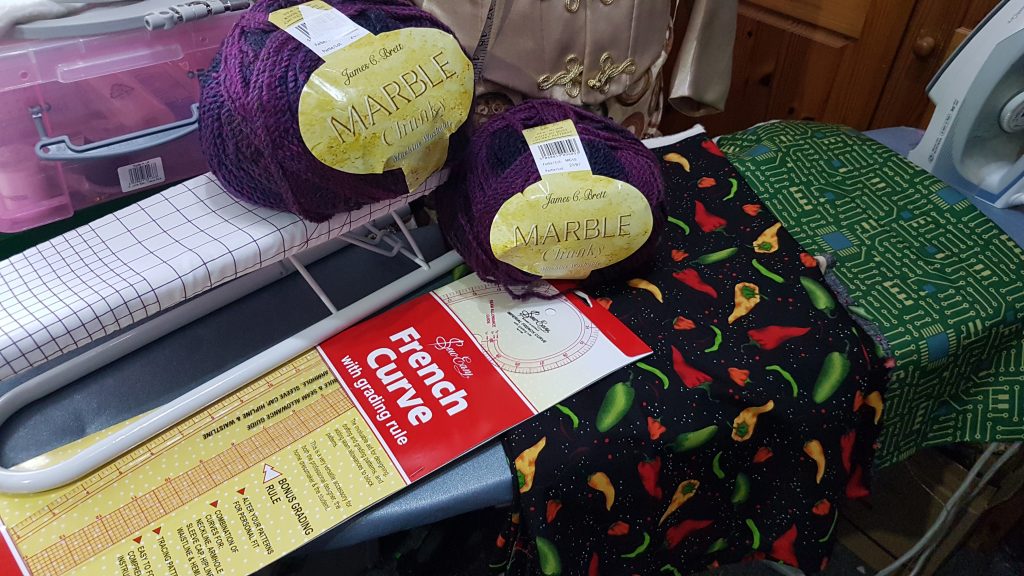
The chilli fabric was a great find on a day out for my birthday in Shrewsbury. I also bought more wool for a chunky cardigan (still in progress at the time of writing), a mini ironing board for sleeves, a french curve, and some great circuit board fabric from Watson & Thornton, another lovely fabric shop in a quaint Tudor building.
After the popularity of the chilli fabric, we have been back for more of it! The second visit was a last day out before second lockdown, and I actually had to queue to get into Abakhan! Everyone stocking up on supplies for lockdown!!
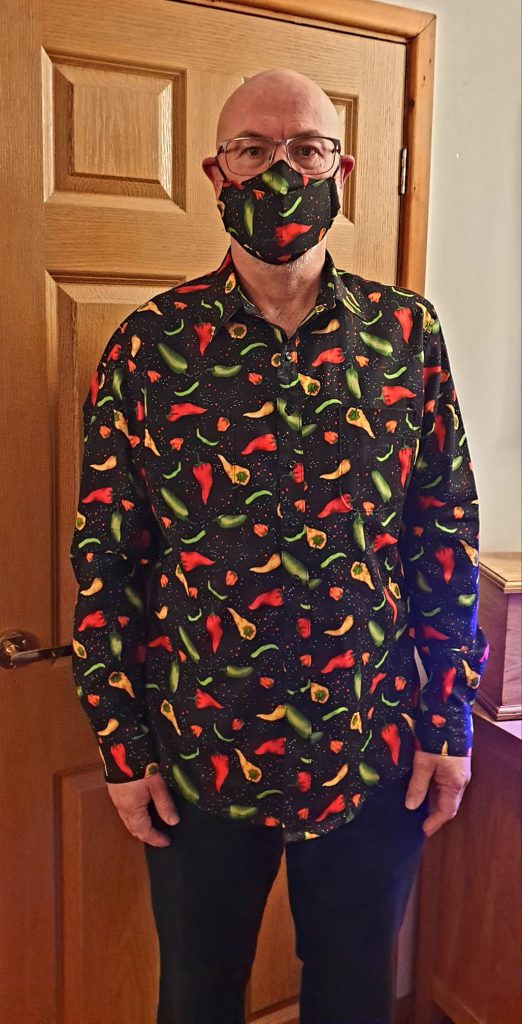
I had 2 lots of the chilli fabric, with the intention being matching shirts for husband and son. My son has grown considerably since the last shirt I made him, and reviewing the kids pattern I usually use for him realised that wouldn’t be big enough for him anymore. I therefore had to use the same pattern as for his dad, but the smallest size. I need to grab him for a photo at some point! But this is hubby wearing his, with matching mask!
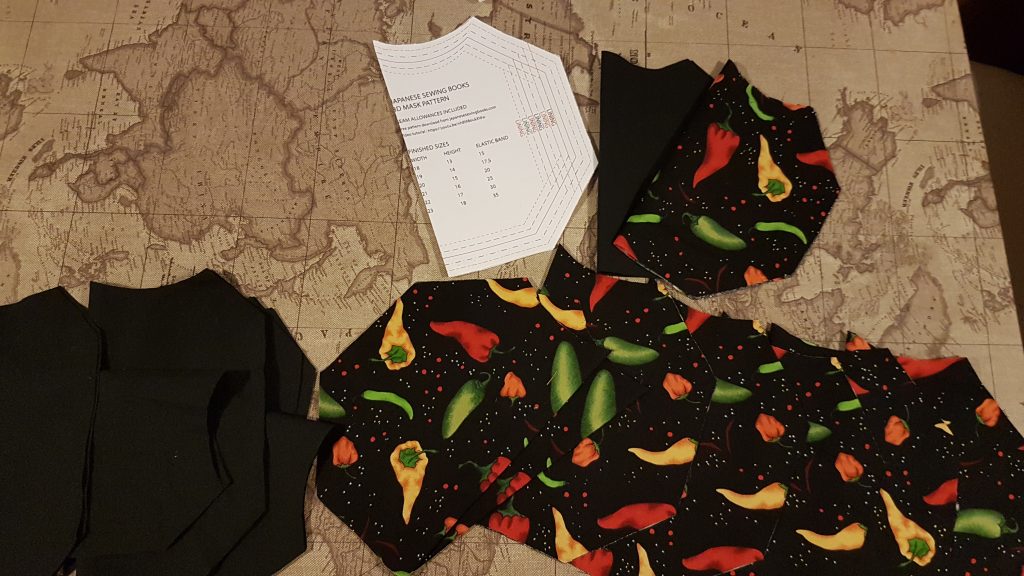
I also made some more of the masks. A couple for the owner at one of our favourite Indian restaurants!


 Users Today : 90
 This Month : 1418
 This Year : 11890
 Total Users : 186118
Recent Comments