This pattern can be found on Ravelry: https://www.ravelry.com/patterns/library/mimosa-shawl—mimosa-huivi I had been given a lovely Sheepjes Whirl for Christmas from my mother-in-law, and spent a while searching for something that I thought would have some resemblance …
Officially started in December 2021, but not done much yet!! This was a spontaneous buy when I had to go to Black Sheep Wools for more yarn for the Labyrinth blanket! I also bought some …
These have been on the go since before Christmas 2020!! Finally finished! I had bought a selection of sock wool, as I do like to wear them, but think I should leave it to Mum …
This was a long project!! Started June 2021, but only finished January 2022!! I really like it, but it hasn’t been a favourite make. It wasn’t something that was easy to remember, so constantly needed …
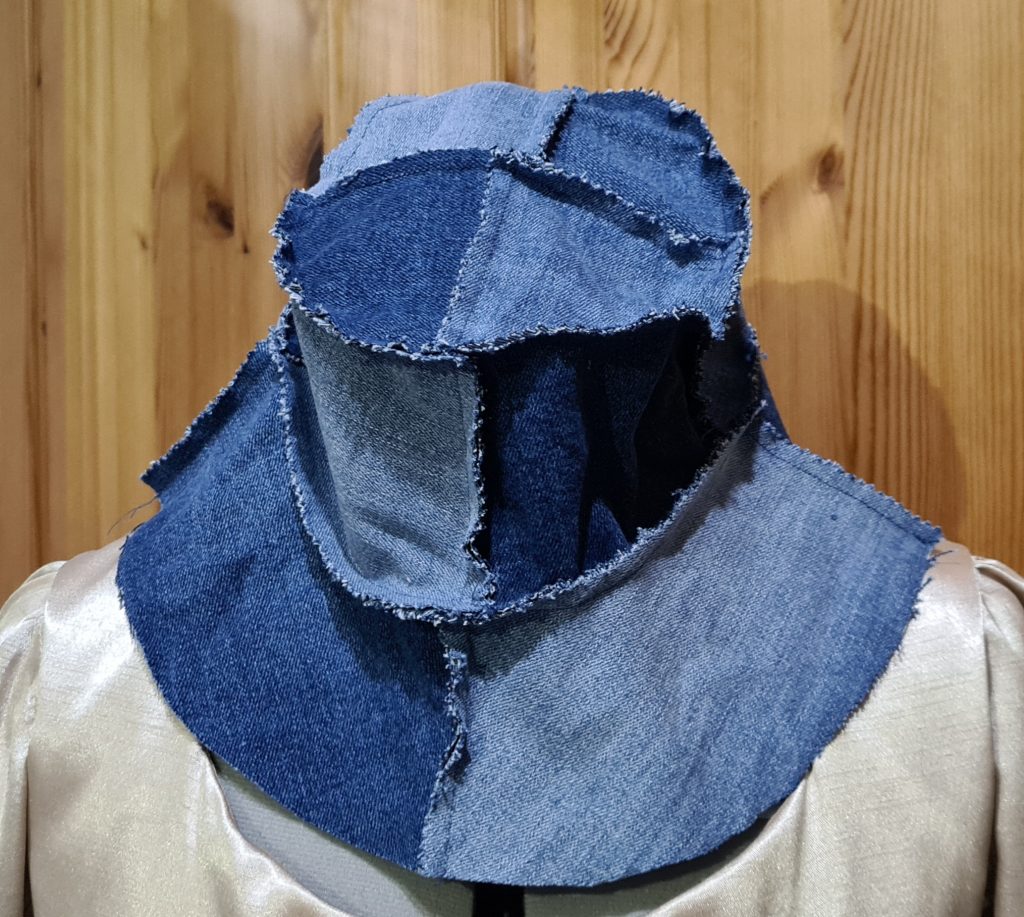
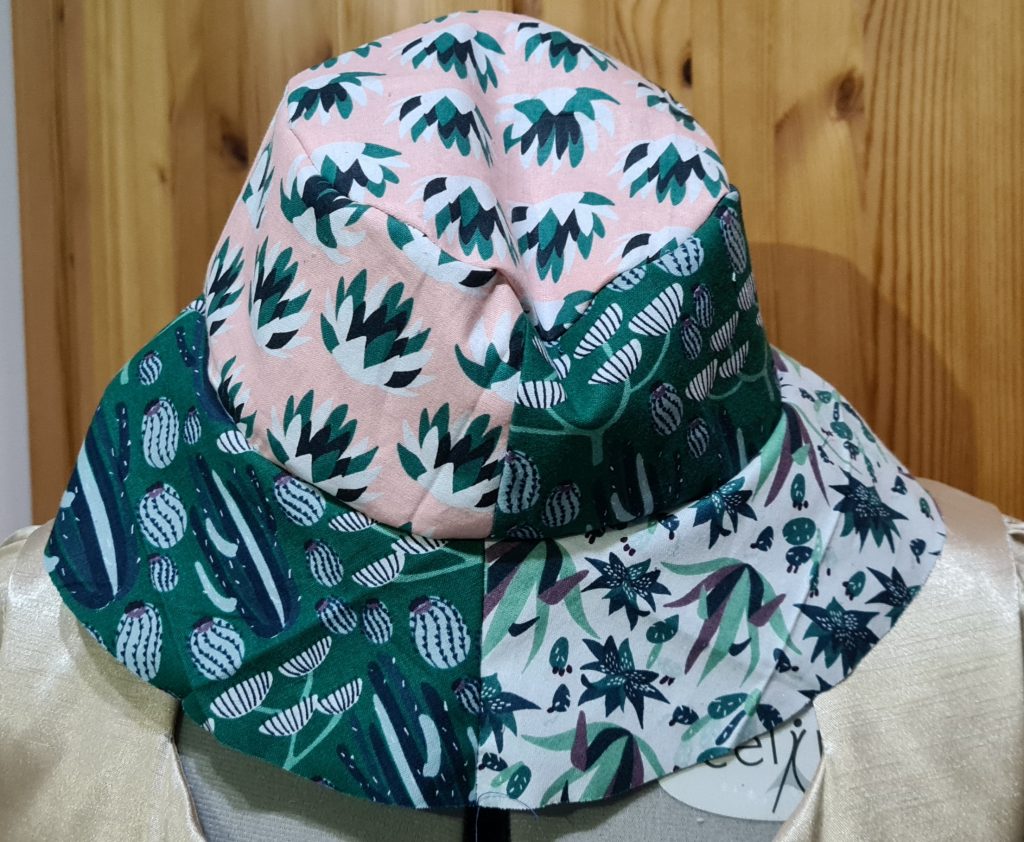
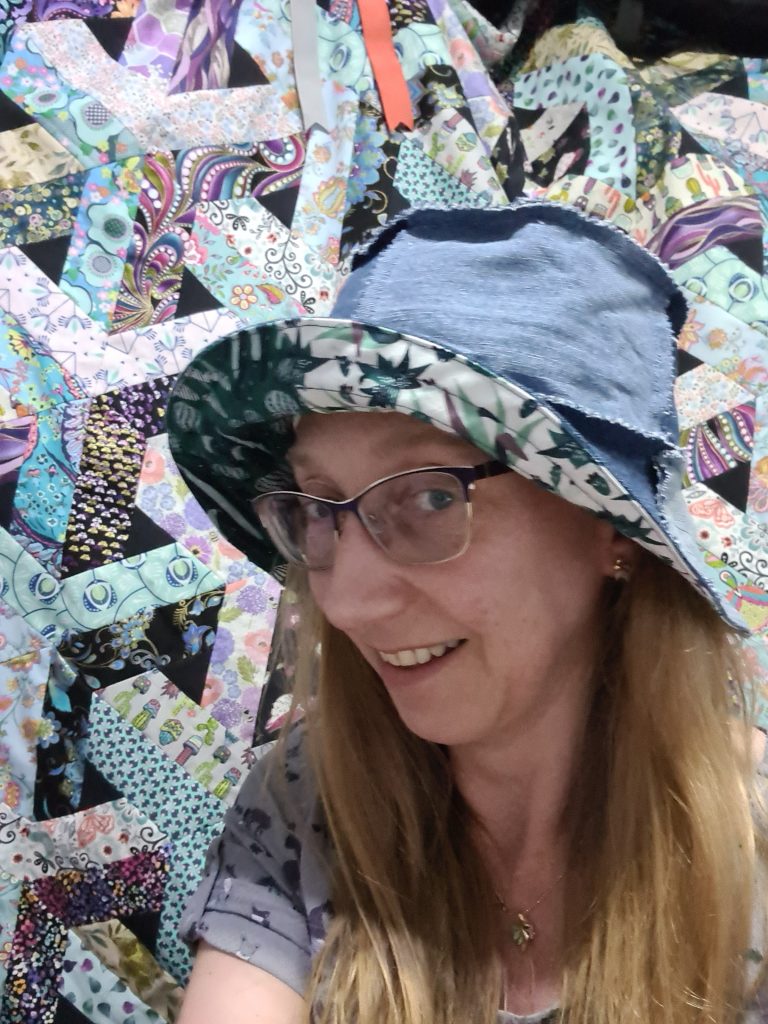
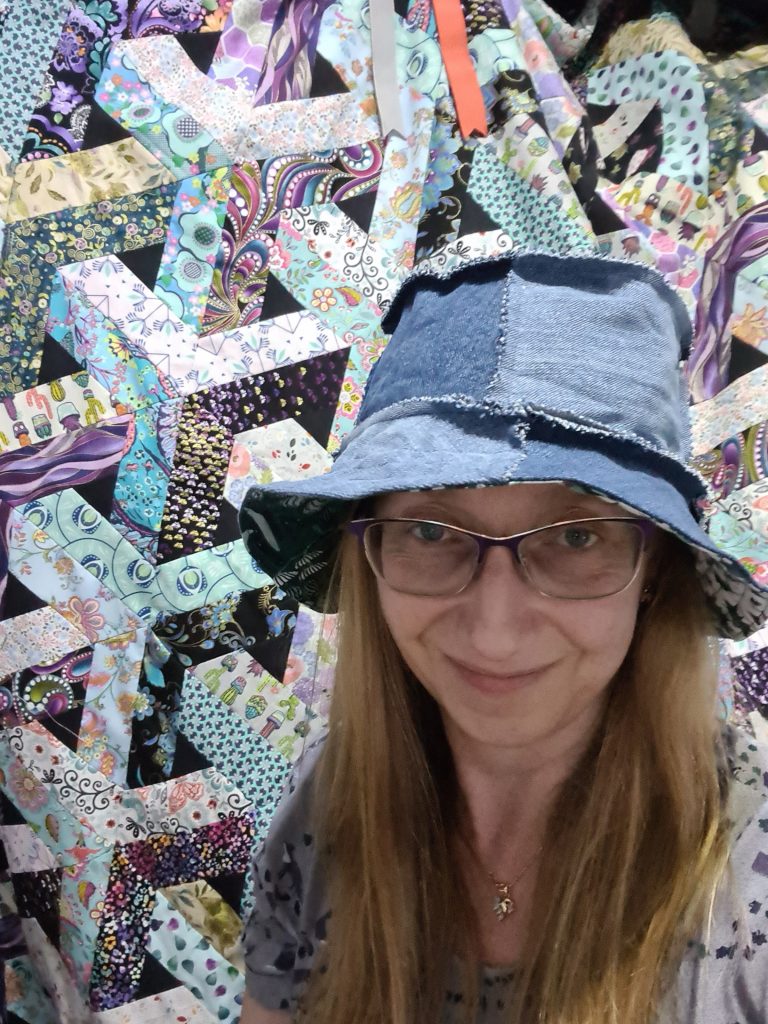
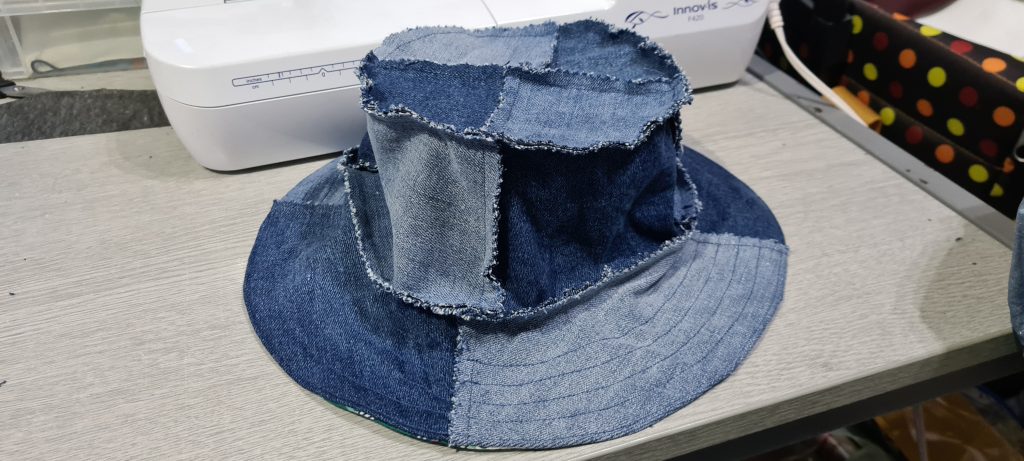
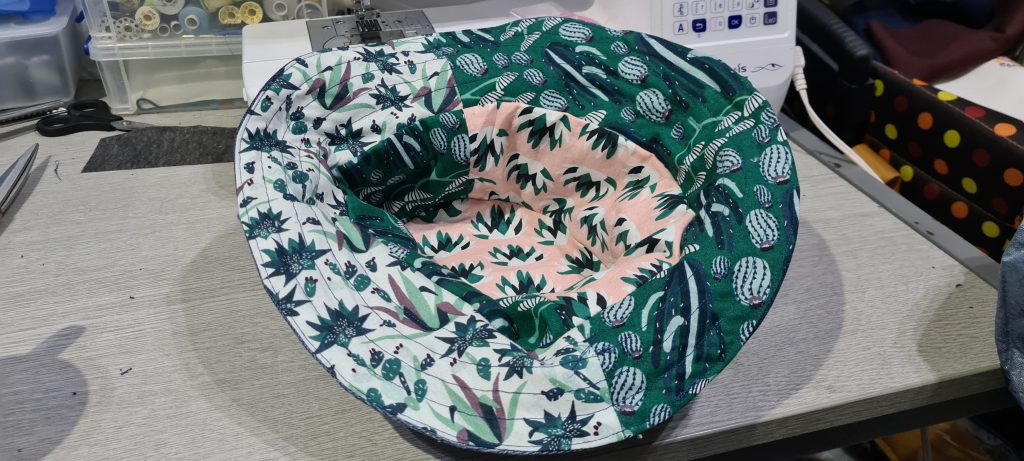
I stumbled across this bucket hat suggestion online.
My version deliberately has rough seams on the outside, and so not strictly reversible as doesn’t sit well the other way, due to the visible seams on the denim. I think some of this inspiration probably came from Raph’s denim dress in the GBSB.
I can’t find where I got it from now. I must start blogging as I do things, not months afterwards. However, this is a very good tutorial on how to do one! Thanks Sew Very Crafty!
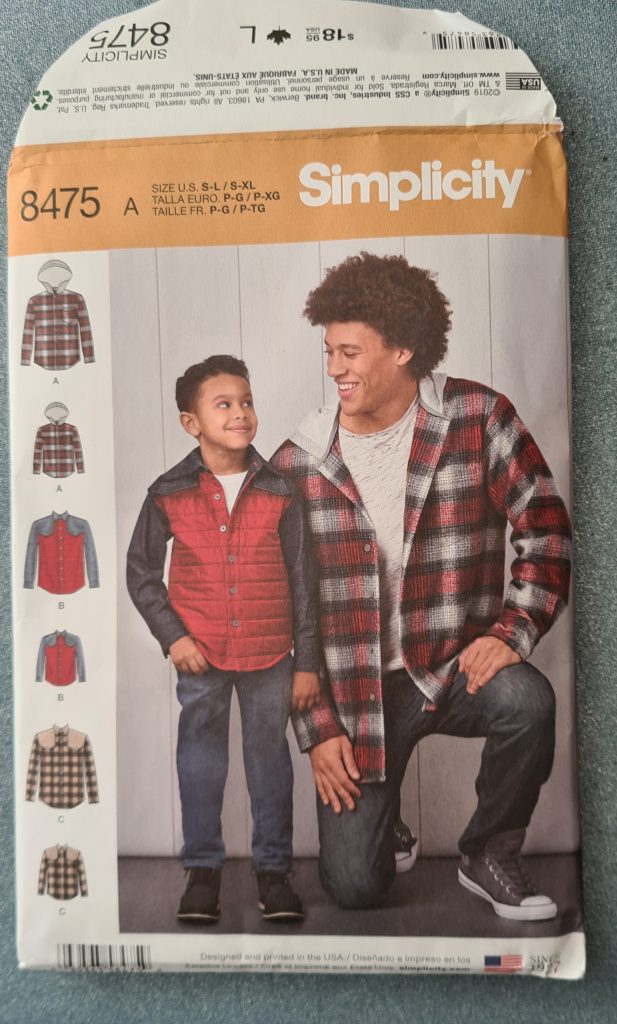
Inspired by Damien’s jacket in the Great British Sewing Bee.
If I am honest this wasn’t my favourite jacket from that round of GBSB. However, my son really liked it, and was actually very enthusiastic for me to make it for him. He even offered to come fabric shopping with me. I think I ended up buying the black denim online (Minerva), but got the dark grey needle cord from Leon’s in Chorlton.
This was the pattern Damien based it on. I had to rewatch the episode to try and figure out what he did to make it more of a jacket than a shirt. I added four patch pockets that copied the shape of the yoke, and then lengthened the front yoke flaps to cover the top pockets, and made up flaps for the lower pockets.
I found the pattern had a huge gap between the kids size and adult size, just where my son fitted…. so did the smallest man’s size, as my son has the habit of growing!!! It is just a bit too big for him, so I wouldn’t win the made-to-measure round, but he will grow into it very soon!!
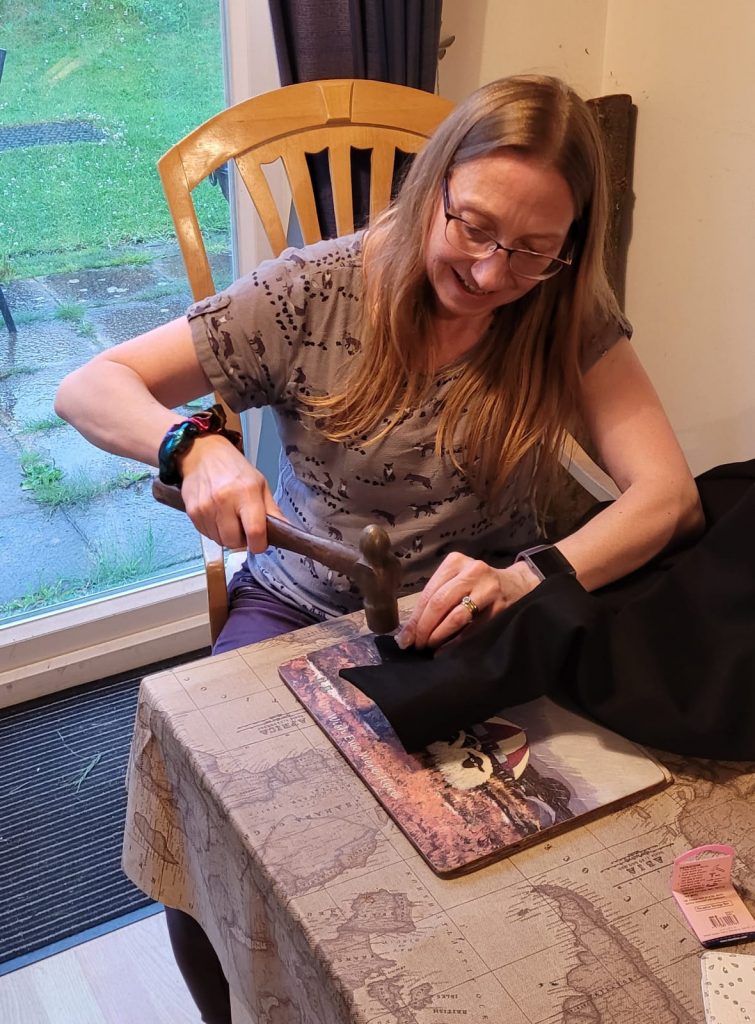
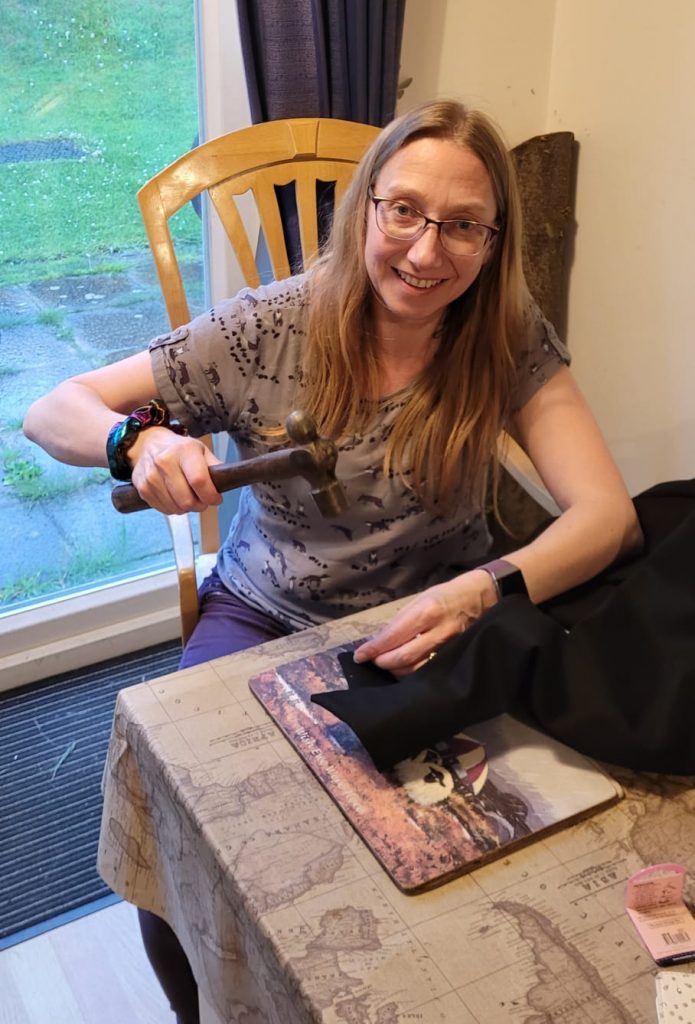
I channelled my very best inner Damo and used a big ‘ammer for the jean style buttons!
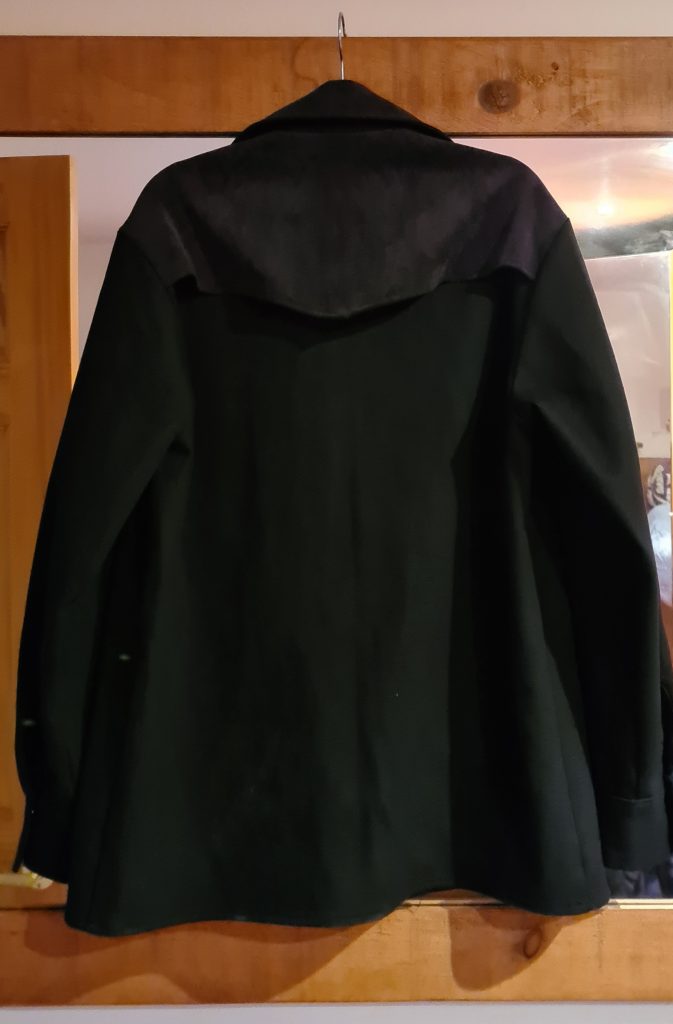
And the finished article. Could do with a version with kid wearing it.. He was pretty pleased with it – lots of pockets for his playing cards for magic tricks.
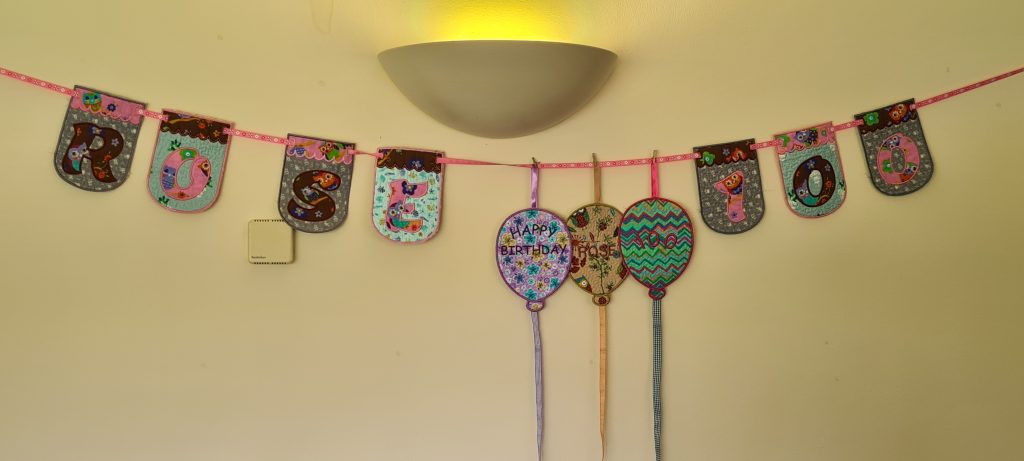
You can’t see on this picture but I bought some nice fabric with owls on for part of the bunting. It took quite a long time to do each letter, so I didn’t get round to doing ‘birthday’!!
The balloons were a bit easier!
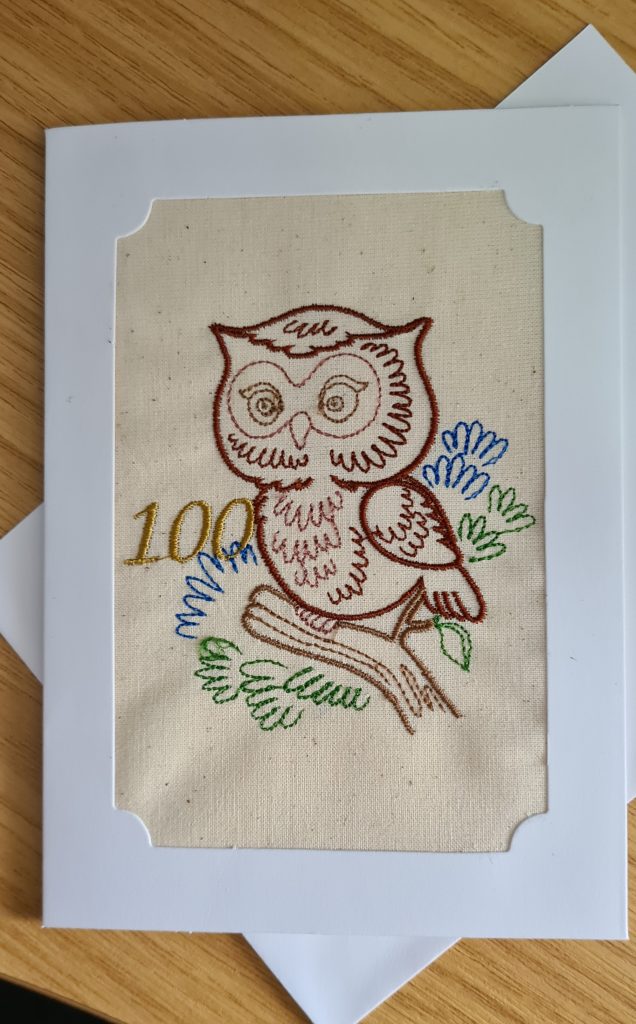
I cheated a little and used a very similar pattern for the card as last year!
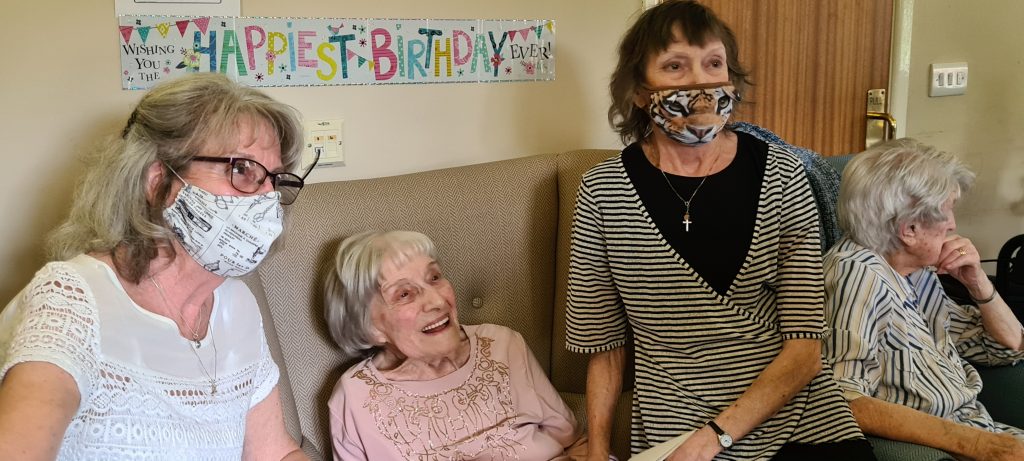
And here is my lovely Nan with her card from the Queen, and her twin daughters, my Mum and Auntie.
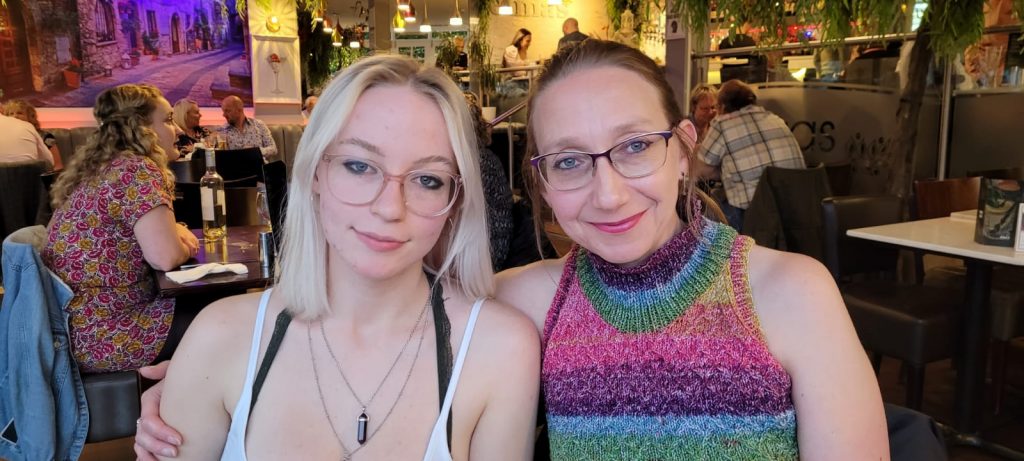
I think I bought this King Cole Shine early on in first lockdown. I bought the pattern at the same time, it just took me a while to get round to making this one. Given how large the previous King Cole Shine knitted up, I did this in a smaller size. I thought the sleeveless top would be nice to wear in Summer. I love how it turned out.
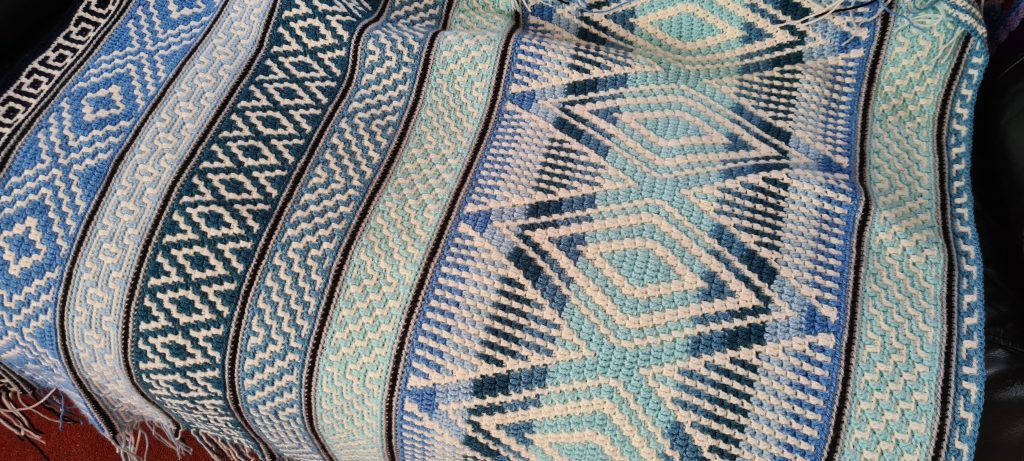
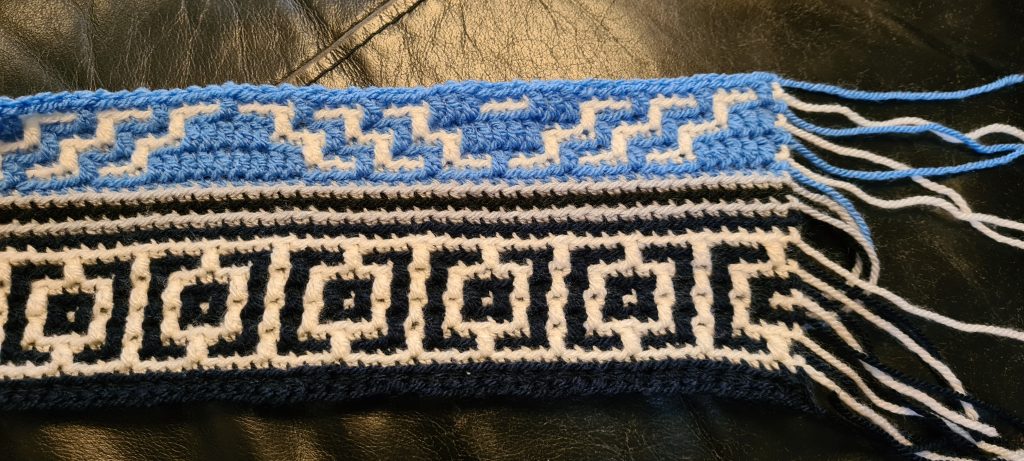
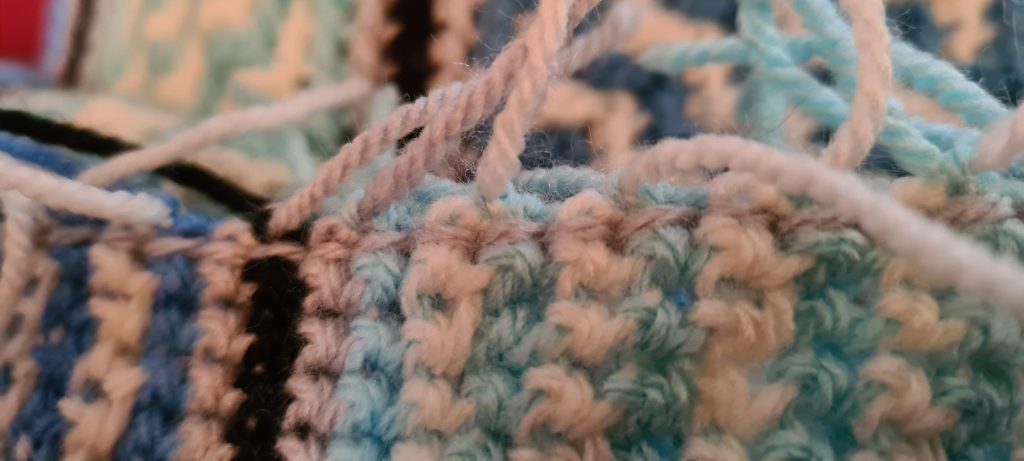
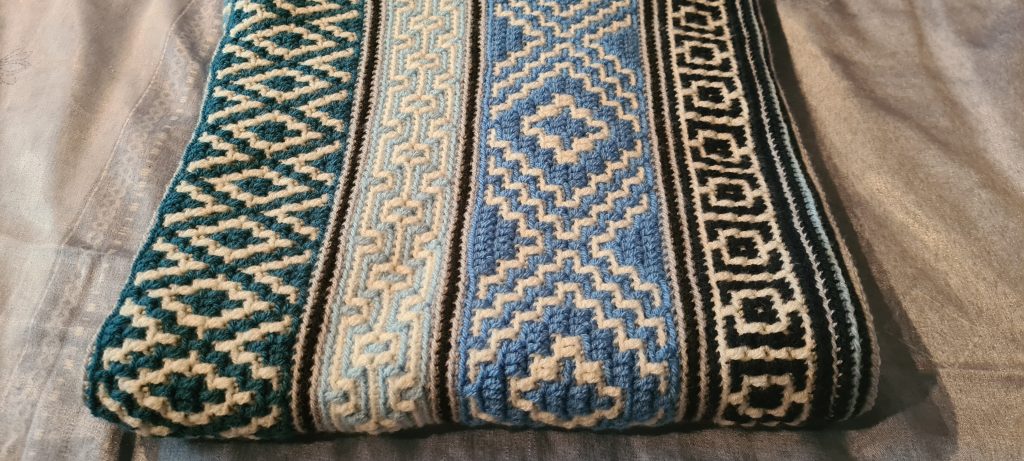
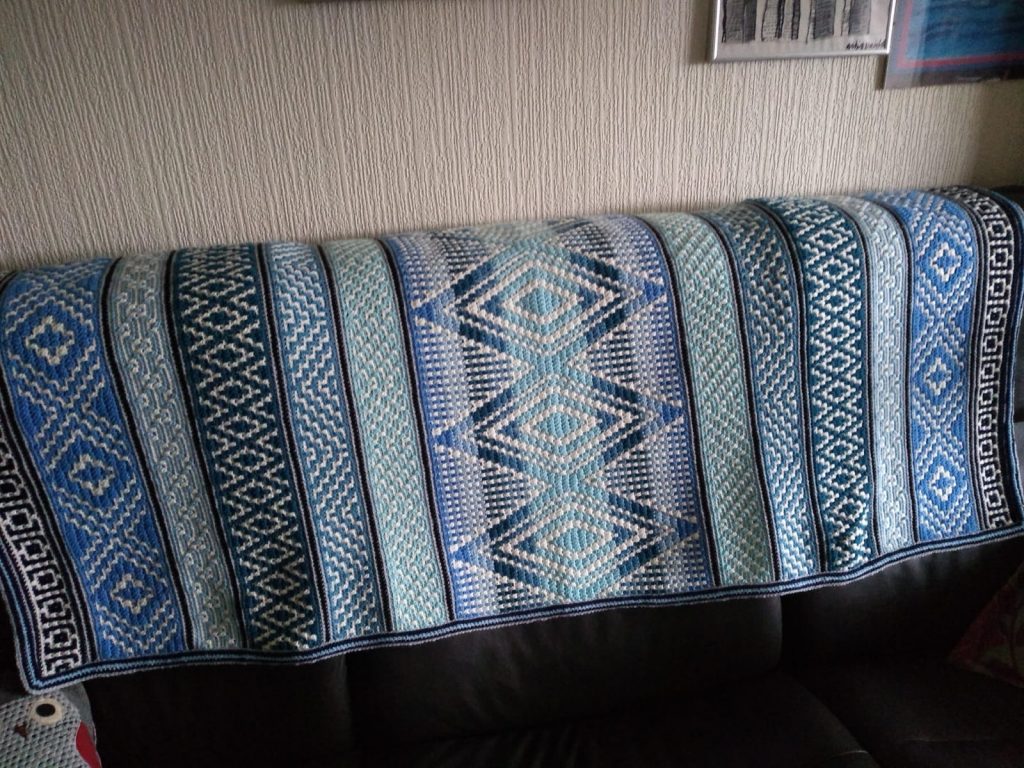
I specifically wanted to make a blanket for my Dad that was less flowery than all the others I have made. I picked lots of shades of blue, his favourite colour, with cream for the contrast. This was specifically to keep him warm while we had to meet outdoors during Covid restrictions. I started on this as soon as I had finished the Alma crochet dress.
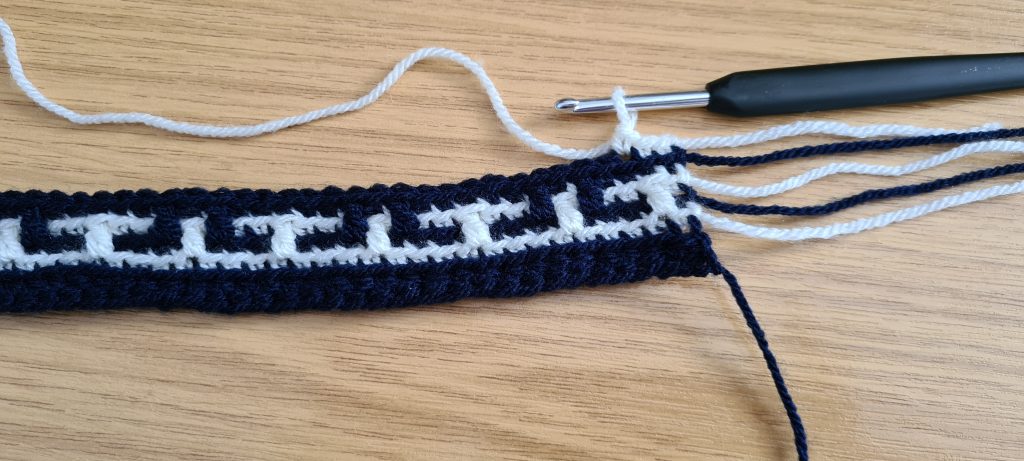
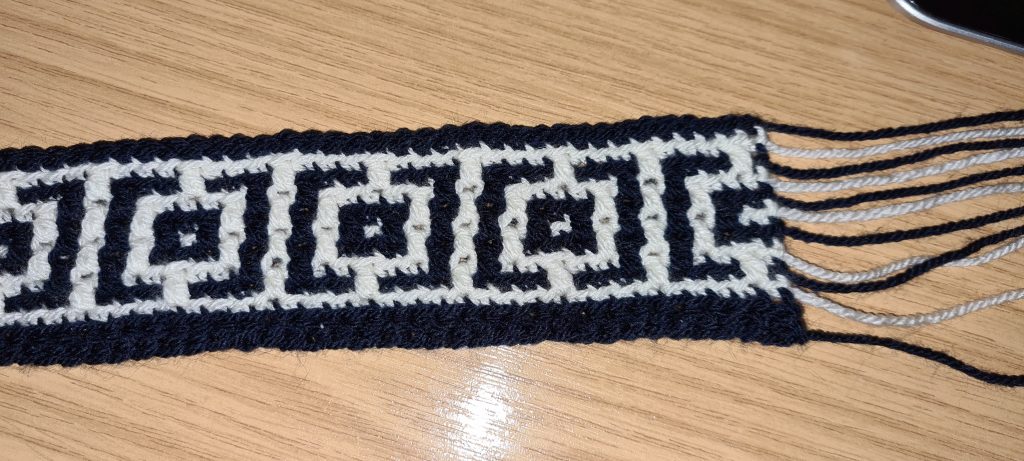
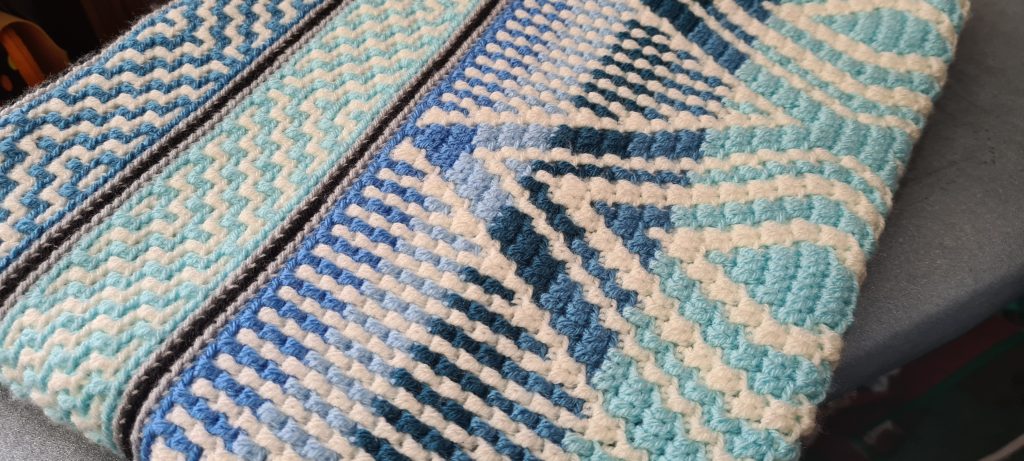
The pattern was pretty easy to follow once I got going and I enjoyed making this (with other projects on the go too, as usual). It did get easier once you get used to the pattern being formed, and how the mosaic crochet ‘works’. This is all worked from the same side, alternating blue / cream every row, and cutting the yarn every row, leaving LOTS of ends. All DC are worked in back loop only (BLO) leaving the front loops for the TC over the top to make the patterns. I have come across other mosaic crochet that uses chains and TC over the gaps. I find this a little easier to follow.
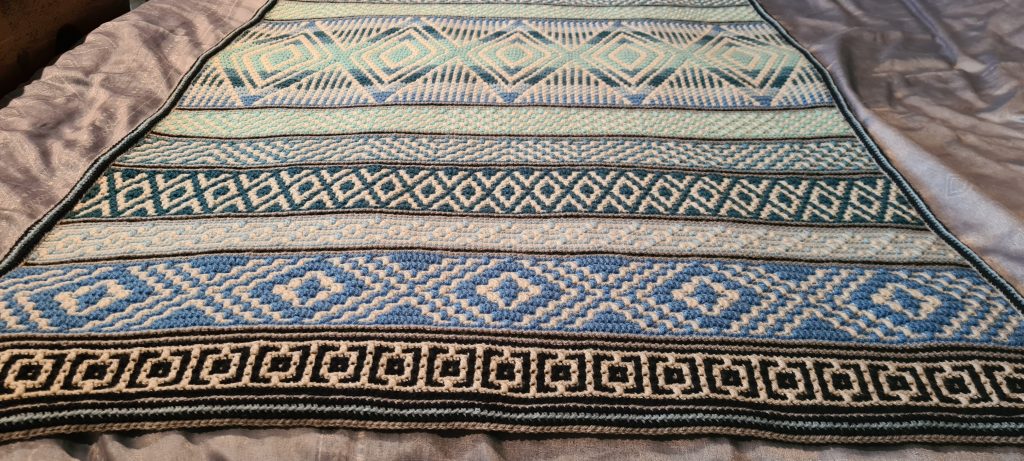
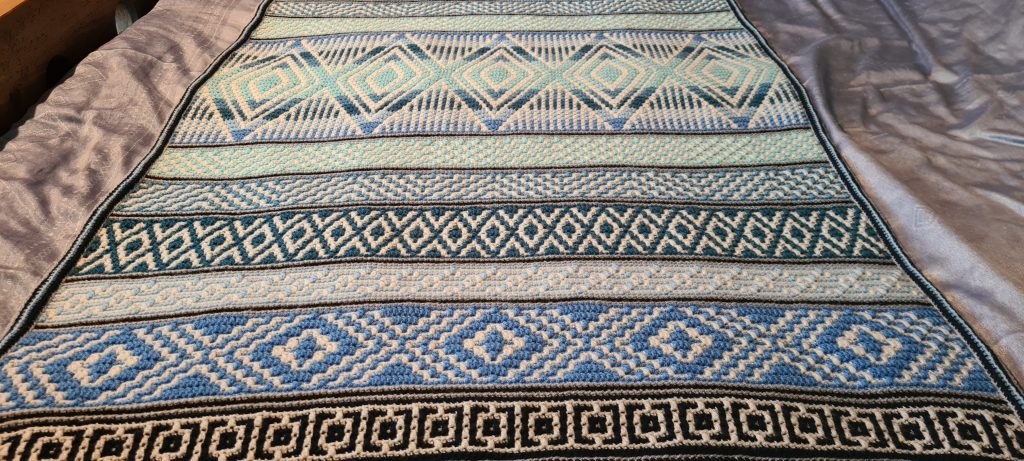
I didn’t seem to take many photos after the first 2 patterns:
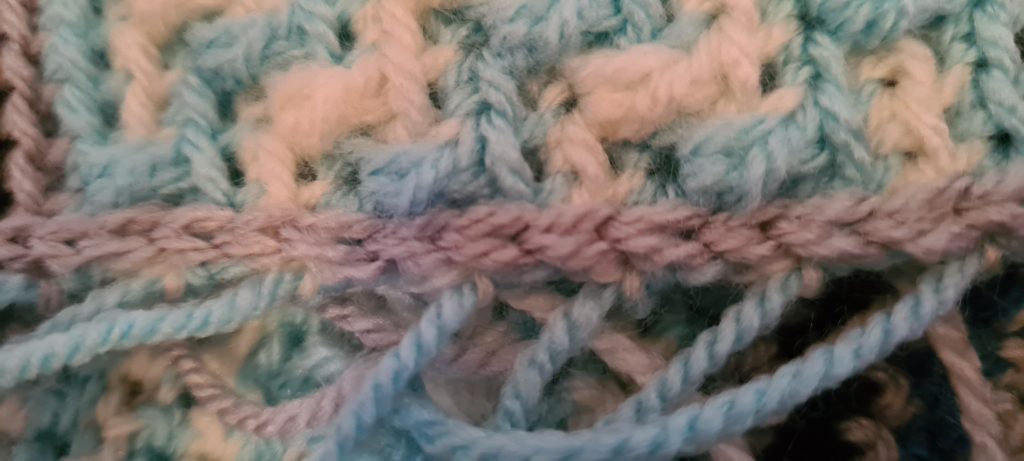
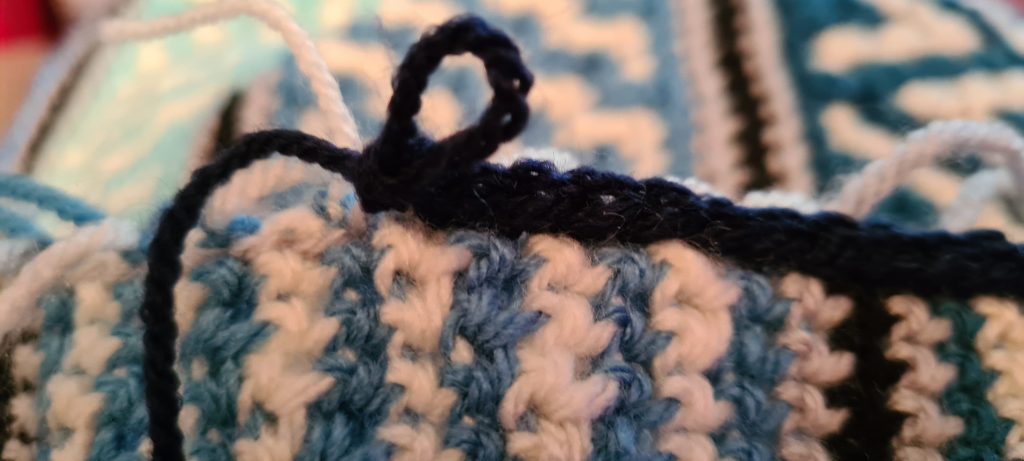
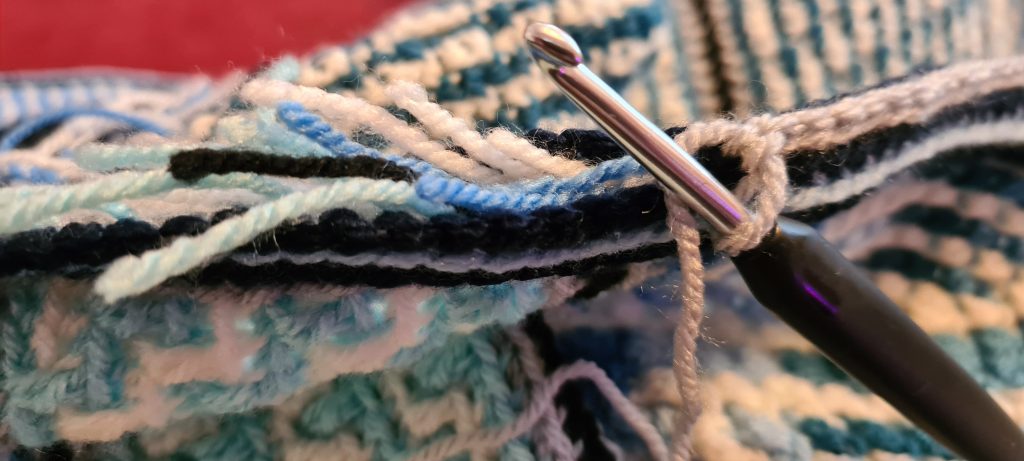
The really good thing about this pattern was the border, which encased all those ends. They were knotted in pairs first to secure them, and the border worked from the front and back, and then joined hiding all the ends! Fantastic not having to sew in lots of ends.
knotting the endsfoundation row to start the borderjoining the front and back of the border, hiding all those ends
This blanket is lovely and thick and warm, just as I wanted it to be.
Not the best photo of Dad, but wanted one of him with the blanket.
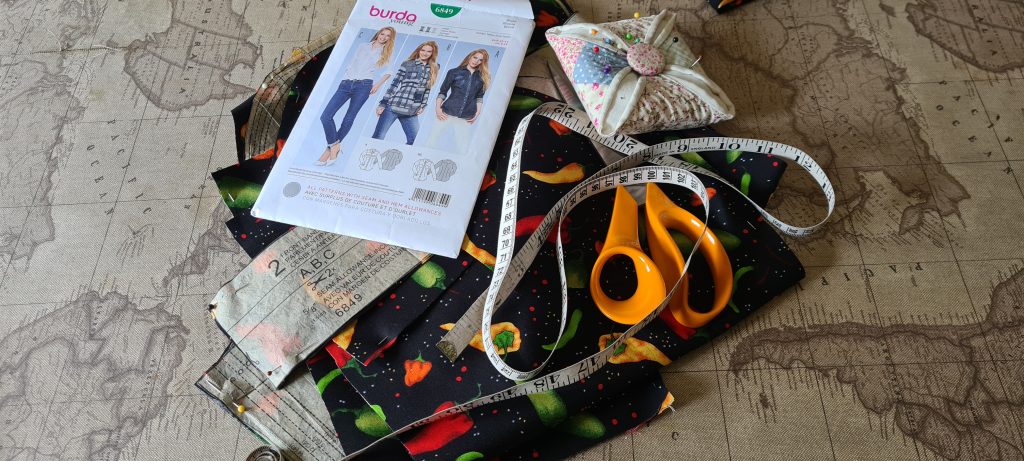
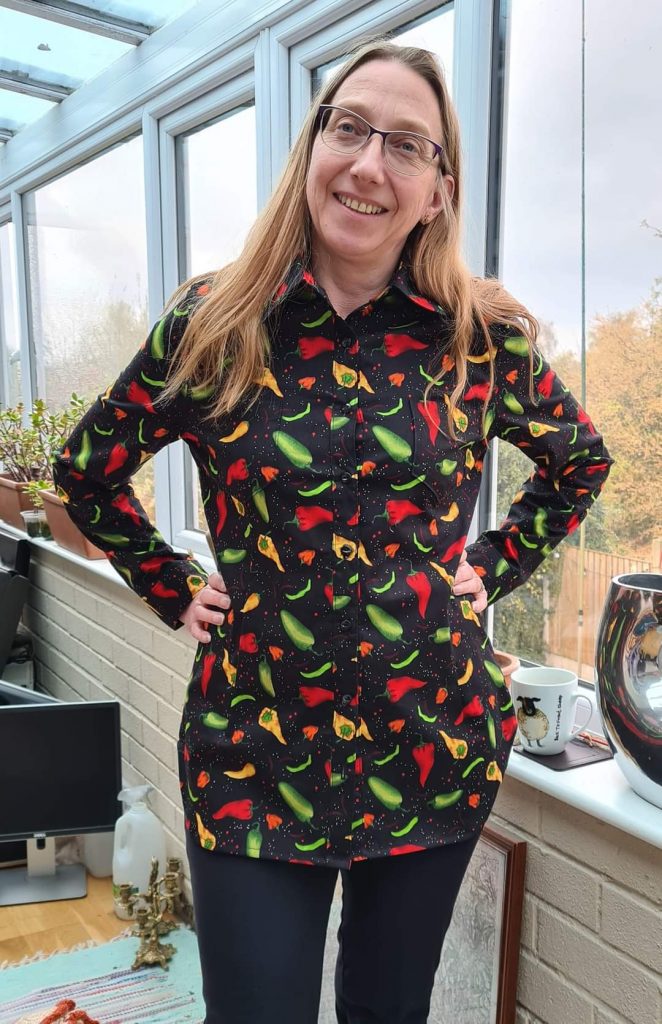
I happened to be in Abakhan again (I know how does that happen?)… and found some more of the chilli fabric that I had made shirts for Paul and Robin out of. I had a silly thought to make matching ones for myself and Milly!! Milly was having nothing to do with us though (so I still have some of the fabric spare… will come in handy when Robin grows again, and I need to make him a bigger one!).
I was tempted to use the shirt pattern for mine, but in the end decided to use the same blouse pattern I had used previously (Burda 6849 – https://kariscraft.space/index.php/2019/06/27/another-dragonfly-shirt/), but just make it bigger this time. The dragonfly blouse isn’t quite right – either length of the body / position of the waist – so sometimes feels a little tight, and I am constantly pulling it down. A size bigger I am really happy with!
I am really not sure how this came about. A silly conversation about what I may have done / made if I had crocheted when the kids were little perhaps? Anyway, however we came about to be talking about In The Night Garden, when my 15 year old son said he would like a Makka Pakka, what else could I do?
I winged it, completely making it up as I went along. I think it turning out quite well.
A quick version of New Look 6435 again, same as the Robin dress done at Christmas, but this time I remembered to add pockets!! Cut out Thursday night, and sewn in about 4 hours on Friday – and ready to wear 🙂
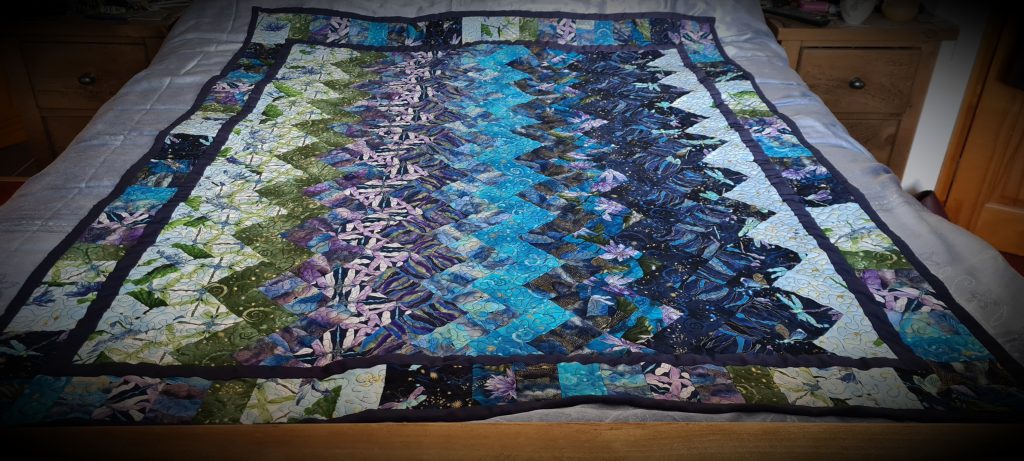
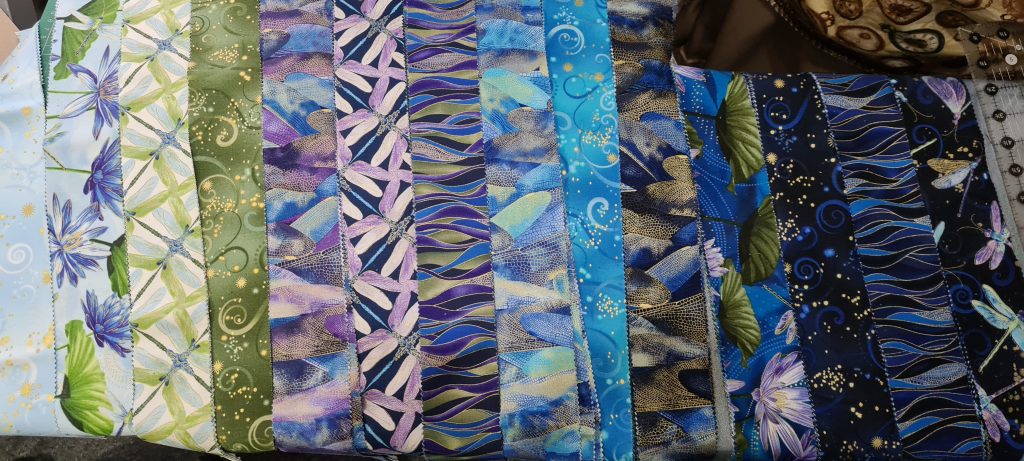
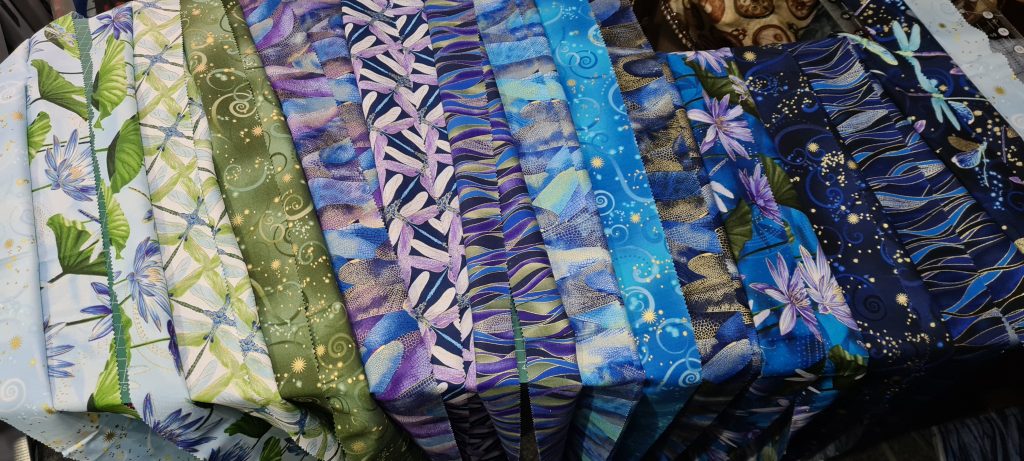
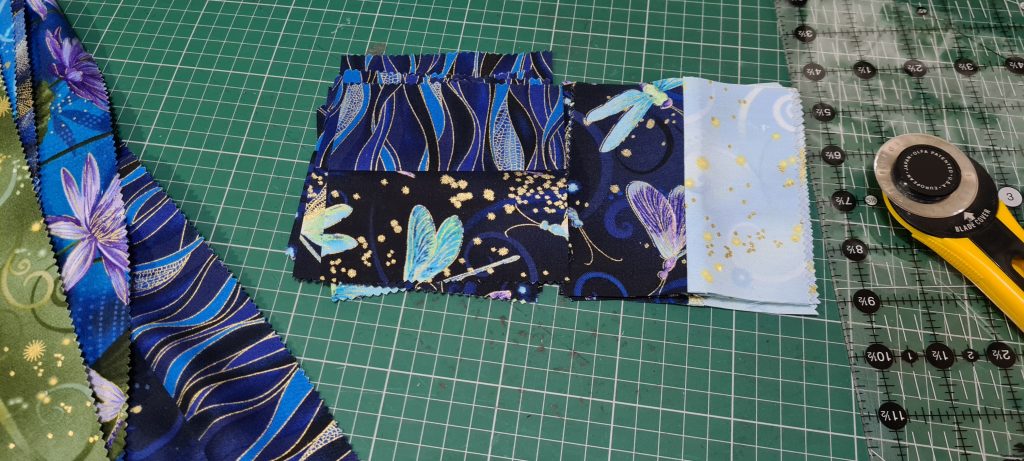
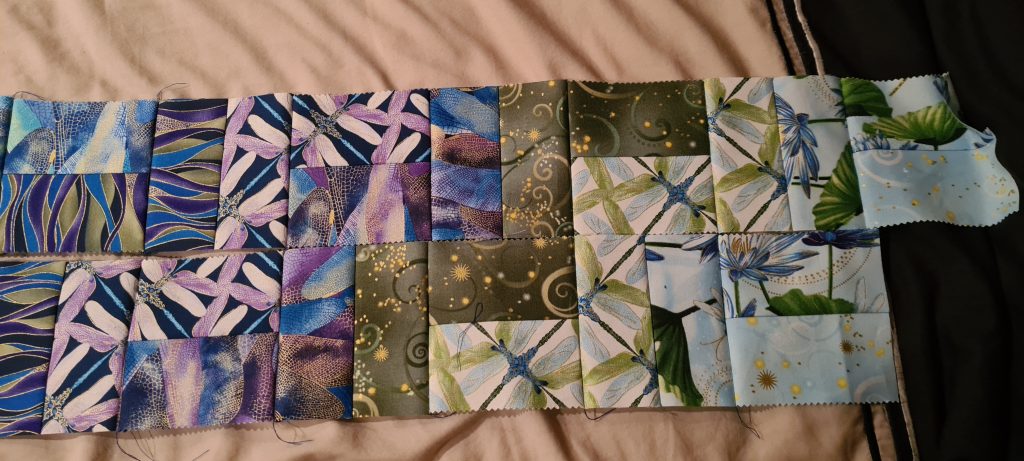
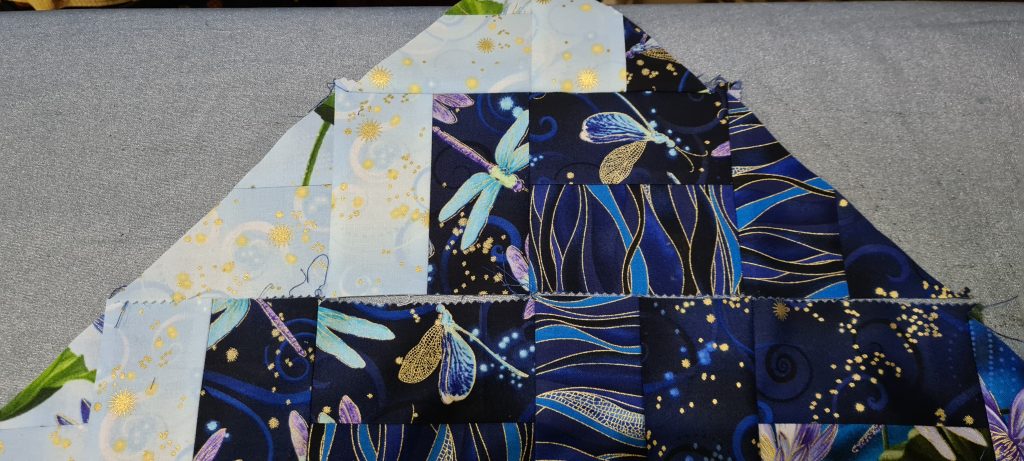
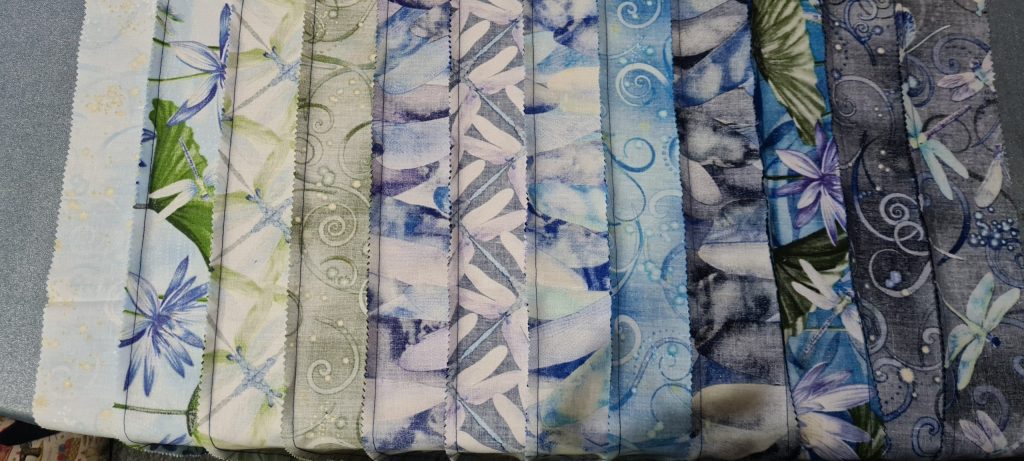
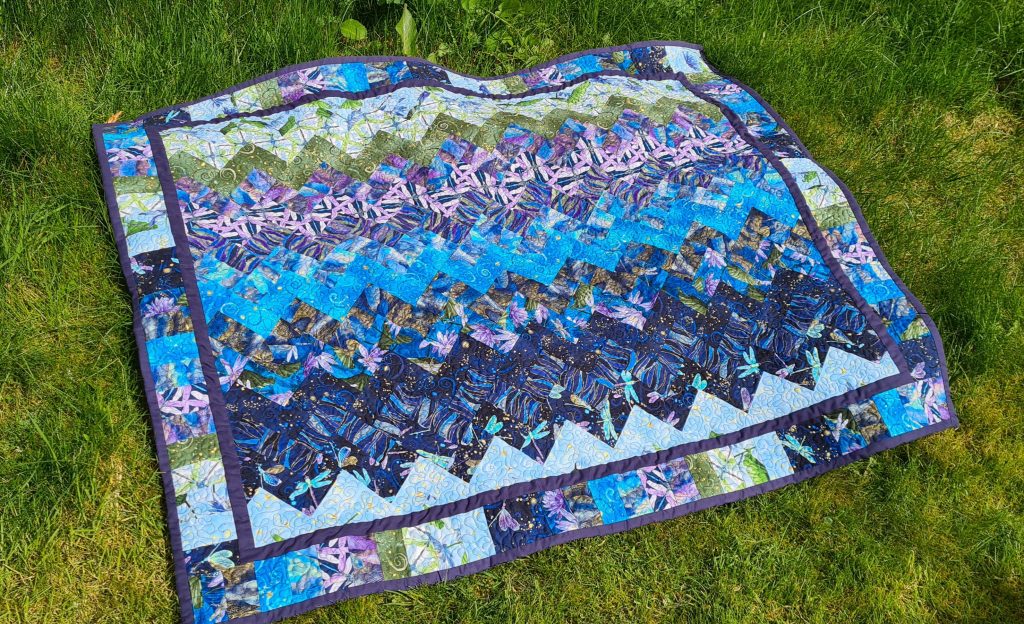
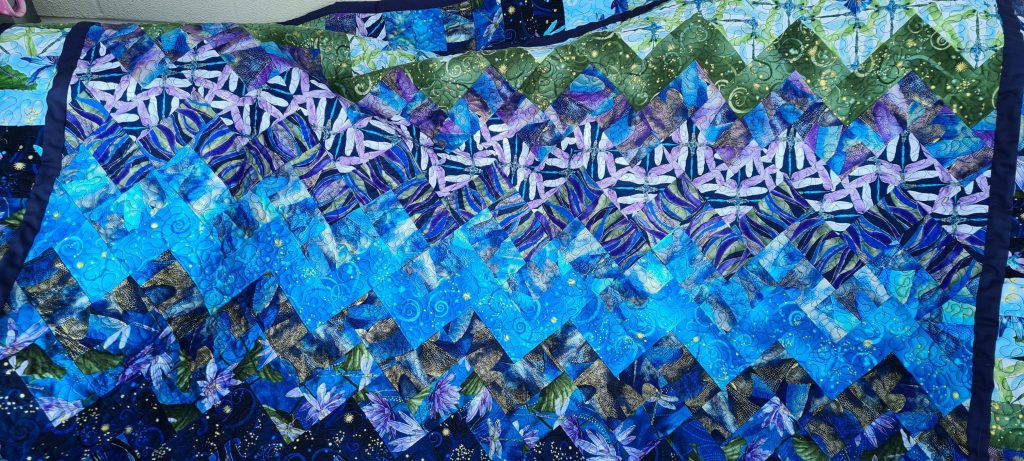
I started planning this when I had finished my previous patchwork quilt. I have bought the jelly roll at the same time, and love the colours, but wasn’t sure the best way to use them. I googled jelly roll quilts and came across a zig zag patchwork image that I found quite striking, and decided to go with this!
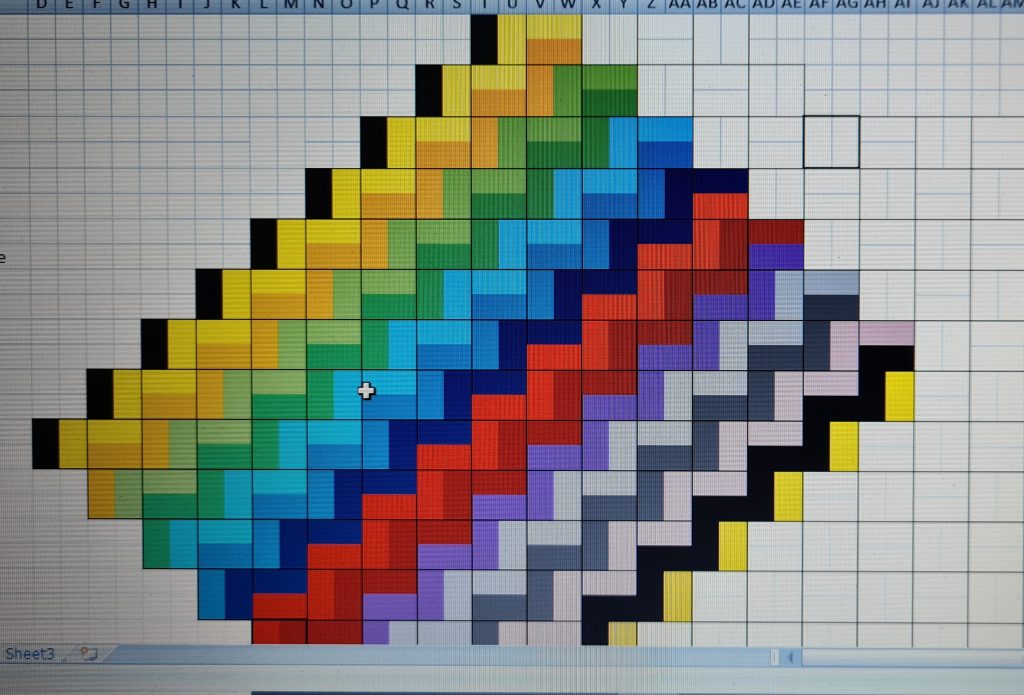
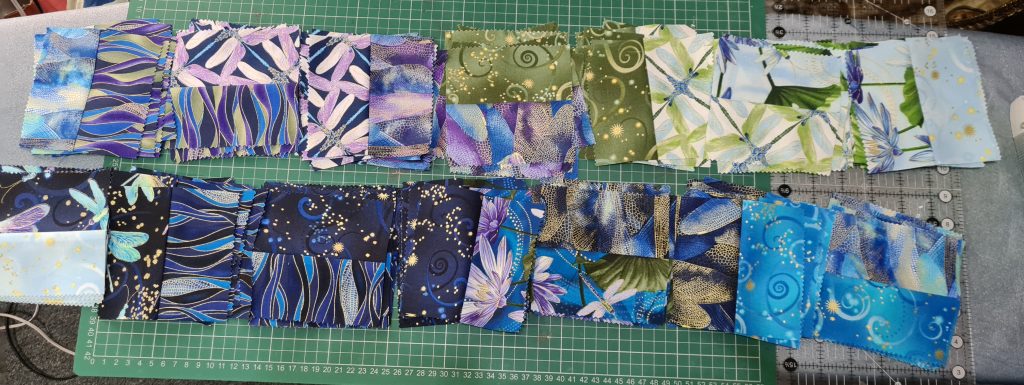
I easily established that the zig zag effect is created by squares with 2 strips in. These would be horizontal with colours 1 & 2, and then vertical with colours 2 & 3 etc. I needed to work out what I could make with the limited strip combinations I had. This pack had 14 different fabrics, 12 had 3 strips of each, and 2 just 2 strips. I realised I could use 2 strips of each to create the zig zag (i.e. fabric 1&2, then 2&3, 3&4,… 14&1). I could get 9 x 4.5″ squares out of each ‘pair’ of strips. Me being me, I used a spreadsheet to help me see how this would work out. I also decided I wanted the zig zag up / down the quilt, not diagonally – which made it a little harder to do! This would leave me with 1 strip each left of 12 of the fabrics – I will come back to them – they won’t be wasted!
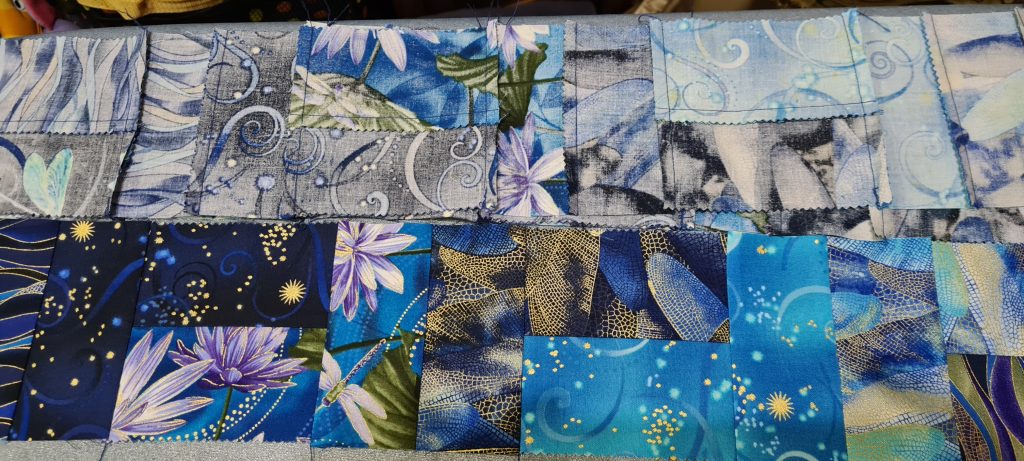
I started by arranging the strips in order from light to dark for my zig zags, then sewing them together into strips of 2. These were then cut into 4.5″ squares.
1/4″ patchwork foot
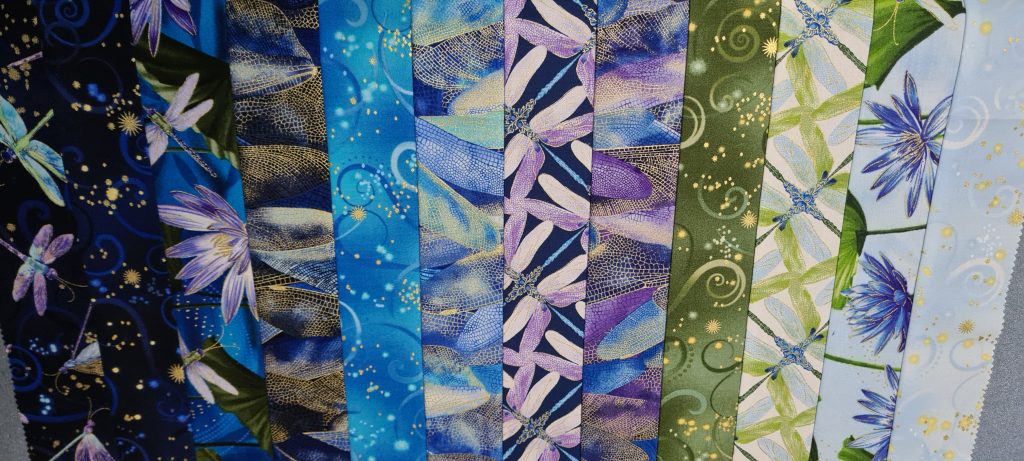
this fabric is so gorgeous – look at the colour pattern in the selvedge!
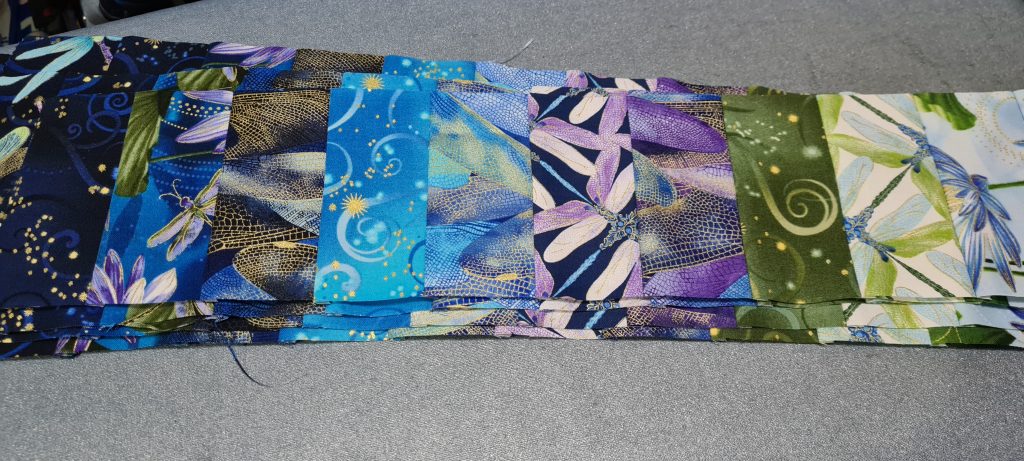
14 strips of 2
ironed
ready for cutting into 4.5″ squares
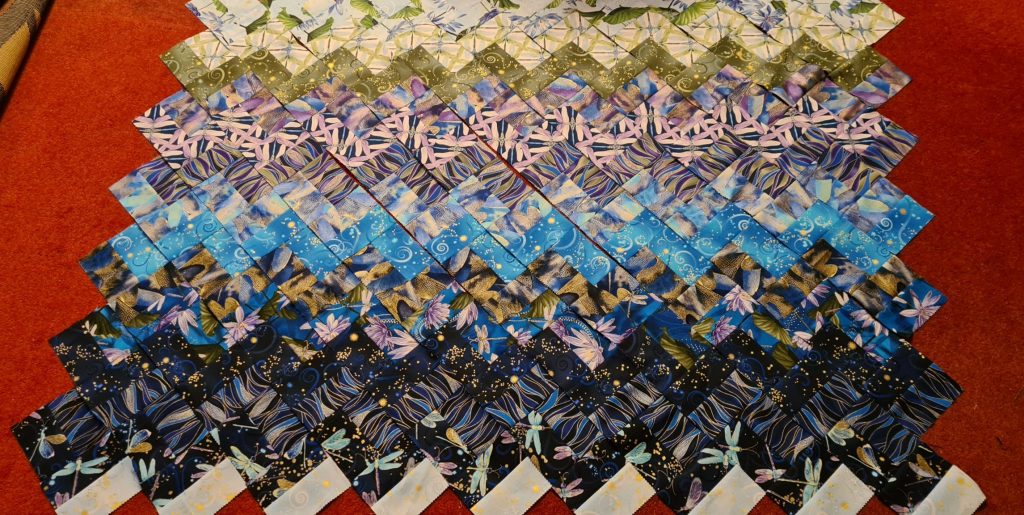
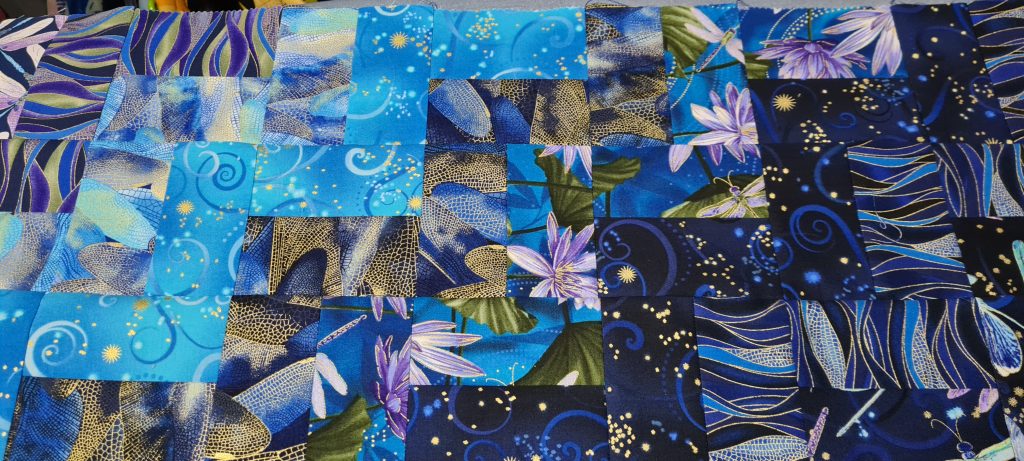
And then piles of squares:
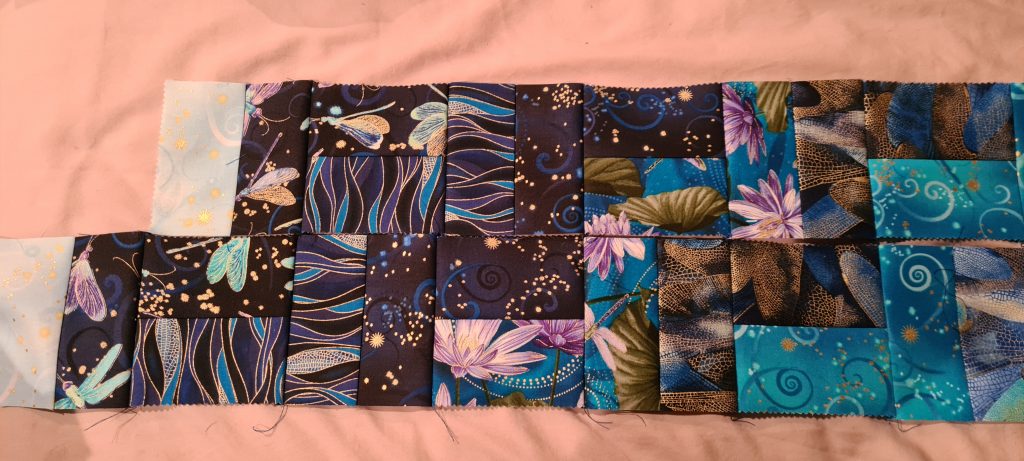
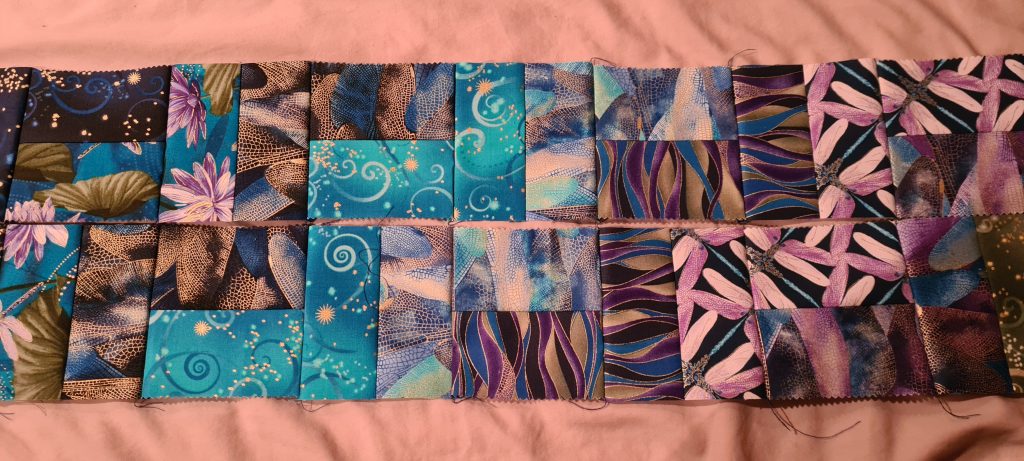
I then needed to arrange them in the rows to stitch them, which is not going to look anything like a zig zag yet, and to make sure I get each row correct so when they are lined up, we get the zig zag:
Basically the two middle rows are the same and offset one square. Referring back to the original spreadsheet diagram, they get shorter above and below that. I named my squares A to N. It turned out that you need an A-B in the top part, and a C-N in the bottom, an A-D in the top and E-N in the bottom etc. So once you get going sewing the squares together is relatively easy!!! (If a little time consuming!)
As usual all seams are ironed either all to the left or all to the right, to ensure seams aren’t bulky when the rows are sewn together. Just checking this looked right:
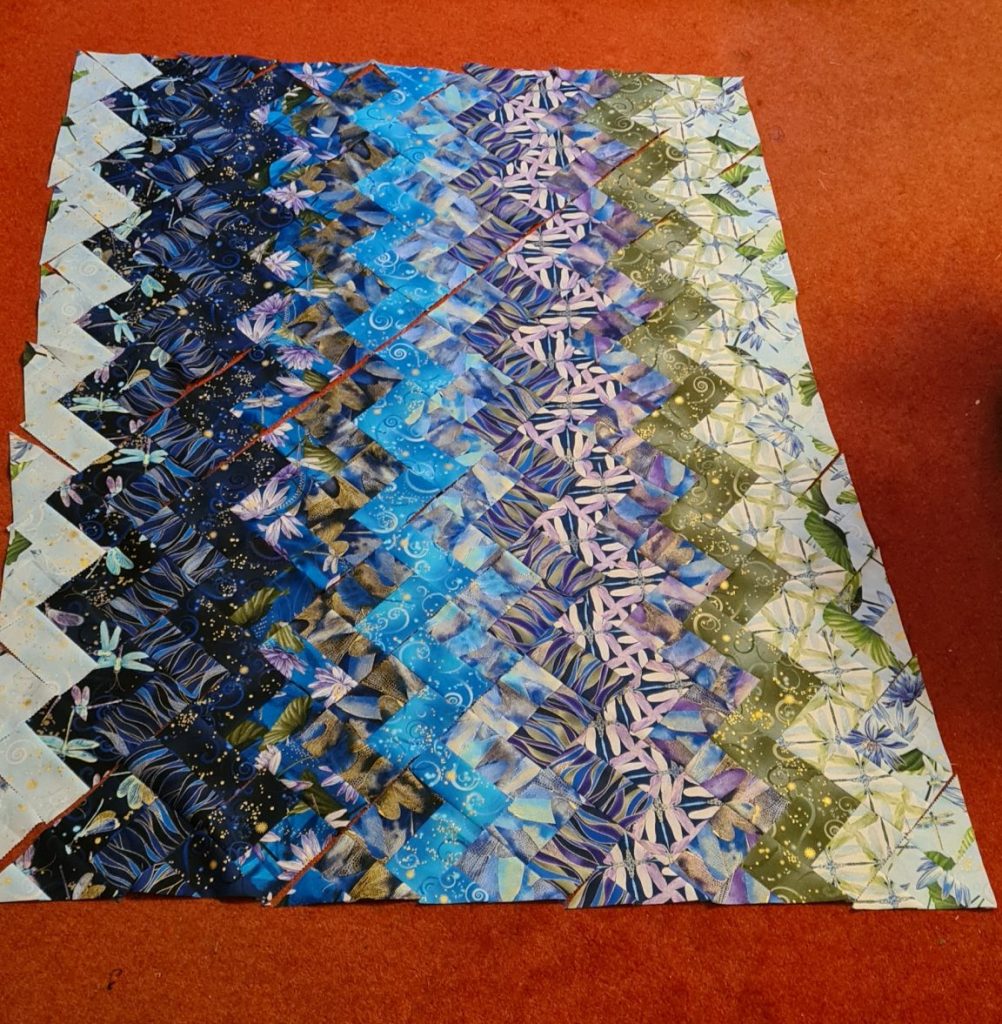
I then needed to decide what to do about the edges, and the triangles.. I REALLY didn’t want to just trim them off and waste them, so I trimmed them off one long and one short edge, and sewed the triangle part to the other side of the appropriate strip.
A few hours later!! This is what you get!
Now remember those remaining 12 strips… They are now all sewn together in the same colour order, and cut into 4.5″ strips.
I sashed the zig zag patchwork with a 1″ strip of plain blue fabric (from the sheet backing) and then arranged these 4.5″ strip sections around the outside. I don’t have a photo of this stage. It was a bit ‘faffy’ cutting the small sashing section, but if I had made it too big, I wouldn’t have had enough of these strips to go around the outside! I did have to unpick some of strips from these to get them to fit correctly around the outside.
THE QUILT SANDWICH STAGE
So I have the patchwork done. That was probably about 8-9 hours work, and the bit I actually enjoy! This time I am going to try and quilt a bit more, rather than just in the ditch strips to keep the wadding in place. I watched a few YouTube videos on how to free motion quilt and how to create the quilt sandwich a bit better so it doesn’t move at all. I very carefully rolled out my layers on the dining room table (not big enough!), smoothed them out, and then rolled each layer up individually. I opted to use spray glue to fix the wadding to the backing, so carefully unroll the wadding on top of the backing, spray gluing a bit at a time and smoothing it out. Because the table wasn’t really big enough, it would have been difficult to do the same with the patchwork layer, so I just rolled that back out carefully, smoothing lots, and pinning lots! And then rolled it back up!
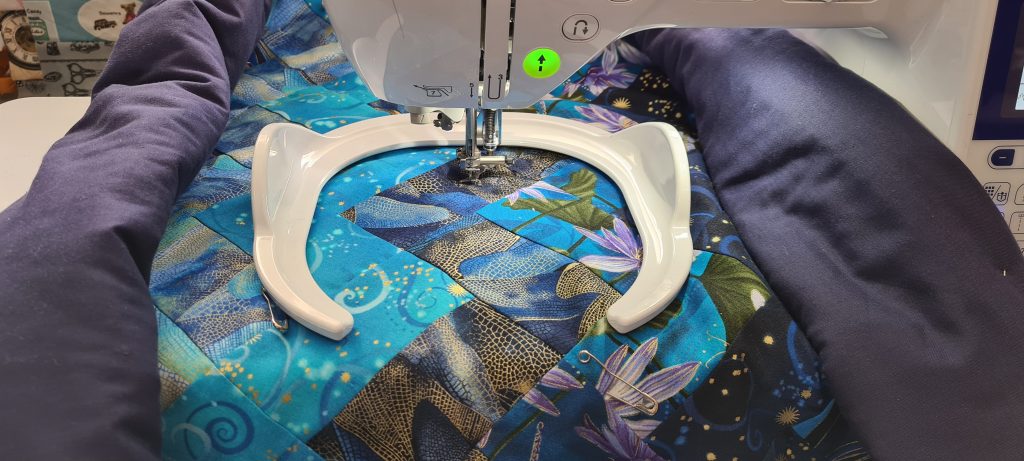
The dreaded QUILTING STAGE!!
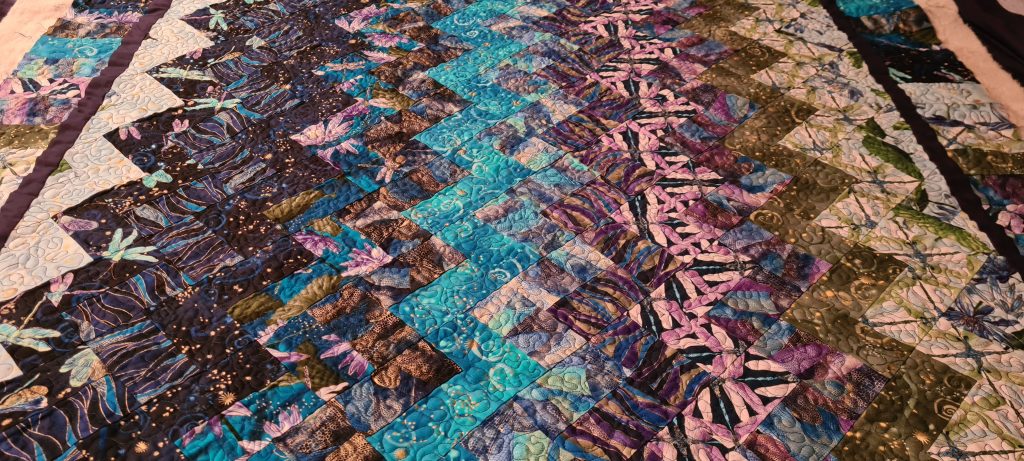
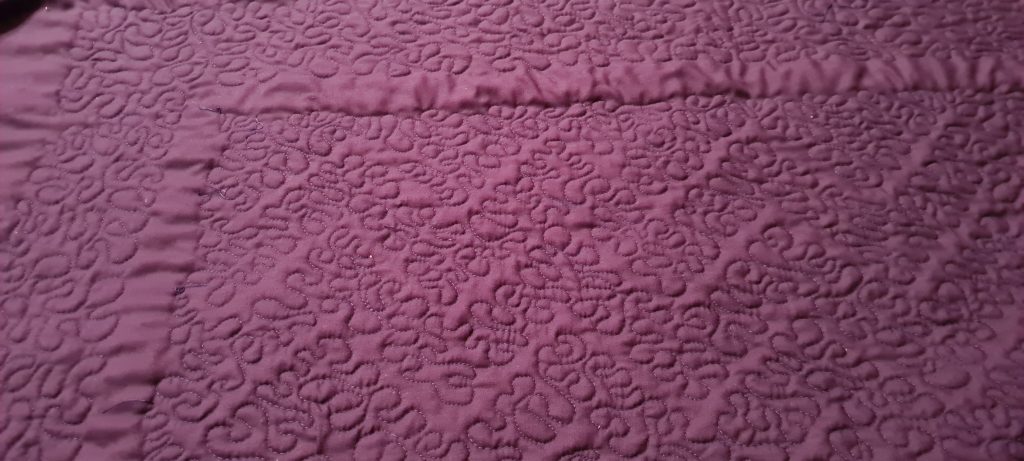
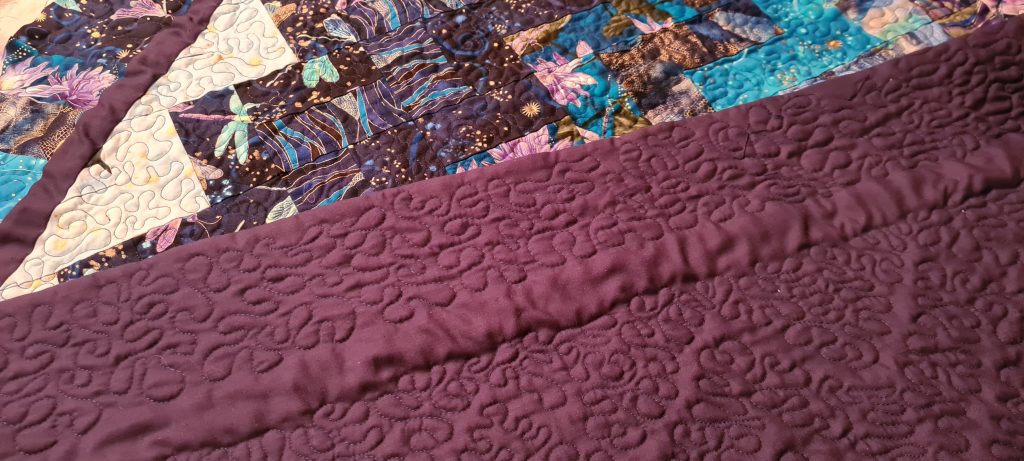
Using free motion foot, with feed dogs down, and adding the quilting table to the machine. Done by each zig zag from the middle down then up… random looping
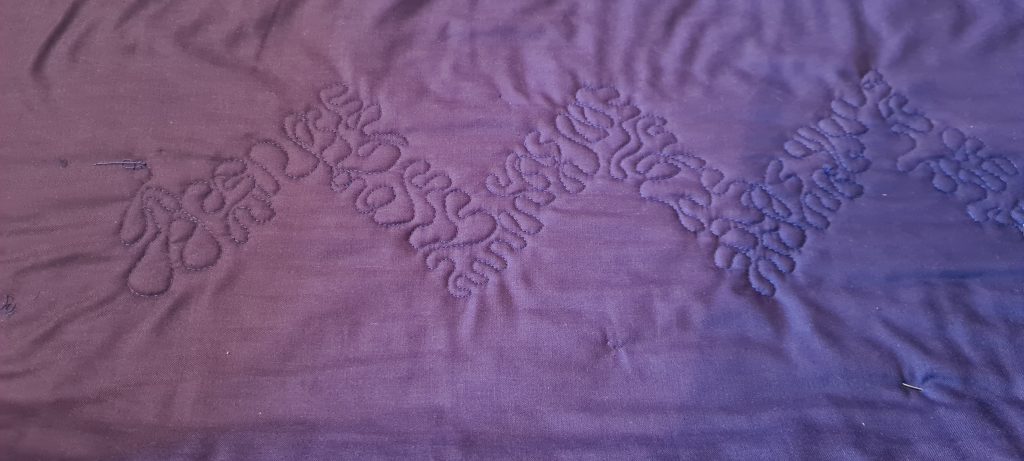
can’t see he quilting very well on the front on this strip, so here’s the back!
The quilting took a LONG time. I did a few hours on either Sat/Sun over 3 weekends! I took quite a few in progress photos, but here it is at the end.
Nearly there now. Next stage, to trim the wadding and backing, and to add the binding. Binding was cut from the same sheet used for the backing, 2.5″ strips joined together (diagonally), ironed in half with 1/4″ fold over for the back. It was sewn to the front by machine, and hand-stitched to the back (another 2 hours work!).
And there we go. Finally done. I guesstimate about 20 hours work, more than half on the quilting part. And this is still practice before I do the ‘big one’, as this is much smaller than the 3D patchwork already made, but not quilted! I am quite happy with it though!
more pics
Note, started 20th Feb, finally finished 5th April.
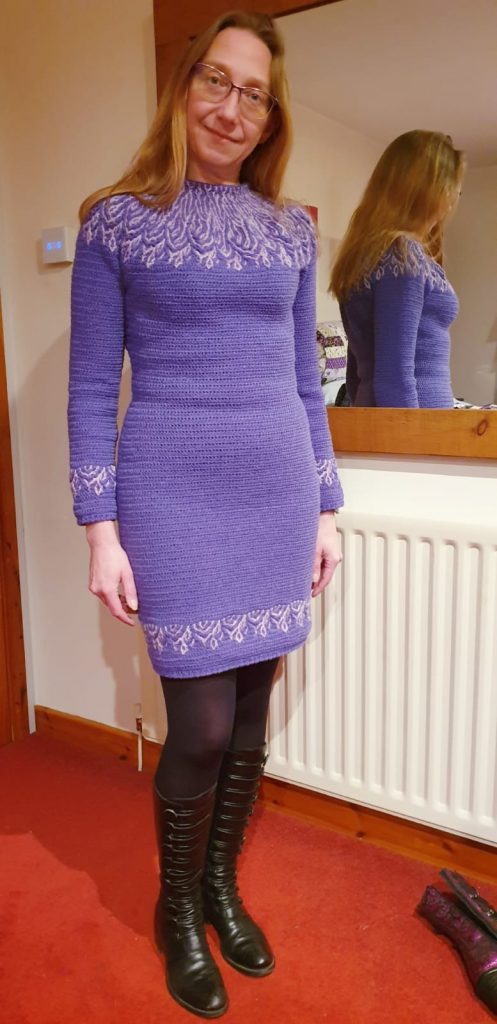
I didn’t take many more progress pictures. I kept trying the dress on to increase to the right size and length having measured how much the last few rows of the colourwork would be. I distinctly remembered thinking that my stitch count needed to be divisible by 4 for the colourwork (I was sure my stitch count at the start was 104), so having decreased 4 per row, and increased 4 per row I was certain the count would be correct for the pattern… I was wrong, and it should be divisible by 5! But it was easy enough to ‘fudge’ the extra stitch in the first couple of rows! For some reason I did the same on the sleeves – and forgot it should be 5 and started the colourwork on multiple of 4 for the first sleeve (did it correct for the second, no-one will notice!).
I did some shaping on the sleeves. In hindsight it should have been started sooner and been more gradual, but it looks fine on! I decreased a couple of stitches on alternate rows towards the end of the sleeve. I made the sleeves long (anticipating sitting outside pubs hopefully in the not too distant future), and added colourwork on these too.
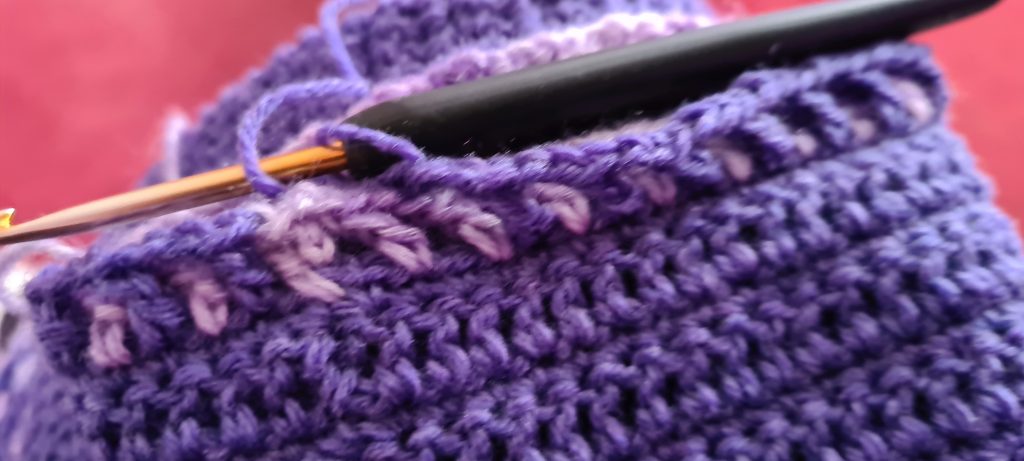
Having never made a crochet jumper before I had never finished off with a ‘rib’. This was quite effective, just alternating a front post treble (UK terms) / slip stitch around the bottom.
rows of alternating colour trebles to start the colourwork
Colourwork at the bottom, and the rib finish
I also did some slip stitches around the neck, as it was curling over too much for me.
The finished article. I was blown away with how many likes and comments this got on the Lilla Bjorn Crochet and Friends Group Facebook page (815!)


 Users Today : 140
 This Month : 1648
 This Year : 12120
 Total Users : 186348
Recent Comments